") 瑞芯微(EASY EAI)RV1126B OCR文字識(shí)別
瑞芯微(EASY EAI)RV1126B OCR文字識(shí)別

1. OCR文字識(shí)別簡(jiǎn)介
文字識(shí)別也是圖像領(lǐng)域一個(gè)常見(jiàn)問(wèn)題。然而,對(duì)于自然場(chǎng)景圖像,首先要定位圖像中的文字位置,然后才能進(jìn)行文字的識(shí)別。所以一般包含兩個(gè)步驟:
文字檢測(cè):解決的問(wèn)題是哪里有文字,文字的范圍有多少。
文字識(shí)別:對(duì)定位好的文字區(qū)域進(jìn)行識(shí)別,主要解決的問(wèn)題是每個(gè)文字是什么,將圖像中的文字區(qū)域進(jìn)轉(zhuǎn)化為字符信息。
我們的OCR算法是基于CTPN+CRNN設(shè)計(jì)的。CTPN是一種文字檢測(cè)算法,能有效的檢測(cè)出復(fù)雜場(chǎng)景的橫向分布的文字,是目前比較好的文字檢測(cè)算法。CRNN算法主要用于端到端地對(duì)不定長(zhǎng)的文本序列進(jìn)行識(shí)別,不用先對(duì)單個(gè)文字進(jìn)行切割,而是將文本識(shí)別轉(zhuǎn)化為時(shí)序依賴的序列學(xué)習(xí)問(wèn)題,就是基于圖像的序列識(shí)別。
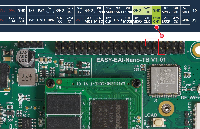
基于EASY-EAI-Nano-TB硬件主板的運(yùn)行效率:

2. 快速上手
2.1 開(kāi)發(fā)環(huán)境準(zhǔn)備
如果您初次閱讀此文檔,請(qǐng)閱讀《入門(mén)指南/開(kāi)發(fā)環(huán)境準(zhǔn)備/Easy-Eai編譯環(huán)境準(zhǔn)備與更新》,并按照其相關(guān)的操作,進(jìn)行編譯環(huán)境的部署。
在PC端Ubuntu系統(tǒng)中執(zhí)行run腳本,進(jìn)入EASY-EAI編譯環(huán)境,具體如下所示。
cd ~/develop_environment
./run.sh
2.2 源碼下載
在EASY-EAI編譯環(huán)境下創(chuàng)建存放源碼倉(cāng)庫(kù)的管理目錄:
cd /opt
mkdir EASY-EAI-Toolkit
cd EASY-EAI-Toolkit
通過(guò)git工具,在管理目錄內(nèi)克隆遠(yuǎn)程倉(cāng)庫(kù)
git clone https://github.com/EASY-EAI/EASY-EAI-Toolkit-1126B.git
注:
* 此處可能會(huì)因網(wǎng)絡(luò)原因造成卡頓,請(qǐng)耐心等待。
* 如果實(shí)在要在gitHub網(wǎng)頁(yè)上下載,也要把整個(gè)倉(cāng)庫(kù)下載下來(lái),不能單獨(dú)下載本實(shí)例對(duì)應(yīng)的目錄。
2.3 模型部署
要完成算法Demo的執(zhí)行,需要先下載OCR算法模型。
百度網(wǎng)盤(pán)鏈接為:https://pan.baidu.com/s/1imI86u1O9xH6T6V_0k2jxw?pwd=1234 (提取碼:1234 )。
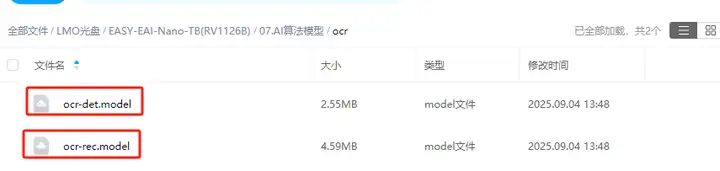
同時(shí)需要把下載的OCR算法模型復(fù)制粘貼到Release/目錄:

2.4 例程編譯
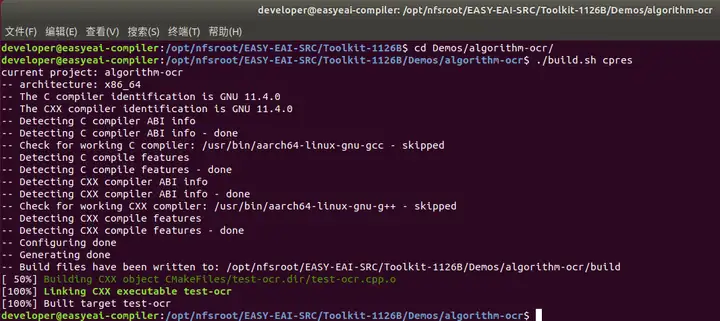
進(jìn)入到對(duì)應(yīng)的例程目錄執(zhí)行編譯操作,具體命令如下所示:
cd EASY-EAI-Toolkit-1126B/Demos/algorithm-ocr/
./build.sh cpres
注:
* 由于依賴庫(kù)部署在板卡上,因此交叉編譯過(guò)程中必須保持/mnt掛載。
* 若build.sh腳本帶有cpres參數(shù),則會(huì)把Release/目錄下的所有資源都拷貝到開(kāi)發(fā)板上。
2.5 例程運(yùn)行及效果
通過(guò)串口調(diào)試或ssh調(diào)試,進(jìn)入板卡后臺(tái),定位到例程部署的位置,如下所示:
cd /userdata/Demo/algorithm-ocr/
運(yùn)行例程命令如下所示:
sudo ./test-ocr test.jpg
在EASY-EAI編譯環(huán)境可以取回測(cè)試圖片:
cp /mnt/userdata/Demo/algorithm-ocr/result.jpg .
結(jié)果圖片如下所示:

API的詳細(xì)說(shuō)明,以及API的調(diào)用(本例程源碼),詳細(xì)信息見(jiàn)下方說(shuō)明。
3. OCR文字識(shí)別API說(shuō)明
3.1 引用方式
為方便客戶在本地工程中直接調(diào)用我們的EASY EAI api庫(kù),此處列出工程中需要鏈接的庫(kù)以及頭文件等,方便用戶直接添加。

3.2 OCR檢測(cè)初始化函數(shù)
設(shè)置OCR檢測(cè)初始化函數(shù)原型如下所示。
int ocr_det_init(const char* model_path, rknn_app_context_t* app_ctx);具體介紹如下所示。

3.3 OCR檢測(cè)運(yùn)行函數(shù)
設(shè)置OCR檢測(cè)運(yùn)行原型如下所示。
int ocr_det_run(rknn_app_context_t* app_ctx, cv::Mat input_image, ocr_det_postprocess_params* params, ocr_det_result* out_result);具體介紹如下所示。

3.4 OCR檢測(cè)釋放函數(shù)
設(shè)置OCR檢測(cè)釋放原型如下所示。
int ocr_det_release(rknn_app_context_t* app_ctx);具體介紹如下所示。

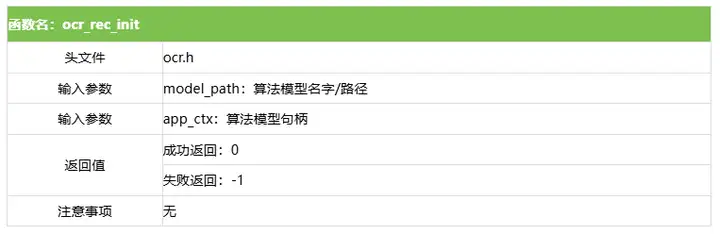
3.5 OCR識(shí)別初始化函數(shù)
OCR識(shí)別初始化函數(shù)原型如下所示。
int ocr_rec_init(const char* model_path, rknn_app_context_t* app_ctx);具體介紹如下所示。
3.6 OCR識(shí)別運(yùn)行函數(shù)
OCR識(shí)別運(yùn)行函數(shù)原型如下所示。
int ocr_rec_run(rknn_app_context_t* app_ctx, cv::Mat input_image, ocr_rec_result* out_result);具體介紹如下所示。

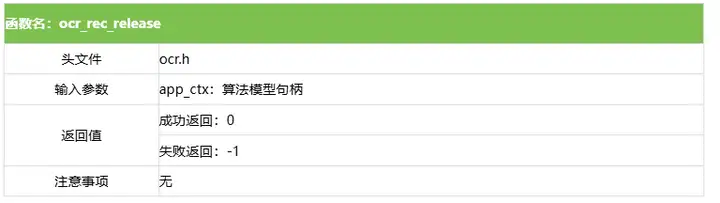
3.7 OCR識(shí)別釋放函數(shù)
OCR識(shí)別釋放函數(shù)原型如下所示。
int ocr_rec_release(rknn_app_context_t* app_ctx);具體介紹如下所示。
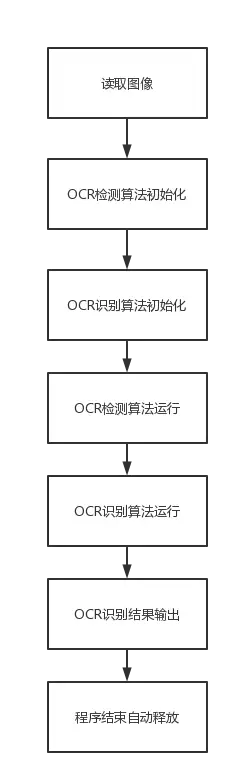
4. OCR檢測(cè)算法例程
例程目錄為Demos/algorithm-ocr/test-ocr.cpp,操作流程如下。
#include
#include
#include
#include"ocr.h"

using namespace cv;
using namespace std;

#define INDENT "    "
#define THRESHOLD 0.3 // pixel score threshold
#define BOX_THRESHOLD 0.9 // box score threshold
#define USE_DILATION false // whether to do dilation, true or false
#define DB_UNCLIP_RATIO 1.5 // unclip ratio for poly type

int main(int argc, char **argv)
{
	if (argc != 2) {
		printf("%s \n", argv[0]);
		return -1;
	}
	/* 參數(shù)初始化 */
	const char *img_path = argv[1];
	Mat input_image, rgb_img;
	input_image = imread(img_path);
	if (input_image.empty()) {
		cout << "Error: Could not load image" << endl;
		return -1;
	}

	cv::cvtColor(input_image, rgb_img, COLOR_BGR2RGB);

	rknn_app_context_t ocr_det_ctx, ocr_rec_ctx;
	memset(&ocr_det_ctx, 0, sizeof(rknn_app_context_t));
	memset(&ocr_rec_ctx, 0, sizeof(rknn_app_context_t));

	/* OCR算法檢測(cè)模型&識(shí)別模型初始化 */
	ocr_det_init("ocr-det.model", &ocr_det_ctx);
	ocr_rec_init("ocr-rec.model", &ocr_rec_ctx);

	struct timeval start;
    struct timeval end;
    float time_use=0;

	/* OCR算法檢測(cè)模型運(yùn)行 */
	ocr_det_result results;
    ocr_det_postprocess_params params;
    params.threshold = THRESHOLD;
    params.box_threshold = BOX_THRESHOLD;
    params.use_dilate = USE_DILATION;
    params.db_score_mode = (char*)"slow";
    params.db_box_type = (char*)"poly";
    params.db_unclip_ratio = DB_UNCLIP_RATIO;

	gettimeofday(&start,NULL);
	int ret;
    ret = ocr_det_run(&ocr_det_ctx, rgb_img, ¶ms, &results);
    if (ret != 0) {
        printf("inference_ppocr_rec_model fail! ret=%d\n", ret);
    }

    gettimeofday(&end,NULL);
    time_use=(end.tv_sec-start.tv_sec)*1000000+(end.tv_usec-start.tv_usec);//微秒
    printf("time_use is %f\n",time_use/1000);

	/* 截取文字信息和畫(huà)框 */
    printf("DRAWING OBJECT\n");
    for (int i = 0; i < results.count; i++)
    {
        printf("[%d]: [(%d, %d), (%d, %d), (%d, %d), (%d, %d)] %f\n", i,
            results.box[i].left_top.x, results.box[i].left_top.y, results.box[i].right_top.x, results.box[i].right_top.y,
            results.box[i].right_bottom.x, results.box[i].right_bottom.y, results.box[i].left_bottom.x, results.box[i].left_bottom.y,
            results.box[i].score);

        line(input_image, Point(results.box[i].left_top.x, results.box[i].left_top.y), Point(results.box[i].right_top.x, results.box[i].right_top.y),
             Scalar(0, 255, 0), 1, LINE_AA);
        line(input_image, Point(results.box[i].right_top.x, results.box[i].right_top.y), Point(results.box[i].right_bottom.x, results.box[i].right_bottom.y),
             Scalar(0, 255, 0), 1, LINE_AA);
        line(input_image, Point(results.box[i].right_bottom.x, results.box[i].right_bottom.y), Point(results.box[i].left_bottom.x, results.box[i].left_bottom.y),
             Scalar(0, 255, 0), 1, LINE_AA);
        line(input_image, Point(results.box[i].left_bottom.x, results.box[i].left_bottom.y), Point(results.box[i].left_top.x, results.box[i].left_top.y),
             Scalar(0, 255, 0), 1, LINE_AA);

		cv::Mat rgb_crop_image = GetRotateCropImage(rgb_img, results.box[i]);

		/* OCR算法識(shí)別模型運(yùn)行 */
		ocr_rec_result rec_results;
		ocr_rec_run(&ocr_rec_ctx, rgb_crop_image, &rec_results);

		// print text result
    		printf("regconize result: %s, score=%f\n", rec_results.str, rec_results.score);
    }
    cv::imwrite("result.jpg", input_image);
	return 0;
}-
Linux
+關(guān)注
關(guān)注
88文章
11785瀏覽量
219313 -
瑞芯微
+關(guān)注
關(guān)注
27文章
806瀏覽量
54526 -
EASY-EAI靈眸科技
+關(guān)注
關(guān)注
4文章
69瀏覽量
3689 -
RV1126B
+關(guān)注
關(guān)注
0文章
59瀏覽量
211
發(fā)布評(píng)論請(qǐng)先 登錄
瑞芯微(EASY EAI)RV1126B 音頻輸入

瑞芯微(EASY EAI)RV1126B PWM使用
如何用瑞芯微RV1126B核心板贏得AI紅利?
【EASY EAI Nano-TB(RV1126B)開(kāi)發(fā)板試用】+初識(shí)篇
【EASY EAI Nano-TB(RV1126B)開(kāi)發(fā)板試用】命令行功能測(cè)試-shell腳本進(jìn)行IO控制-燈閃
【EASY EAI Nano-TB(RV1126B)開(kāi)發(fā)板試用】命令行功能測(cè)試-shell腳本進(jìn)行IO控制-紅綠燈項(xiàng)目
【EASY EAI Nano-TB(RV1126B)開(kāi)發(fā)板試用】命令行功能測(cè)試-shell腳本進(jìn)行IO控制-紅綠燈按鈕項(xiàng)目
請(qǐng)問(wèn)各位大佬,如何解決,瑞芯微 RV1126B 使用 mpp 自帶工具 調(diào)試時(shí),內(nèi)核直接報(bào)錯(cuò)崩潰!
【EASY EAI Nano-TB(RV1126B)開(kāi)發(fā)板試用】+1、開(kāi)箱上電
【EASY EAI Nano-TB(RV1126B)開(kāi)發(fā)板試用】介紹、系統(tǒng)安裝
RV1126系列選型指南:從RV1126到RV1126B,一文看懂升級(jí)差異

【免費(fèi)試用】EASY EAI Nano-TB(RV1126B)開(kāi)發(fā)套件評(píng)測(cè)

瑞芯微RV1126B特性概述
替代升級(jí)實(shí)錘!實(shí)測(cè)RV1126B,CPU性能吊打RV1126

瑞芯微(EASY EAI)RV1126B 人體關(guān)鍵點(diǎn)識(shí)別


 工商網(wǎng)監(jiān)
評(píng)論