 基于YOLOv8實現自定義姿態評估模型訓練

前言
Hello大家好,今天給大家分享一下如何基于YOLOv8姿態評估模型,實現在自定義數據集上,完成自定義姿態評估模型的訓練與推理。
01tiger-pose數據集
YOLOv8官方提供了一個自定義tiger-pose數據集(老虎姿態評估),總計數據有263張圖像、其中210張作為訓練集、53張作為驗證集。
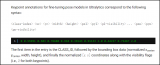
其中YOLOv8-pose的數據格式如下:
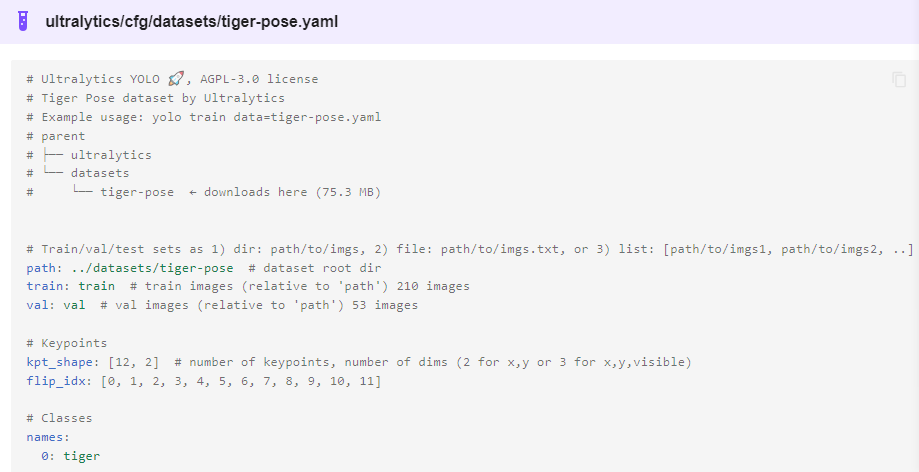
解釋一下:
Class-index 表示對象類型索引,從0開始
后面的四個分別是對象的中心位置與寬高 xc、yc、width、height
px1,py1表示第一個關鍵點坐標、p1v表示師傅可見,默認填2即可。
kpt_shape=12x2表示有12個關鍵點,每個關鍵點是x,y
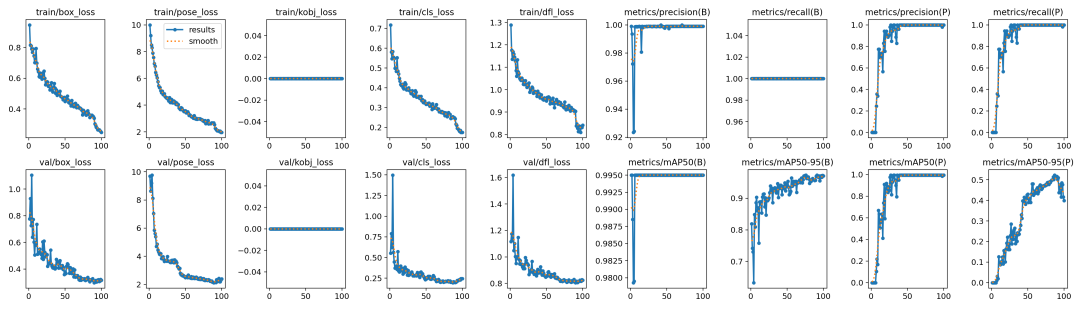
02模型訓練
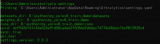
跟訓練YOLOv8對象檢測模型類似,直接運行下面的命令行即可:
yolotrainmodel=yolov8n-pose.ptdata=tiger_pose_dataset.yamlepochs=100imgsz=640batch=1
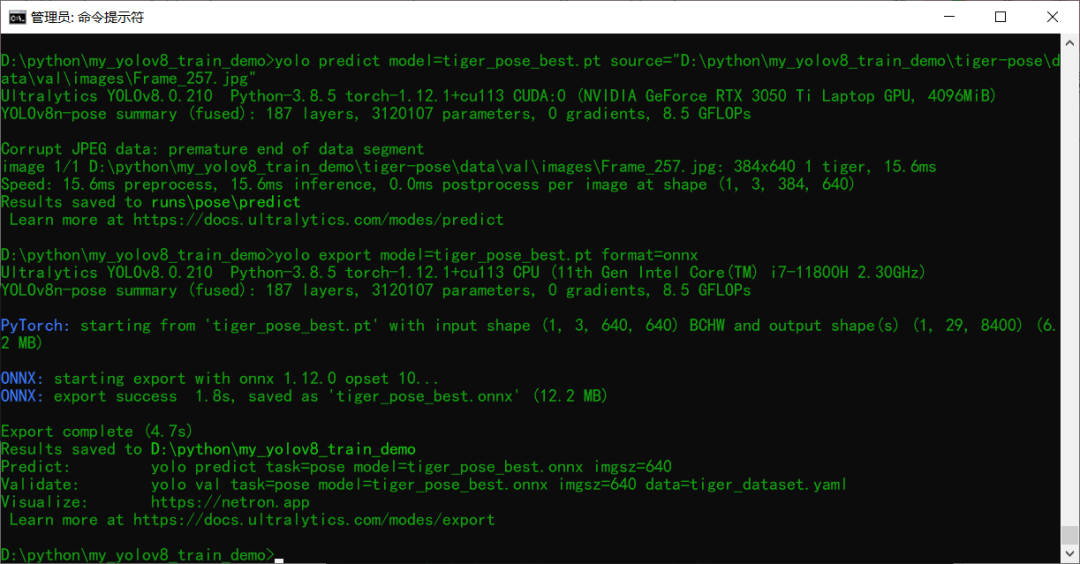
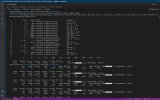
03模型導出預測
訓練完成以后模型預測推理測試 使用下面的命令行:
yolo predict model=tiger_pose_best.pt source=D:/123.jpg
導出模型為ONNX格式,使用下面命令行即可
yolo export model=tiger_pose_best.pt format=onnx
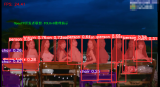
04部署推理
基于ONNX格式模型,采用ONNXRUNTIME推理結果如下:
ORT相關的推理演示代碼如下:
def ort_pose_demo():


    # initialize the onnxruntime session by loading model in CUDA support
    model_dir = "tiger_pose_best.onnx"
    session = onnxruntime.InferenceSession(model_dir, providers=['CUDAExecutionProvider'])


    # 就改這里, 把RTSP的地址配到這邊就好啦,然后直接運行,其它任何地方都不準改!
    # 切記把 yolov8-pose.onnx文件放到跟這個python文件同一個文件夾中!
    frame = cv.imread("D:/123.jpg")
    bgr = format_yolov8(frame)
    fh, fw, fc = frame.shape


    start = time.time()
    image = cv.dnn.blobFromImage(bgr, 1 / 255.0, (640, 640), swapRB=True, crop=False)


    # onnxruntime inference
    ort_inputs = {session.get_inputs()[0].name: image}
    res = session.run(None, ort_inputs)[0]


    # matrix transpose from 1x8x8400 => 8400x8
    out_prob = np.squeeze(res, 0).T


    result_kypts, confidences, boxes = wrap_detection(bgr, out_prob)
    for (kpts, confidence, box) in zip(result_kypts, confidences, boxes):
        cv.rectangle(frame, box, (0, 0, 255), 2)
        cv.rectangle(frame, (box[0], box[1] - 20), (box[0] + box[2], box[1]), (0, 255, 255), -1)
        cv.putText(frame, ("%.2f" % confidence), (box[0], box[1] - 10), cv.FONT_HERSHEY_SIMPLEX, .5, (0, 0, 0))
        cv.circle(frame, (int(kpts[0]), int(kpts[1])), 3, (255, 0, 255), 4, 8, 0)
        cv.circle(frame, (int(kpts[2]), int(kpts[3])), 3, (255, 0, 255), 4, 8, 0)
        cv.circle(frame, (int(kpts[4]), int(kpts[5])), 3, (255, 0, 255), 4, 8, 0)
        cv.circle(frame, (int(kpts[6]), int(kpts[7])), 3, (255, 0, 255), 4, 8, 0)
        cv.circle(frame, (int(kpts[8]), int(kpts[9])), 3, (255, 0, 255), 4, 8, 0)
        cv.circle(frame, (int(kpts[10]), int(kpts[11])), 3, (255, 0, 255), 4, 8, 0)
        cv.circle(frame, (int(kpts[12]), int(kpts[13])), 3, (255, 0, 255), 4, 8, 0)
        cv.circle(frame, (int(kpts[14]), int(kpts[15])), 3, (255, 0, 255), 4, 8, 0)
        cv.circle(frame, (int(kpts[16]), int(kpts[17])), 3, (255, 0, 255), 4, 8, 0)
        cv.circle(frame, (int(kpts[18]), int(kpts[19])), 3, (255, 0, 255), 4, 8, 0)
        cv.circle(frame, (int(kpts[20]), int(kpts[21])), 3, (255, 0, 255), 4, 8, 0)
        cv.circle(frame, (int(kpts[22]), int(kpts[23])), 3, (255, 0, 255), 4, 8, 0)


    cv.imshow("Tiger Pose Demo - gloomyfish", frame)
    cv.waitKey(0)
    cv.destroyAllWindows()
審核編輯:湯梓紅
聲明:本文內容及配圖由入駐作者撰寫或者入駐合作網站授權轉載。文章觀點僅代表作者本人,不代表電子發燒友網立場。文章及其配圖僅供工程師學習之用,如有內容侵權或者其他違規問題,請聯系本站處理。
舉報投訴
-
模型
+關注
關注
1文章
3751瀏覽量
52097 -
數據集
+關注
關注
4文章
1236瀏覽量
26188 -
命令行
+關注
關注
0文章
83瀏覽量
10759
原文標題:【YOLOv8】自定義姿態評估模型訓練
文章出處:【微信號:CVSCHOOL,微信公眾號:OpenCV學堂】歡迎添加關注!文章轉載請注明出處。
發布評論請先 登錄
相關推薦
熱點推薦
請問如何在imx8mplus上部署和運行YOLOv5訓練的模型?
我正在從事 imx8mplus yocto 項目。我已經在自定義數據集上的 YOLOv5 上訓練了對象檢測模型。它在 ubuntu 電腦上運
發表于 03-25 07:23
TensorRT 8.6 C++開發環境配置與YOLOv8實例分割推理演示
對YOLOv8實例分割TensorRT 推理代碼已經完成C++類封裝,三行代碼即可實現YOLOv8對象檢測與實例分割模型推理,不需要改任何代碼即可支持

在AI愛克斯開發板上用OpenVINO?加速YOLOv8目標檢測模型
《在 AI 愛克斯開發板上用 OpenVINO 加速 YOLOv8 分類模型》介紹了在 AI 愛克斯開發板上使用 OpenVINO 開發套件部署并測評 YOLOv8 的分類模型,本文將

YOLOv8版本升級支持小目標檢測與高分辨率圖像輸入
YOLOv8版本最近版本又更新了,除了支持姿態評估以外,通過模型結構的修改還支持了小目標檢測與高分辨率圖像檢測。原始的YOLOv8
AI愛克斯開發板上使用OpenVINO加速YOLOv8目標檢測模型
《在AI愛克斯開發板上用OpenVINO加速YOLOv8分類模型》介紹了在AI愛克斯開發板上使用OpenVINO 開發套件部署并測評YOLOv8的分類模型,本文將介紹在AI愛克斯開發板

教你如何用兩行代碼搞定YOLOv8各種模型推理
大家好,YOLOv8 框架本身提供的API函數是可以兩行代碼實現 YOLOv8 模型推理,這次我把這段代碼封裝成了一個類,只有40行代碼左右,可以同時支持
三種主流模型部署框架YOLOv8推理演示
深度學習模型部署有OpenVINO、ONNXRUNTIME、TensorRT三個主流框架,均支持Python與C++的SDK使用。對YOLOv5~YOLOv8的系列模型,均可以通過C+
基于YOLOv8的自定義醫學圖像分割
YOLOv8是一種令人驚嘆的分割模型;它易于訓練、測試和部署。在本教程中,我們將學習如何在自定義數據集上使用YOLOv8。但在此之前,我想告
如何基于深度學習模型訓練實現圓檢測與圓心位置預測
Hello大家好,今天給大家分享一下如何基于深度學習模型訓練實現圓檢測與圓心位置預測,主要是通過對YOLOv8姿態
如何基于深度學習模型訓練實現工件切割點位置預測
Hello大家好,今天給大家分享一下如何基于深度學習模型訓練實現工件切割點位置預測,主要是通過對YOLOv8姿態

RV1126 yolov8訓練部署教程
YOLOv8 是 ultralytics 公司在 2023 年 1月 10 號開源的基于YOLOV5進行更新的 下一個重大更新版本,目前支持圖像分類、物體檢測和實例分割任務,鑒于Yolov5的良好表現,
使用ROCm?優化并部署YOLOv8模型
://github.com/ultralytics/ultralytics/tree/main YOLOv8模型的卓越性能使其在多個領域具有廣泛的應用前景,如自動駕


 工商網監
工商網監
評論