") SpringBoot自動(dòng)裝配原理分析
SpringBoot自動(dòng)裝配原理分析

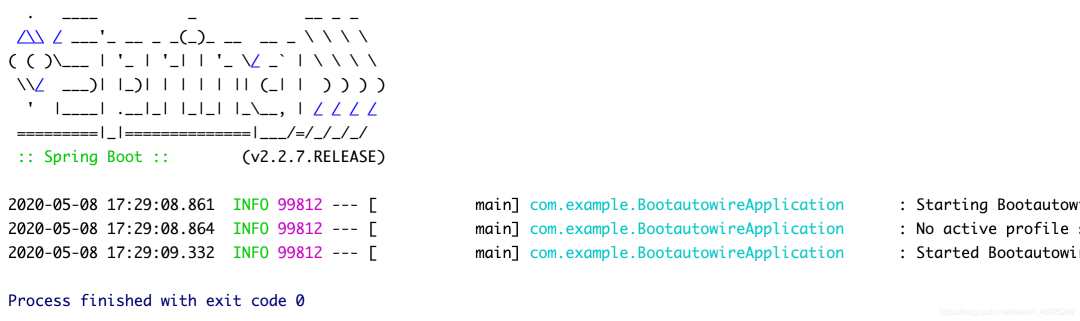
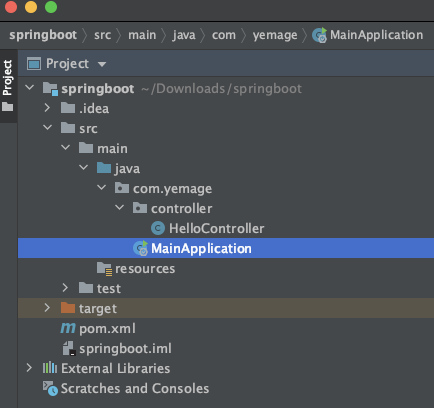
我們知道,在使用SpringBoot的時(shí)候,我們只需要如下方式即可直接啟動(dòng)一個(gè)Web程序:
@SpringBootApplication
public class DemoApplication {
    public static void main(String[] args) {
        SpringApplication.run(DemoApplication.class, args);
    }
}
和我們之前使用普通Spring時(shí)繁瑣的配置相比簡(jiǎn)直不要太方便,那么你知道SpringBoot實(shí)現(xiàn)這些的原理么
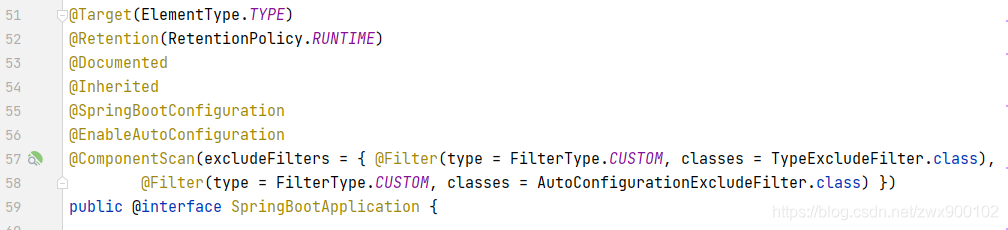
首先我們看到類(lèi)上方包含了一個(gè)@SpringBootApplication注解
@SpringBootConfiguration
@EnableAutoConfiguration
@ComponentScan(
    excludeFilters = {@Filter(
    type = FilterType.CUSTOM,
    classes = {TypeExcludeFilter.class}
), @Filter(
    type = FilterType.CUSTOM,
    classes = {AutoConfigurationExcludeFilter.class}
)}
)
public @interface SpringBootApplication {
    @AliasFor(
        annotation = EnableAutoConfiguration.class
    )
    Class?[] exclude() default {};

    @AliasFor(
        annotation = EnableAutoConfiguration.class
    )
    String[] excludeName() default {};

    @AliasFor(
        annotation = ComponentScan.class,
        attribute = "basePackages"
    )
    String[] scanBasePackages() default {};

    @AliasFor(
        annotation = ComponentScan.class,
        attribute = "basePackageClasses"
    )
    Class?[] scanBasePackageClasses() default {};
}
這個(gè)注解上邊包含的東西還是比較多的,咱們先看一下兩個(gè)簡(jiǎn)單的熱熱身
@ComponentScan 注解
@ComponentScan(excludeFilters = {
		@Filter(type = FilterType.CUSTOM, classes = TypeExcludeFilter.class),
		@Filter(type = FilterType.CUSTOM, classes = AutoConfigurationExcludeFilter.class) })
這個(gè)注解咱們都是比較熟悉的,無(wú)非就是自動(dòng)掃描并加載符合條件的Bean到容器中,這個(gè)注解會(huì)默認(rèn)掃描聲明類(lèi)所在的包開(kāi)始掃描,例如:
類(lèi)cn.shiyujun.Demo類(lèi)上標(biāo)注了@ComponentScan 注解,則cn.shiyujun.controller、cn.shiyujun.service等等包下的類(lèi)都可以被掃描到
這個(gè)注解一共包含以下幾個(gè)屬性:
basePackages:指定多個(gè)包名進(jìn)行掃描
basePackageClasses:對(duì)指定的類(lèi)和接口所屬的包進(jìn)行掃
excludeFilters:指定不掃描的過(guò)濾器
includeFilters:指定掃描的過(guò)濾器
lazyInit:是否對(duì)注冊(cè)掃描的bean設(shè)置為懶加載
nameGenerator:為掃描到的bean自動(dòng)命名
resourcePattern:控制可用于掃描的類(lèi)文件
scopedProxy:指定代理是否應(yīng)該被掃描
scopeResolver:指定掃描bean的范圍
useDefaultFilters:是否開(kāi)啟對(duì)@Component,@Repository,@Service,@Controller的類(lèi)進(jìn)行檢測(cè)
@SpringBootConfiguration注解
這個(gè)注解更簡(jiǎn)單了,它只是對(duì)Configuration注解的一個(gè)封裝而已
@Target({ElementType.TYPE})
@Retention(RetentionPolicy.RUNTIME)
@Documented
@Configuration
public @interface SpringBootConfiguration {
}
EnableAutoConfiguration注解
這個(gè)注解可是重頭戲了,SpringBoot號(hào)稱的約定大于配置,也就是本文的重點(diǎn)自動(dòng)裝配的原理就在這里了
@Import({AutoConfigurationImportSelector.class})
public @interface EnableAutoConfiguration {
    String ENABLED_OVERRIDE_PROPERTY = "spring.boot.enableautoconfiguration";

    Class?[] exclude() default {};

    String[] excludeName() default {};
}
簡(jiǎn)單概括一下,這個(gè)注解存在的意義就是:利用@Import注解,將所有符合自動(dòng)裝配條件的bean注入到IOC容器中,關(guān)于@Import注解原理這里就不再闡述。
進(jìn)入類(lèi)AutoConfigurationImportSelector,觀察其selectImports方法,這個(gè)方法執(zhí)行完畢后,Spring會(huì)把這個(gè)方法返回的類(lèi)的全限定名數(shù)組里的所有的類(lèi)都注入到IOC容器中
public String[] selectImports(AnnotationMetadata annotationMetadata) {
        if (!this.isEnabled(annotationMetadata)) {
            return NO_IMPORTS;
        } else {
            AutoConfigurationMetadata autoConfigurationMetadata = AutoConfigurationMetadataLoader.loadMetadata(this.beanClassLoader);
            AnnotationAttributes attributes = this.getAttributes(annotationMetadata);
            List
觀察上方代碼:
- 第一行if時(shí)會(huì)首先判斷當(dāng)前系統(tǒng)是否禁用了自動(dòng)裝配的功能,判斷的代碼如下:
protected boolean isEnabled(AnnotationMetadata metadata) {
       return this.getClass() == AutoConfigurationImportSelector.class ? (Boolean)this.getEnvironment().getProperty("spring.boot.enableautoconfiguration", Boolean.class, true) : true;
   }
- 如果當(dāng)前系統(tǒng)禁用了自動(dòng)裝配的功能則會(huì)返回如下這個(gè)空的數(shù)組,后續(xù)也就無(wú)法注入bean了
private static final String[] NO_IMPORTS = new String[0];
- 此時(shí)如果沒(méi)有禁用自動(dòng)裝配則進(jìn)入else分枝,第一步操作首先會(huì)去加載所有Spring預(yù)先定義的配置條件信息,這些配置信息在
org.springframework.boot.autoconfigure包下的META-INF/spring-autoconfigure-metadata.properties文件中 - 這些配置條件主要含義大致是這樣的:如果你要自動(dòng)裝配某個(gè)類(lèi)的話,你覺(jué)得先存在哪些類(lèi)或者哪些配置文件等等條件,這些條件的判斷主要是利用了
@ConditionalXXX注解。 - 這個(gè)文件里的內(nèi)容格式是這樣的:
org.springframework.boot.actuate.autoconfigure.web.servlet.WebMvcEndpointChildContextConfiguration.ConditionalOnClass=org.springframework.web.servlet.DispatcherServlet
org.springframework.boot.actuate.autoconfigure.metrics.jdbc.DataSourcePoolMetricsAutoConfiguration.ConditionalOnClass=javax.sql.DataSource,io.micrometer.core.instrument.MeterRegistry
org.springframework.boot.actuate.autoconfigure.flyway.FlywayEndpointAutoConfiguration.AutoConfigureAfter=org.springframework.boot.autoconfigure.flyway.FlywayAutoConfiguration
-
具體的加載代碼就不列出了,無(wú)法就是個(gè)讀取配置文件
-
這里放個(gè)加載之后的結(jié)果圖:
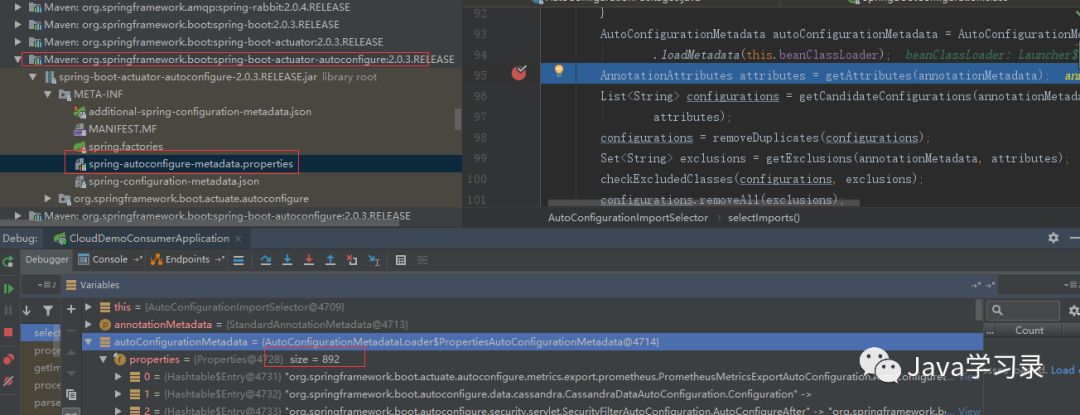
-
獲取
@EnableAutoConfiguration注解上的exclude、excludeName屬性,這兩個(gè)屬性的作用都是排除一些類(lèi)的 -
這里又是關(guān)鍵的一步,可以看到剛才圖片中spring-autoconfigure-metadata.properties文件的上方存在一個(gè)文件spring.factories,這個(gè)文件可就不止存在于
org.springframework.boot.autoconfigure包里了,所有的包里都有可能存在這個(gè)文件,所以這一步是加載整個(gè)項(xiàng)目所有的spring.factories文件。這個(gè)文件的格式是這樣的
org.springframework.boot.autoconfigure.EnableAutoConfiguration=\\org.springframework.boot.actuate.autoconfigure.amqp.RabbitHealthIndicatorAutoConfiguration,\\org.springframework.boot.actuate.autoconfigure.audit.AuditAutoConfiguration,\\org.springframework.boot.actuate.autoconfigure.audit.AuditEventsEndpointAutoConfiguration
這里存在一個(gè)知識(shí)點(diǎn),SpringBoot中的star就是依靠這個(gè)文件完成的,假如我們需要自定義一個(gè)SpringBoot的Star,就可以在我們的項(xiàng)目的META-INF文件夾下新建一個(gè)spring.factories文件
org.springframework.boot.autoconfigure.EnableAutoConfiguration=cn.shiyujun.TestAutoConfiguration
這樣當(dāng)別的項(xiàng)目依賴我們的項(xiàng)目時(shí)就會(huì)自動(dòng)把我們的TestAutoConfiguration類(lèi)注入到Spring容器中
- 刪除重復(fù)的自動(dòng)配置類(lèi)
- 下面三行就是去除我們指定排除的配置類(lèi)
- 接著這一行的邏輯稍微復(fù)雜一些,主要就是根據(jù)加載的配置條件信息來(lái)判斷各個(gè)配置類(lèi)上的
@ConditionalXXX系列注解是否滿足需求 - 最后就是發(fā)布自動(dòng)裝配完成事件,然后返回所有能夠自動(dòng)裝配的類(lèi)的全限定名
到了這里我們已經(jīng)把SpringBoot自動(dòng)裝配的原理搞清楚了,但是總感覺(jué)差點(diǎn)什么,那我們從這些自動(dòng)裝配的類(lèi)里面挑一個(gè)我們比較熟悉的關(guān)于Servlet的類(lèi)來(lái)看看咋回事吧:
@Configuration
@ConditionalOnWebApplication(
    type = Type.SERVLET
)
public class ServletEndpointManagementContextConfiguration {
    public ServletEndpointManagementContextConfiguration() {
    }

    @Bean
    public ExposeExcludePropertyEndpointFilter
自上而下觀察整個(gè)類(lèi)的代碼,你會(huì)發(fā)現(xiàn)這些自動(dòng)裝配的套路都是一樣的
- 如果當(dāng)前是Servlet環(huán)境則裝配這個(gè)bean
- 當(dāng)存在類(lèi)
ResourceConfig以及不存在類(lèi)DispatcherServlet時(shí)裝配JerseyServletEndpointManagementContextConfiguration - 當(dāng)存在
DispatcherServlet類(lèi)時(shí)裝配WebMvcServletEndpointManagementContextConfiguration - 接下來(lái)如果還有面試官問(wèn)你,你會(huì)了么?
-
Web
+關(guān)注
關(guān)注
2文章
1304瀏覽量
74448 -
JAVA
+關(guān)注
關(guān)注
20文章
3001瀏覽量
116419 -
spring
+關(guān)注
關(guān)注
0文章
341瀏覽量
15935 -
SpringBoot
+關(guān)注
關(guān)注
0文章
177瀏覽量
684
發(fā)布評(píng)論請(qǐng)先 登錄
自動(dòng)裝配線的類(lèi)型與應(yīng)用場(chǎng)景
關(guān)于自動(dòng)裝配線的設(shè)計(jì)
自動(dòng)裝配線有哪些設(shè)計(jì)
Jenkins+docker+springboot一鍵自動(dòng)部署項(xiàng)目
Spring和Springboot的擴(kuò)展接口總結(jié)
初學(xué)者必看的SpringBoo自動(dòng)裝配原理1
初學(xué)者必看的SpringBoo自動(dòng)裝配原理2
初學(xué)者必看的SpringBoo自動(dòng)裝配原理3
初學(xué)者必看的SpringBoo自動(dòng)裝配原理4
深入了解SpringBoot的自動(dòng)配置原理
什么是 SpringBoot?


 工商網(wǎng)監(jiān)
評(píng)論