") 【米爾MYD-YT507開發(fā)板試用體驗】基于Fluter+Django+OpenCV的米爾行車記錄儀
【米爾MYD-YT507開發(fā)板試用體驗】基于Fluter+Django+OpenCV的米爾行車記錄儀

本文來源電子發(fā)燒友社區(qū),作者:HonestQiao, 帖子地址:https://bbs.elecfans.com/jishu_2303715_1_1.html
之前分享的文章中,在米爾MYD-YT507開發(fā)板上進行了攝像頭流媒體的嘗試,在此基礎(chǔ)上,進一步對之前的評測計劃進行了實現(xiàn)。
經(jīng)過充分的學習,最終應用Fluter+Django+OpenCV,實現(xiàn)了一款米爾行車記錄儀,現(xiàn)將實現(xiàn)的具體內(nèi)容,與大家分享。
目錄:
- 行車記錄儀業(yè)務(wù)邏輯規(guī)劃
- 硬件設(shè)備準備
- 攝像頭信息記錄和實時畫面播放服務(wù)開發(fā)
- 攝像頭視頻信息記錄
- 攝像頭服務(wù)的完整代碼
- 歷史數(shù)據(jù)RestFul服務(wù)開發(fā)
- Flutter Web界面開發(fā)
- 整體運行效果
- 車試
- 實際代碼使用
- 感謝
- 總結(jié)
一、行車記錄儀業(yè)務(wù)邏輯規(guī)劃
經(jīng)過詳細的分析,規(guī)劃了如下的基本業(yè)務(wù)邏輯結(jié)構(gòu):
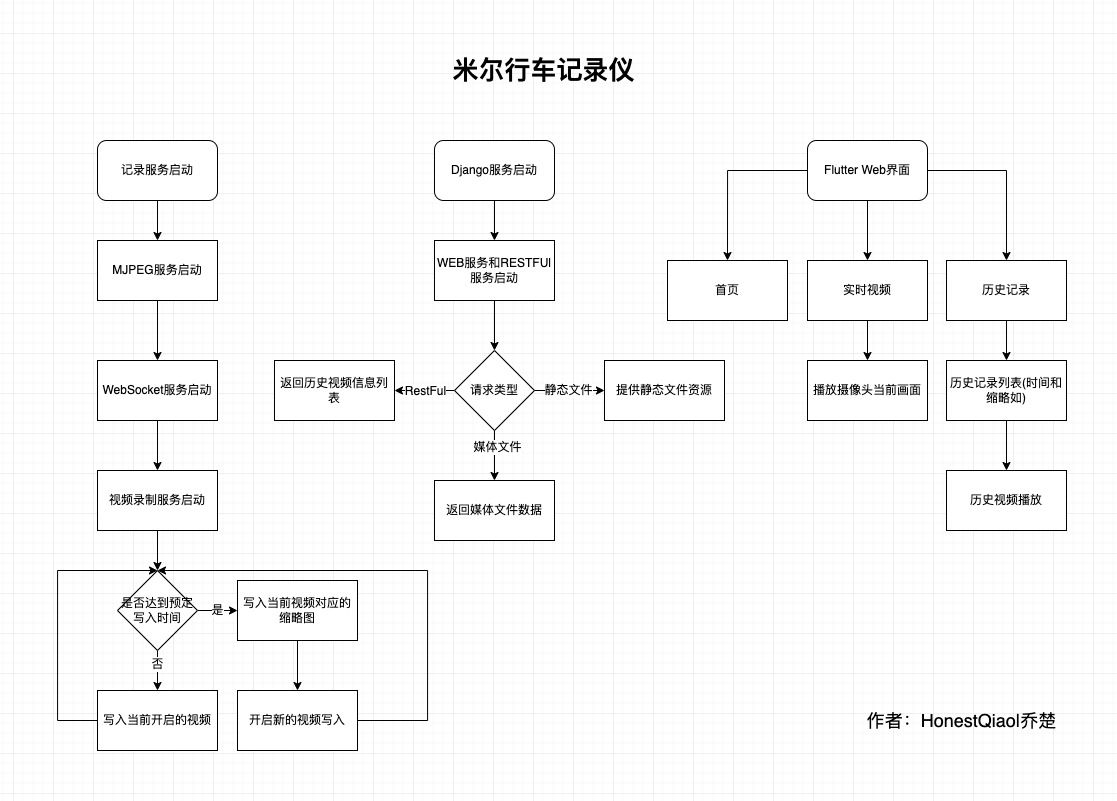
整體分為三個部分:
- 記錄服務(wù):用于記錄攝像頭拍攝的視頻信息,以及提供攝像頭當前畫面的實時播放服務(wù)
- Django服務(wù):包括RestFul提供API接口獲取歷史數(shù)據(jù)信息,以及為Flutter的Web界面提供訪問服務(wù)
- Flutter Web界面,用于實時畫面播放、歷史記錄播放的界面
為了又快又好的開發(fā)行車記錄儀的實際界面,以及后續(xù)進行各移動平臺的App開發(fā),選擇了Flutter。事實證明,坑太多了。不過,跨平臺特性,確實好。
二、硬件設(shè)備準備:
開發(fā)這款行車記錄儀,實際使用到的硬件設(shè)備如下:
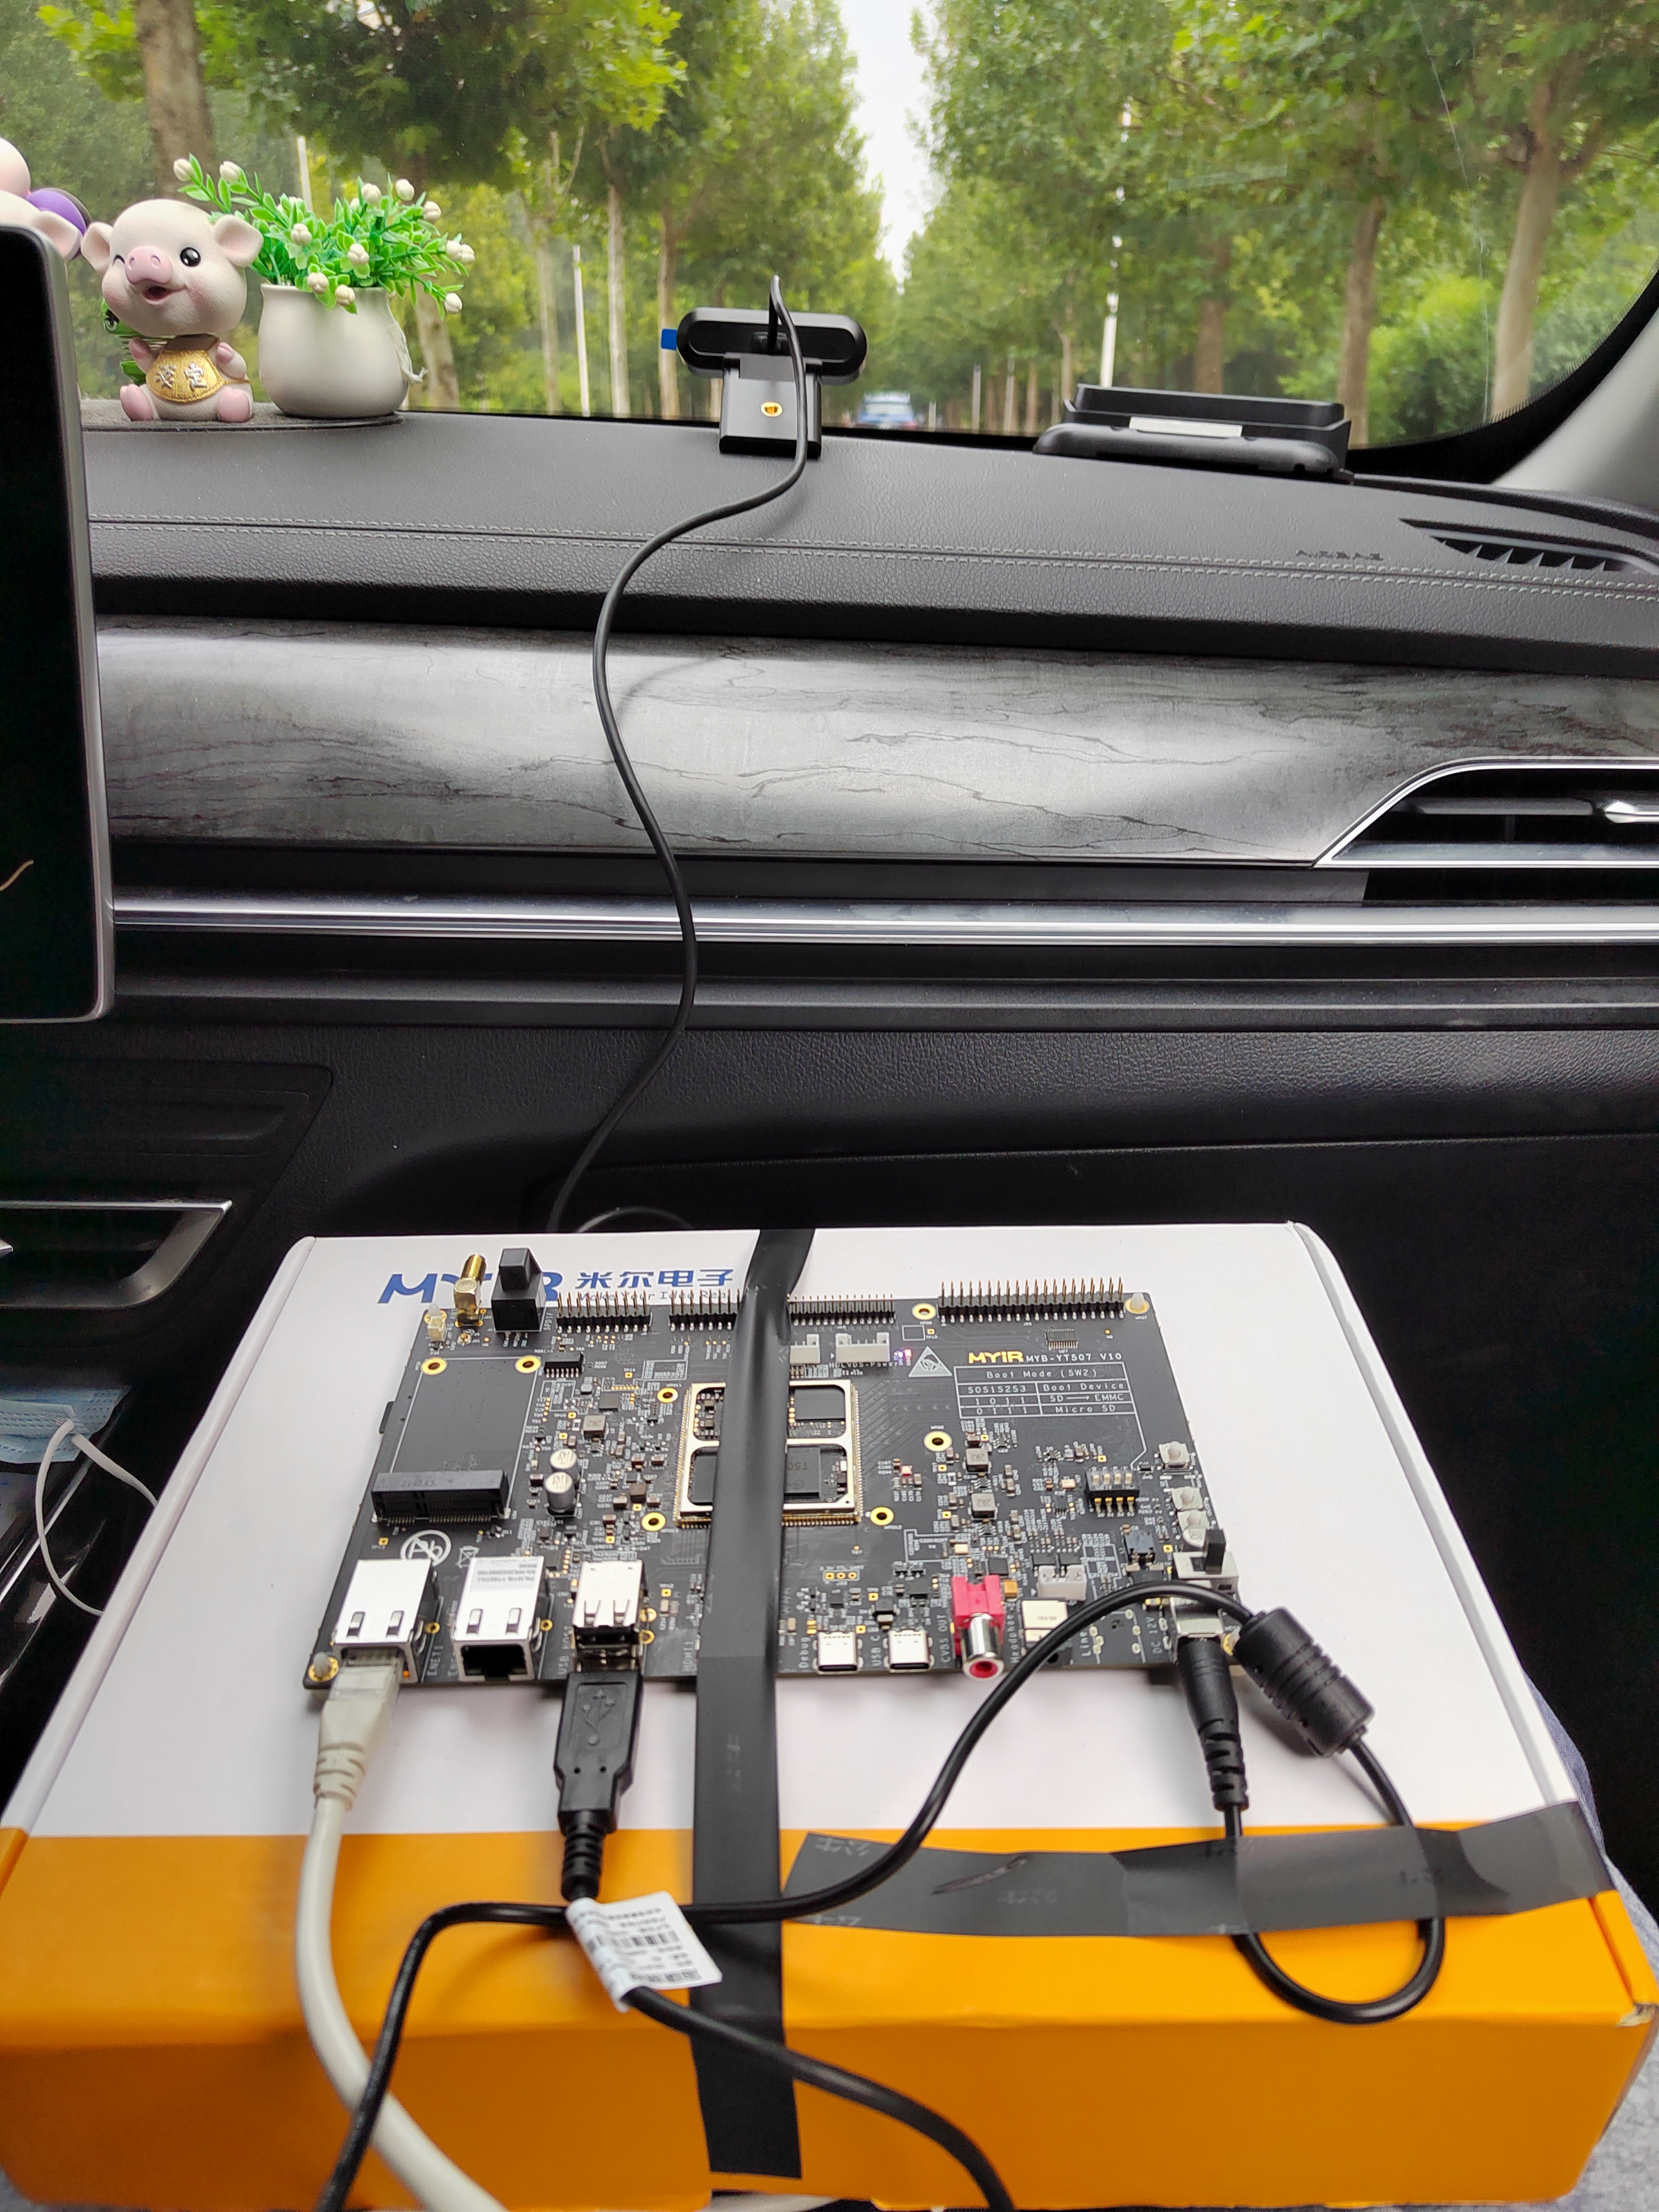
路由器沒有拍照,用普通無線路由器即可,當然帶寬越高越好。
開發(fā)板上有兩個USB3.0接口,選一個接上路由器即可。
然后,將開發(fā)板使用網(wǎng)線連接到路由器,再上電,就可以進行實際的操作了。
我這邊實際使用中,電源接口有點松,容易突然斷電,所以使用膠帶進行了加固。
三、攝像頭實時畫面播放服務(wù)開發(fā)
在之前嘗試MJPEG視頻流直播的時候,使用了mjpeg_streamer,但不清楚如何進行視頻的分割。
因為行車記錄儀,一般都是按照一定的時間進行視頻的分割存放,避免單個視頻過大。
經(jīng)過仔細的學習了解,OpenCV也可以獲取攝像頭的信息,并按照需要寫入文件。
最后,采用了Python+OpenCV的方案,有Python負責具體的邏輯,Python-OpenCV負責攝像頭視頻數(shù)據(jù)的采集。
視頻采集部分,包含的具體功能為:
- 能夠采集攝像頭的數(shù)據(jù)
- 能夠提供實時視頻查看
- 能夠按時間寫入視頻數(shù)據(jù)到文件,自動進行分割
采集攝像頭的數(shù)據(jù),Python-opencv搞定。
寫入視頻數(shù)據(jù)到文件,Python簡單搞定。
提供實時視頻預覽,這個花了不少功夫。
因為同時要寫入到文件,還要提供預覽,數(shù)據(jù)需要復用。
經(jīng)過學習了解,可以將Python-opencv采集的畫面,按幀在HTTP以JPEG數(shù)據(jù)發(fā)送,那么播放端,就能收到MJPEG數(shù)據(jù)流,進行播放了。
因此,第一版,參考資料,實現(xiàn)了一個Python版的MJPEG播放服務(wù),讀取幀,寫入臨時文件,然后從臨時文件讀取數(shù)據(jù)返回。
為了提高效率,還進行了優(yōu)化,不寫入臨時文件,直接在內(nèi)存中進行轉(zhuǎn)換。
最終形成的代碼如下:
# http服務(wù)器請求處理:網(wǎng)頁、MJPEG數(shù)據(jù)流
class CamHandler(BaseHTTPRequestHandler):
    def do_GET(self):
        # mjpeg推流
        if self.path.endswith('.mjpg'):
            self.send_response(200)
            self.send_header('Content-type','multipart/x-mixed-replace; boundary=--jpgboundary')
            self.end_headers()
            while True:
                if is_stop:
                    break
                try:
                    # rc,img = cameraCapture.read()
                    rc,img = success,frame
                    if not rc:
                        continue
                    if True:
                        imgRGB=cv2.cvtColor(img,cv2.COLOR_BGR2RGB)
                        jpg = Image.fromarray(imgRGB)
                        tmpFile = BytesIO()
                        jpg.save(tmpFile,'JPEG')
                        self.wfile.write(b"--jpgboundary")
                        self.send_header(b'Content-type','image/jpeg')
                        self.send_header(b'Content-length',str(tmpFile.getbuffer().nbytes))
                        self.end_headers()
                        jpg.save(self.wfile,'JPEG')
                    else:
                        img_fps = JPEG_QUALITY_VALUE
                        img_param = [int(cv2.IMWRITE_JPEG_QUALITY), img_fps]
                        img_str = cv2.imencode('.jpg', img, img_param)[1].tobytes() # change image to jpeg format
                        self.send_header('Content-type','image/jpeg')
                        self.end_headers()
                        self.wfile.write(img_str)
                        self.wfile.write(b"
--jpgboundary
") # end of this part
                    time.sleep(0.033)
                except KeyboardInterrupt:
                    self.wfile.write(b"
--jpgboundary--
")
                    break
                except BrokenPipeError:
                    continue
            return
        # 網(wǎng)頁
        if self.path == '/' or self.path.endswith('.html'):
            self.send_response(200)
            self.send_header('Content-type','text/html')
            self.end_headers()
            self.wfile.write(b'
') self.wfile.write((' ' % self.headers.get('Host')).encode()) self.wfile.write(b'') return
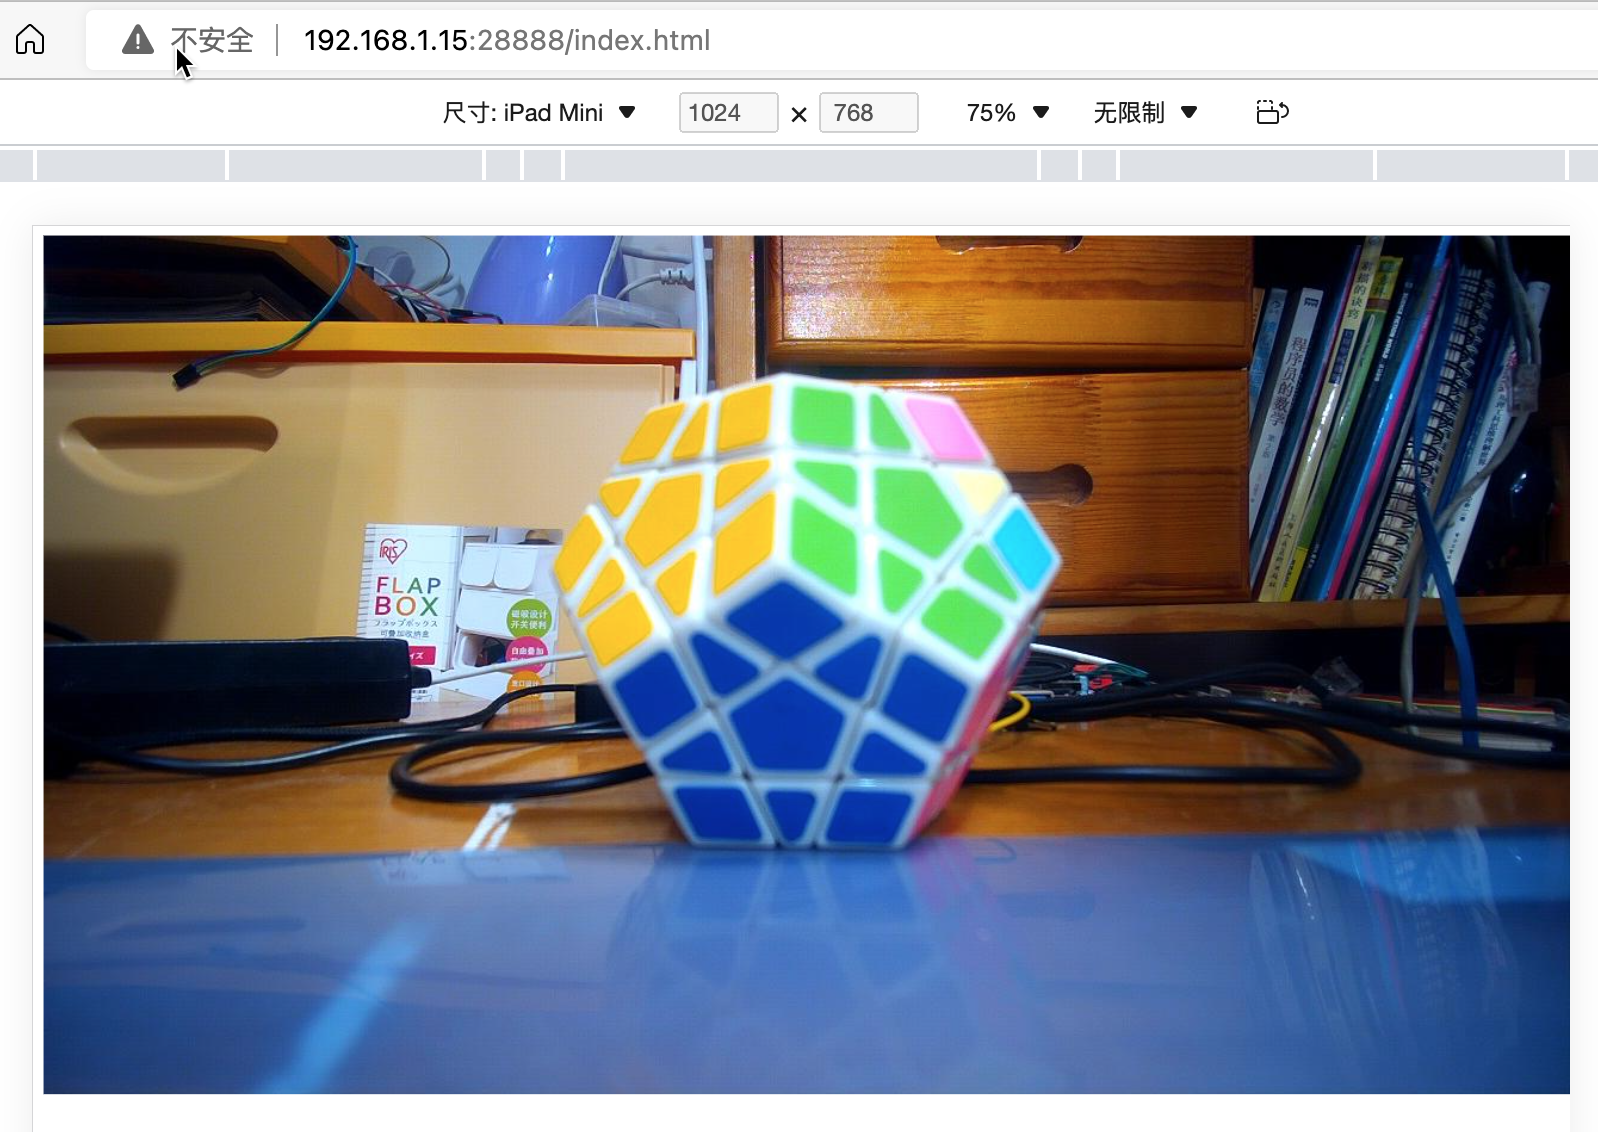
這段代碼,提供了兩個功能:
- 如果通過瀏覽器訪問http://ip:端口/index.html,就會返回包含MJPEG調(diào)用地址的網(wǎng)頁
- 如果通過瀏覽器訪問http://ip:端口/live.mjpg,就會返回MJPEG流媒體數(shù)據(jù),以便播放
在開發(fā)過程中,運行該服務(wù)后,隨時可以通過瀏覽器查看效果。
其中涉及到opencv相關(guān)的知識,以及webserver相關(guān)的知識,大家可以了解相關(guān)的資料做基礎(chǔ),這里就不詳細說了。
本來以為提供了MJPEG服務(wù),就能夠在Flutter開發(fā)的Web界面中調(diào)用了。然而,實際使用時,發(fā)現(xiàn)坑來了。
Flutter的公共庫里面,有MJPEG的庫,但是在目前的版本中,已經(jīng)不能使用了。且官方認為用的人不多,在可預見的將來,不會修復。悲催啊!!!
條條大道通羅馬,此處不通開新路。
經(jīng)過再次的學習了解,F(xiàn)lutter的Video功能,支持Stream模式,其可以采用WebSocket的方式來獲取數(shù)據(jù),然后進行播放。
那么,只要能夠在服務(wù)端,將獲取的幀數(shù)據(jù),使用WebSocket提供,就能夠正常播放了。
最終,使用Python開發(fā)了能夠提供實時視頻數(shù)據(jù)的WebSocket服務(wù),具體代碼如下:
# websocket服務(wù)請求處理
async def CamTransmitHandler(websocket, path):
    print("Client Connected !")
    try :
        while True:
            # rc,img = cameraCapture.read()
            rc,img = success,frame
            if not rc:
                continue

            img_fps = JPEG_QUALITY_VALUE
            img_param = [int(cv2.IMWRITE_JPEG_QUALITY), img_fps]
            encoded = cv2.imencode('.jpg', img, img_param)[1]
            data = str(base64.b64encode(encoded))
            data = data[2:len(data)-1]
            await websocket.send(data)

            # cv2.imshow("Transimission", frame)
            # if cv2.waitKey(1) & 0xFF == ord('q'):
            #     break
        # cap.release()
    except EXCEPTION_CONNECTION_CLOSE as e:
        print("Client Disconnected !")
        # cap.release()
    except:
        print("Someting went Wrong !")
這個部分比之前的更簡單,就是簡單的轉(zhuǎn)換數(shù)據(jù),喂數(shù)據(jù)給WebSocket即可。
上述的兩部分代碼中,都沒有包含完整的邏輯處理過程,只有關(guān)鍵代碼部分。
各部分分別講完以后,將提供完整的代碼以供學習。
到這里,實時流媒體功能就實現(xiàn)了。
四、攝像頭視頻信息記錄
實際上,上一步的實時視頻功能,也依賴于這一步,因為其需要共享實際獲取的攝像頭信息。
其基本邏輯也比較簡單,步驟如下:
- 初始化opencv,開始攝像頭數(shù)據(jù)幀的獲取
- 檢測是否達到預定時間
- 未達到時間,則繼續(xù)寫入當前視頻
- 達到時間了,則關(guān)閉當前視頻,寫入縮略圖,并開啟新的文件寫入
具體代碼如下:
# 捕獲攝像頭
cameraCapture = cv2.VideoCapture(CAMERA_NO)

# 攝像頭參數(shù)設(shè)置
cameraCapture.set(cv2.CAP_PROP_FRAME_WIDTH, 320)
cameraCapture.set(cv2.CAP_PROP_FRAME_WIDTH, 240)
cameraCapture.set(cv2.CAP_PROP_SATURATION, 135)

fps = 30
size=(int(cameraCapture.get(cv2.CAP_PROP_FRAME_WIDTH)),int(cameraCapture.get(cv2.CAP_PROP_FRAME_HEIGHT)))

# 讀取捕獲的數(shù)據(jù)
success,frame = cameraCapture.read()
...
while True:
    if is_stop:
        success = False
        break;

    success,frame = cameraCapture.read()
    if not success:
        continue

    time_now = get_current_time()
    if time_now["time"] - time_record["time"] >= ROTATE_TIME:
        if time_record_prev:
            thubm_file = get_file_name(time_record_prev, 'thumbs', 'jpg')
            print("[Info] write to thumb: %s" % thubm_file)
            if not os.path.isfile(thubm_file):
                cv2.imwrite(thubm_file, frame)

        time_record = time_now
        time_record_prev = get_current_time()
        video_file = get_file_name(time_record_prev, 'videos', MEDIA_EXT)
        print("[Info] write to video: %s" % video_file)

    # encode = cv2.VideoWriter_fourcc(*"mp4v")
    encode = cv2.VideoWriter_fourcc(*'X264')
    # encode = cv2.VideoWriter_fourcc(*'AVC1')
    # encode = cv2.VideoWriter_fourcc(*'XVID')
    # encode = cv2.VideoWriter_fourcc(*'H264')
    videoWriter=cv2.VideoWriter(video_file, encode,fps,size) # mp4
    numFrameRemaining = ROTATE_TIME * fps    #攝像頭捕獲持續(xù)時間
    while success and numFrameRemaining > 0:
        videoWriter.write(frame)
        success,frame = cameraCapture.read()
        numFrameRemaining -= 1

cameraCapture.release()
上述代碼的邏輯其實很清晰,有opencv的基礎(chǔ),一看就懂。
有一個關(guān)鍵點需要注意的就是encode = cv2.VideoWriter_fourcc(*'X264'),在不同的環(huán)境下面,提供的編碼方式不完全相同。
在米爾MYD-YT507開發(fā)板的Ubuntu環(huán)境中,可以使用X264編碼。
上述代碼,會持續(xù)不斷的讀取攝像頭的數(shù)據(jù)幀,存放到frame變量中,然后寫入到視頻文件中。并進行時間判斷,以確定是否需要寫入到新的視頻文件中。
frame變量,在之前實時視頻服務(wù)中,也會使用,相當于是共享了。
五、攝像頭服務(wù)的完整代碼
經(jīng)過上面的兩個部分,就完成了攝像頭部分的服務(wù)代碼。
整體的代碼如下:
# -*- coding: utf-8 -*-
import signal
import cv2
import time
from PIL import Image
from threading import Thread
from http.server import BaseHTTPRequestHandler,HTTPServer
from socketserver import ThreadingMixIn
from io import BytesIO

import os
import sys
import websockets
import asyncio
import base64
import ctypes
import inspect

CAMERA_NO = 2
ROTATE_TIME = 120
MJPEG_ENABLE = 1
WEBSOCKET_ENABLE = 1
MJPEG_SERVER_PORT = 28888
WEBSOCKET_PORT = 28889
JPEG_QUALITY_VALUE = 65
STORE_DIR = "./data/" if os.uname()[0] == 'Darwin' else "/sdcard/data/"
MEDIA_EXT = "mkv"

EXCEPTION_CONNECTION_CLOSE = websockets.exceptions.ConnectionClosed if sys.version[:3] == '3.6' else websockets.ConnectionClosed

def _async_raise(tid, exctype):
    """raises the exception, performs cleanup if needed"""
    try:
        tid = ctypes.c_long(tid)
        if not inspect.isclass(exctype):
            exctype = type(exctype)
        res = ctypes.pythonapi.PyThreadState_SetAsyncExc(tid, ctypes.py_object(exctype))
        if res == 0:
            # pass
            raise ValueError("invalid thread id")
        elif res != 1:
            # """if it returns a number greater than one, you're in trouble,
            # and you should call it again with exc=NULL to revert the effect"""
            ctypes.pythonapi.PyThreadState_SetAsyncExc(tid, None)
            raise SystemError("PyThreadState_SetAsyncExc failed")
    except Exception as err:
        print(err)


def stop_thread(thread):
    """終止線程"""
    _async_raise(thread.ident, SystemExit)

# 信號處理回調(diào)
def signal_handler(signum, frame):
    # global cameraCapture
    # global thread
    # global server
    # global is_stop
    # global success
    print('signal_handler: caught signal ' + str(signum))
    if signum == signal.SIGINT.value:
        print('stop server:')
        is_stop = True
        success = False
        print("mjpeg server.socket.close...")
        server.socket.close()
        print("mjpeg server.shutdown...")
        server.shutdown()
        print("ws server.socket.close...")
        server_ws.ws_server.close()
        time.sleep(1)
        # print("ws server.shutdown...")
        # await server_ws.ws_server.wait_closed()
        print("mjpeg thread.shutdown...")
        thread_mjpeg.join()
        print("ws loop.shutdown...")
        # event_loop_ws.stop()
        event_loop_ws.call_soon_threadsafe(event_loop_ws.stop)
        time.sleep(1)
        # print("ws thread.shutdown...")
        # stop_thread(thread_ws)
        # time.sleep(1)
        # print(server)
        # print(server_ws)
        print(thread_mjpeg.is_alive())
        print(thread_ws.is_alive())
        print(event_loop_ws.is_running())
        # thread_ws.join()
        print("cameraCapture.release...")
        cameraCapture.release()
        print("quit...")
        # print(server_ws)
        sys.exit(0)

# http服務(wù)器請求處理:網(wǎng)頁、MJPEG數(shù)據(jù)流
class CamHandler(BaseHTTPRequestHandler):
    def do_GET(self):
        # mjpeg推流
        if self.path.endswith('.mjpg'):
            self.send_response(200)
            self.send_header('Content-type','multipart/x-mixed-replace; boundary=--jpgboundary')
            self.end_headers()
            while True:
                if is_stop:
                    break
                try:
                    # rc,img = cameraCapture.read()
                    rc,img = success,frame
                    if not rc:
                        continue
                    if True:
                        imgRGB=cv2.cvtColor(img,cv2.COLOR_BGR2RGB)
                        jpg = Image.fromarray(imgRGB)
                        tmpFile = BytesIO()
                        jpg.save(tmpFile,'JPEG')
                        self.wfile.write(b"--jpgboundary")
                        self.send_header(b'Content-type','image/jpeg')
                        self.send_header(b'Content-length',str(tmpFile.getbuffer().nbytes))
                        self.end_headers()
                        jpg.save(self.wfile,'JPEG')
                    else:
                        img_fps = JPEG_QUALITY_VALUE
                        img_param = [int(cv2.IMWRITE_JPEG_QUALITY), img_fps]
                        img_str = cv2.imencode('.jpg', img, img_param)[1].tobytes() # change image to jpeg format
                        self.send_header('Content-type','image/jpeg')
                        self.end_headers()
                        self.wfile.write(img_str)
                        self.wfile.write(b"
--jpgboundary
") # end of this part
                    time.sleep(0.033)
                except KeyboardInterrupt:
                    self.wfile.write(b"
--jpgboundary--
")
                    break
                except BrokenPipeError:
                    continue
            return
        # 網(wǎng)頁
        if self.path == '/' or self.path.endswith('.html'):
            self.send_response(200)
            self.send_header('Content-type','text/html')
            self.end_headers()
            self.wfile.write(b'
') self.wfile.write(('' % self.headers.get('Host')).encode()) self.wfile.write(b'') return class ThreadedHTTPServer(ThreadingMixIn, HTTPServer): """Handle requests in a separate thread.""" # 啟動MJPEG服務(wù) def mjpeg_server_star(): global success global server global thread_mjpeg try: server = ThreadedHTTPServer(('0.0.0.0', MJPEG_SERVER_PORT), CamHandler) print("mjpeg server started: http://0.0.0.0:%d" % MJPEG_SERVER_PORT) # server.serve_forever() thread_mjpeg = Thread(target=server.serve_forever); thread_mjpeg.start() except KeyboardInterrupt: print("mjpeg server stoping...") server.socket.close() server.shutdown() print("mjpeg server stoped") # websocket服務(wù)請求處理 async def CamTransmitHandler(websocket, path): print("Client Connected !") try : while True: # rc,img = cameraCapture.read() rc,img = success,frame if not rc: continue img_fps = JPEG_QUALITY_VALUE img_param = [int(cv2.IMWRITE_JPEG_QUALITY), img_fps] encoded = cv2.imencode('.jpg', img, img_param)[1] data = str(base64.b64encode(encoded)) data = data[2:len(data)-1] await websocket.send(data) # cv2.imshow("Transimission", frame) # if cv2.waitKey(1) & 0xFF == ord('q'): # break # cap.release() except EXCEPTION_CONNECTION_CLOSE as e: print("Client Disconnected !") # cap.release() except: print("Someting went Wrong !") # websocket服務(wù)器啟動 def websocket_server_start(): global thread_ws global server_ws global event_loop_ws event_loop_ws = asyncio.new_event_loop() def run_server(): global server_ws print("websocket server started: ws://0.0.0.0:%d" % WEBSOCKET_PORT) server_ws = websockets.serve(CamTransmitHandler, port=WEBSOCKET_PORT, loop=event_loop_ws) event_loop_ws.run_until_complete(server_ws) event_loop_ws.run_forever() thread_ws = Thread(target=run_server) thread_ws.start() # try: # yield # except e: # print("An exception occurred") # finally: # event_loop.call_soon_threadsafe(event_loop.stop) # 獲取存儲的文件名 def get_file_name(time_obj, path, ext): file_name_time = "%04d-%02d-%02d_%02d-%02d-%02d" % (time_obj["year"], time_obj["month"], time_obj["day"], time_obj["hour"], time_obj["min"], 0) return '%s/%s/%s.%s' % (STORE_DIR, path, file_name_time, ext) # 獲取當前整分時間 def get_current_time(): time_now = time.localtime() time_int = int(time.time()) return { "year": time_now.tm_year, "month": time_now.tm_mon, "day": time_now.tm_mday, "hour": time_now.tm_hour, "min": time_now.tm_min, "sec": time_now.tm_sec, "time": time_int - time_now.tm_sec } # 設(shè)置信號回調(diào) signal.signal(signal.SIGINT, signal_handler) signal.signal(signal.SIGTERM, signal_handler) # 捕獲攝像頭 cameraCapture = cv2.VideoCapture(CAMERA_NO) # 攝像頭參數(shù)設(shè)置 cameraCapture.set(cv2.CAP_PROP_FRAME_WIDTH, 320) cameraCapture.set(cv2.CAP_PROP_FRAME_WIDTH, 240) cameraCapture.set(cv2.CAP_PROP_SATURATION, 135) fps = 30 size=(int(cameraCapture.get(cv2.CAP_PROP_FRAME_WIDTH)),int(cameraCapture.get(cv2.CAP_PROP_FRAME_HEIGHT))) # 讀取捕獲的數(shù)據(jù) success,frame = cameraCapture.read() if not success: print("camera start failed.") quit() is_stop = False server = None server_ws = None event_loop_ws = None thread_mjpeg = None thread_ws = None mjpeg_server_star() websocket_server_start() print("record server star:") thubm_file = None video_file = None time_start = int(time.time()) time_record = {"time":0} time_record_prev = None while True: if is_stop: success = False break; success,frame = cameraCapture.read() if not success: continue time_now = get_current_time() if time_now["time"] - time_record["time"] >= ROTATE_TIME: if time_record_prev: thubm_file = get_file_name(time_record_prev, 'thumbs', 'jpg') print("[Info] write to thumb: %s" % thubm_file) if not os.path.isfile(thubm_file): cv2.imwrite(thubm_file, frame) time_record = time_now time_record_prev = get_current_time() video_file = get_file_name(time_record_prev, 'videos', MEDIA_EXT) print("[Info] write to video: %s" % video_file) # encode = cv2.VideoWriter_fourcc(*"mp4v") encode = cv2.VideoWriter_fourcc(*'X264') # encode = cv2.VideoWriter_fourcc(*'AVC1') # encode = cv2.VideoWriter_fourcc(*'XVID') # encode = cv2.VideoWriter_fourcc(*'H264') videoWriter=cv2.VideoWriter(video_file, encode,fps,size) # mp4 numFrameRemaining = ROTATE_TIME * fps #攝像頭捕獲持續(xù)時間 while success and numFrameRemaining > 0: videoWriter.write(frame) success,frame = cameraCapture.read() numFrameRemaining -= 1 cameraCapture.release()
在上述代碼中,除了前面說過的三個部分,還包括啟動web和websocket線程的部分。因為核心邏輯為讀取視頻數(shù)據(jù)并寫入文件,所以其他部分,以線程的模式啟動,以便同時進行處理。
將上述代碼保存為DrivingRecorderAndMjpegServer.py,然后運行即可。(依賴包,見代碼庫中requirements.txt)
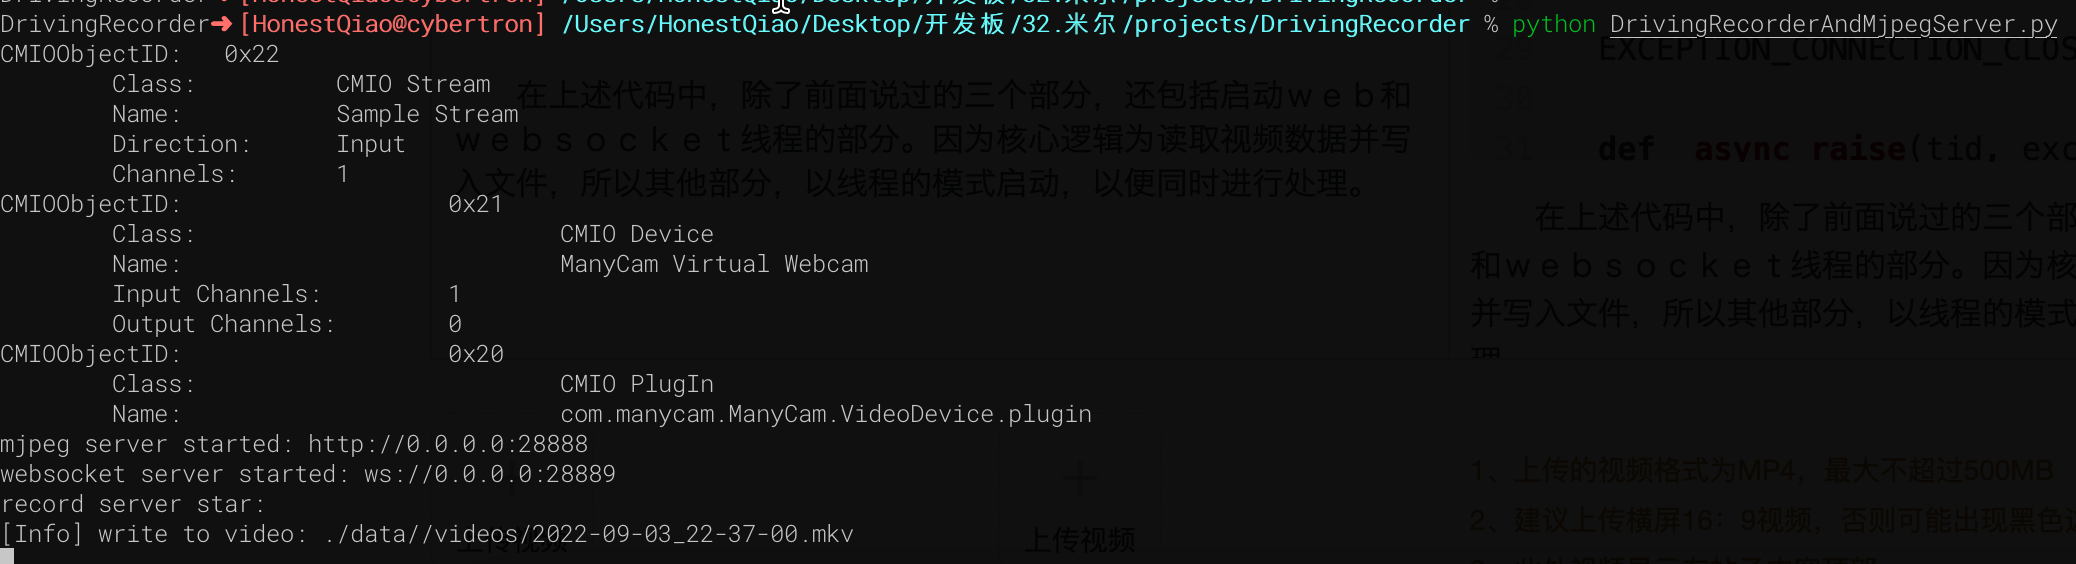
實際訪問效果如下:
六、歷史數(shù)據(jù)RestFul服務(wù)開發(fā)
歷史數(shù)據(jù)服務(wù),本來也可以使用Python直接手寫,但考慮到可擴展性,使用Django來進行了編寫。
Djano服務(wù),需要提供如下的功能:
- 提供api接口,以便獲取歷史數(shù)據(jù)記錄列表,便于前端界面呈現(xiàn)展示
- 提供Flutter Web界面代碼文件的托管,以便通過瀏覽器訪問
- 提供靜態(tài)文件的訪問,例如查看歷史視頻文件
2和3本質(zhì)都是一個問題,通過Django的static功能,就能實現(xiàn)。
也就是在settings.py配置中,提供下面的配置即可:
STATIC_URL = 'static/'

STATICFILES_DIRS = [
    BASE_DIR / "static"
]
1對外提供api服務(wù),則需要設(shè)置對應的url接口,以及讀取歷史文件信息,生成前端需要的json數(shù)據(jù)結(jié)構(gòu),這部分的具體代碼如下:
# 媒體文件存放目錄,以及縮略圖和視頻文件的后綴
THUMB_HOME_DIR = "%s/%s/data/thumbs/" % (BASE_DIR, STATIC_URL)
VIDEO_HOME_DIR = "%s/%s/data/videos/" % (BASE_DIR, STATIC_URL)

IMG_FILTER = [".jpg"]
MEDIA_FILTER = [ ".mkv"]
import json
from django.shortcuts import render, HttpResponse
from rest_framework.response import Response
from rest_framework.permissions import AllowAny
from rest_framework.decorators import api_view, permission_classes
import os
from django.conf import settings

THUMB_HOME_DIR = settings.THUMB_HOME_DIR
VIDEO_HOME_DIR = settings.VIDEO_HOME_DIR
IMG_FILTER = settings.IMG_FILTER
MEDIA_FILTER = settings.MEDIA_FILTER

# Create your views here.
@api_view(['GET'],)
@permission_classes([AllowAny],)
def hello_django(request):
    str = '''[
  {
    "id": 1,
    "time": "2022-07-28 21:00",
    "title": "2022-07-28 21:00",
    "body": "videos/2022-07-28_2100.mp4"
  },
  {
    "id": 2,
    "time": "2022-07-28 23:00",
    "title": "2022-07-28 23:00",
    "body": "videos/2022-07-28_2300.mp4"
  },
  {
    "id": 3,
    "time": "2022-07-28 25:00",
    "title": "2022-07-28 25:00",
    "body": "videos/2022-07-28_2500.mp4"
  }
]'''
    _json = json.loads(str)
    return HttpResponse(json.dumps(_json), content_type='application/json')


@api_view(['GET'],)
@permission_classes([AllowAny],)
def history_list(request):
    next = request.GET.get("next", '')
    print(f"thumb next = {next}")
    path = "/".join(request.path.split("/")[3:])
    print(f"thumb request.path= {request.path}")
    print(f"thumb path = {path}")

    #print os.listdir(FILE_HOME_DIR+".none/")
    data = {"files":[], "dirs":[]}
    print(data)
    child_path = THUMB_HOME_DIR+next
    print(f"child_path = {child_path}")
    data['cur_dir'] = path+next
    print(data)
    for dir in os.listdir(child_path):
        if os.path.isfile(child_path+"/"+dir):
            if os.path.splitext(dir)[1] in IMG_FILTER:
                data['files'].append(dir)
        else:
            data['dirs'].append(dir)

    print(data)
    data['files']=sorted(data['files'])
    data['files'].reverse()
    data['infos'] = []

    for i in range(0,len(data['files'])):
        thumb_name = data['files'][i]
        video_name = thumb_name.replace('.jpg', MEDIA_FILTER[0])
        file_time = thumb_name.replace('.jpg', '').replace('_', ' ')
        data['infos'].append(
          {
            "id": i,
            "time": file_time,
            "title": file_time,
            "body": thumb_name,
            'thumb': thumb_name,
            'video': video_name
          }
        )
    return Response(data['infos'], status = 200)
其中有兩個接口:
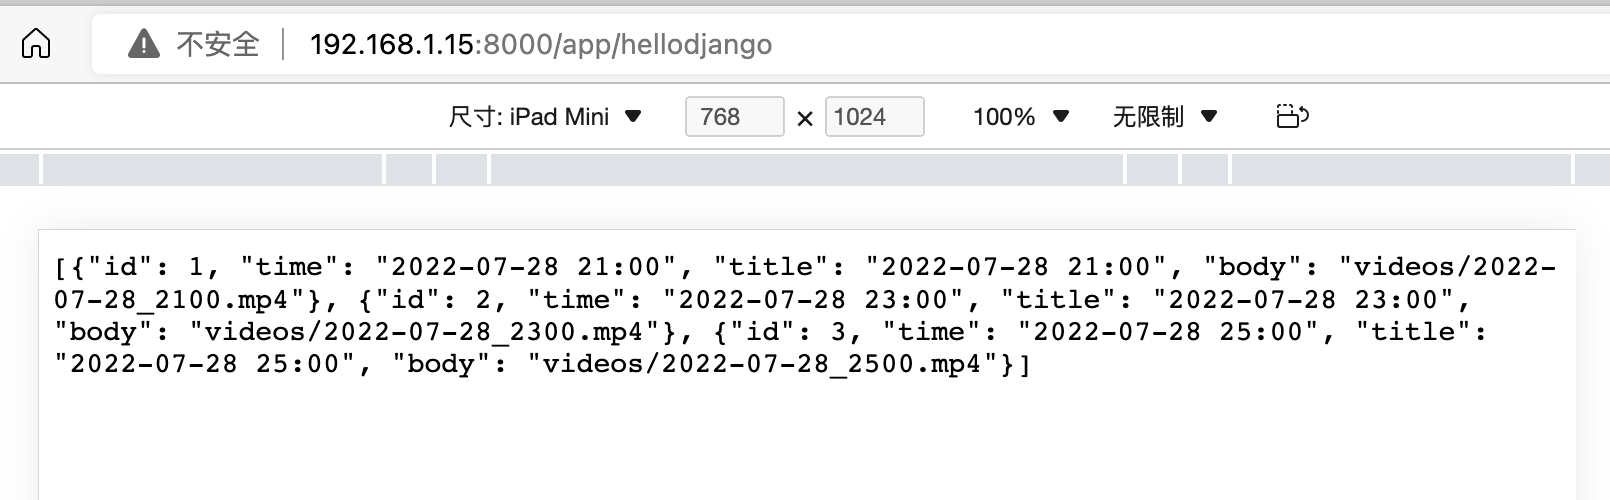
hello_django是最開始學習使用的,返回寫死的json數(shù)據(jù)。
history_list,則是自動遍歷縮略圖文件夾,獲取縮略圖文件信息,并生成所需要的json數(shù)據(jù)格式。
在對應的代碼庫文件中,也包含了requirements.txt,其中標明了實際需要的依賴庫。
下載代碼,進入manage.py所在的目錄后,執(zhí)行下面的命令即可啟動:
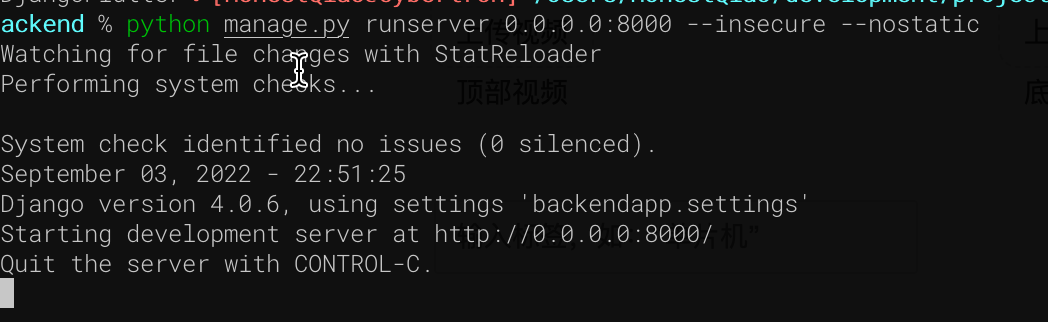
訪問192.168.1.15:8000/app/hellodjango:
訪問:History List – Django REST framework
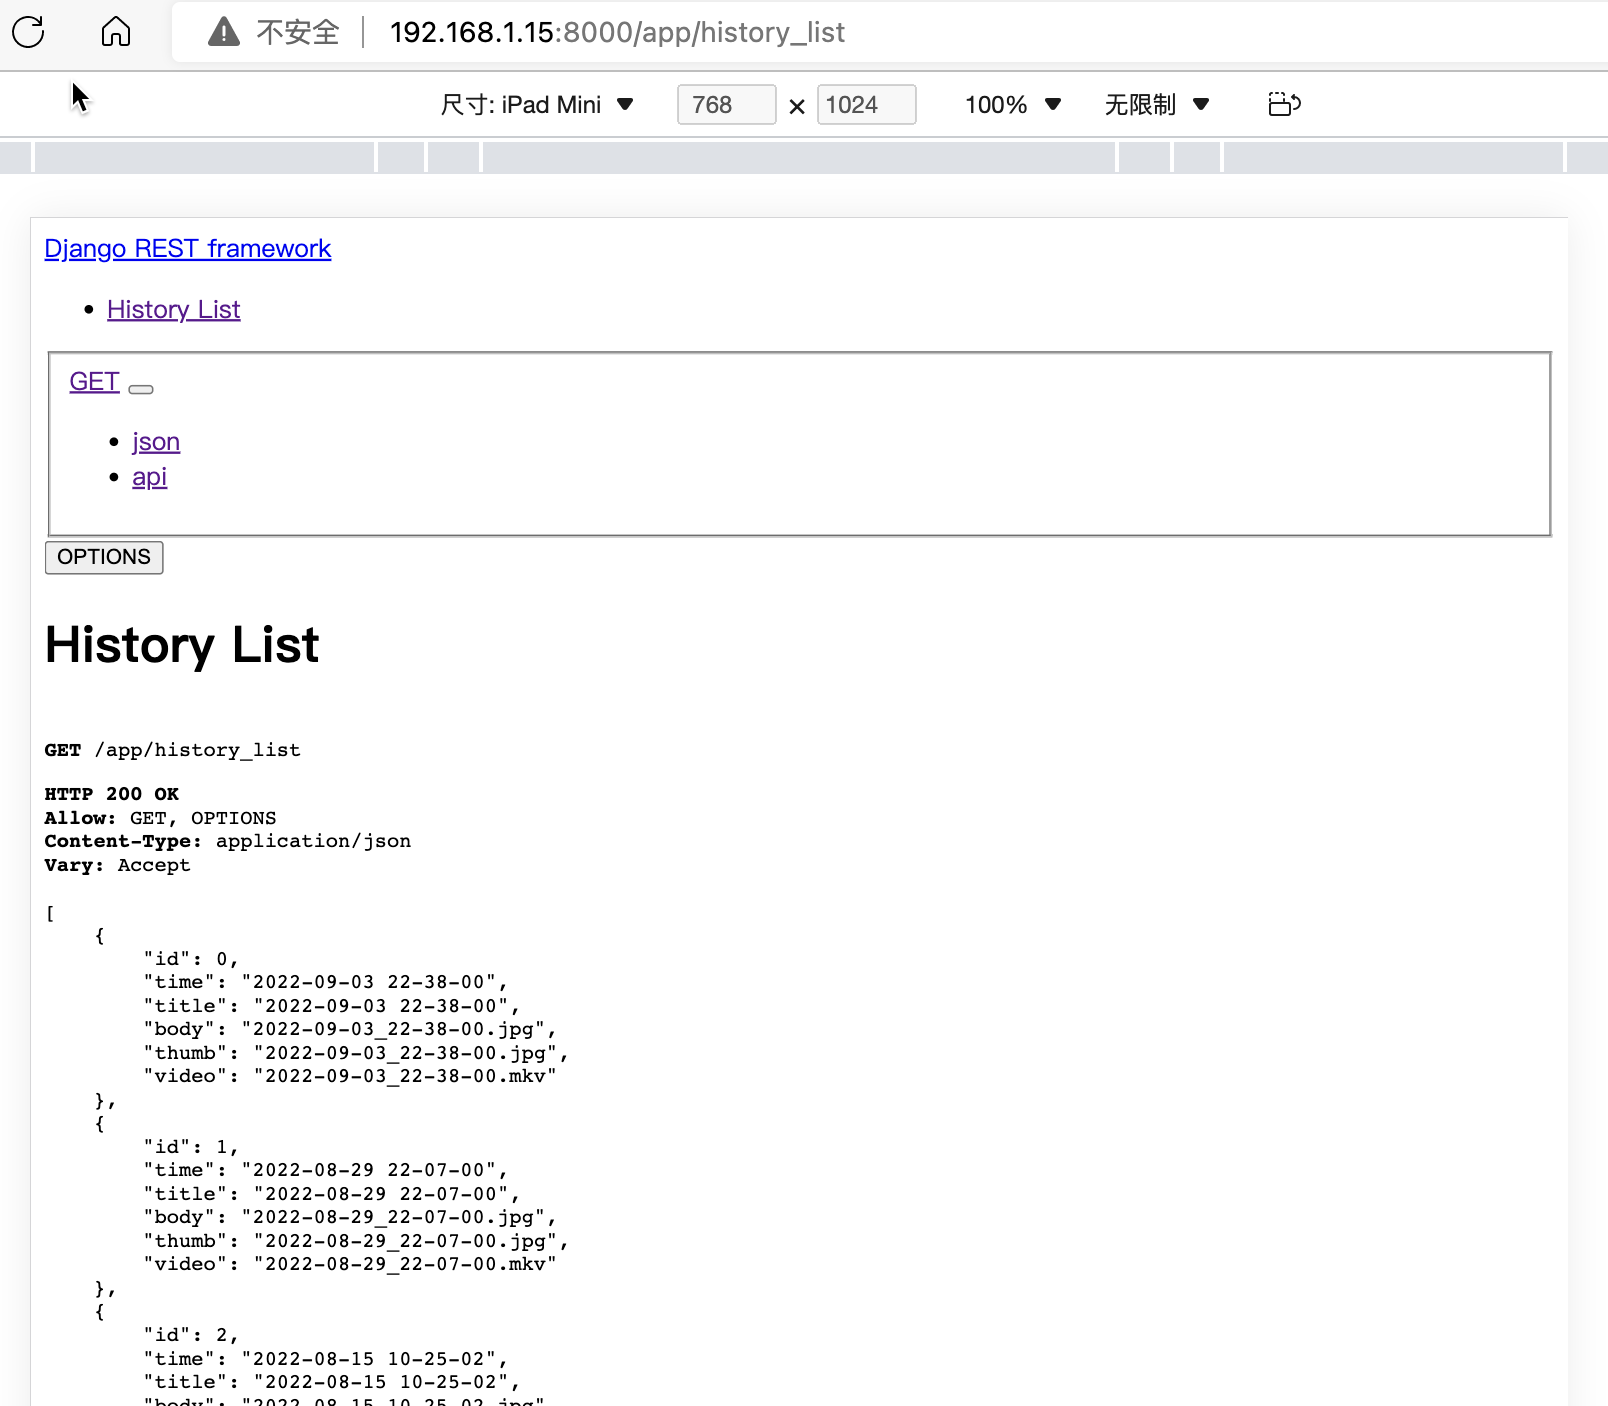
可以看到 history_list接口,已經(jīng)可以提供實際需要的數(shù)據(jù)了。
七、Flutter Web界面開發(fā)
這個部分設(shè)計的代碼比較多,所以只對關(guān)鍵部分的代碼進行說明。
開發(fā)的實際代碼,位于lib目錄,具體為:
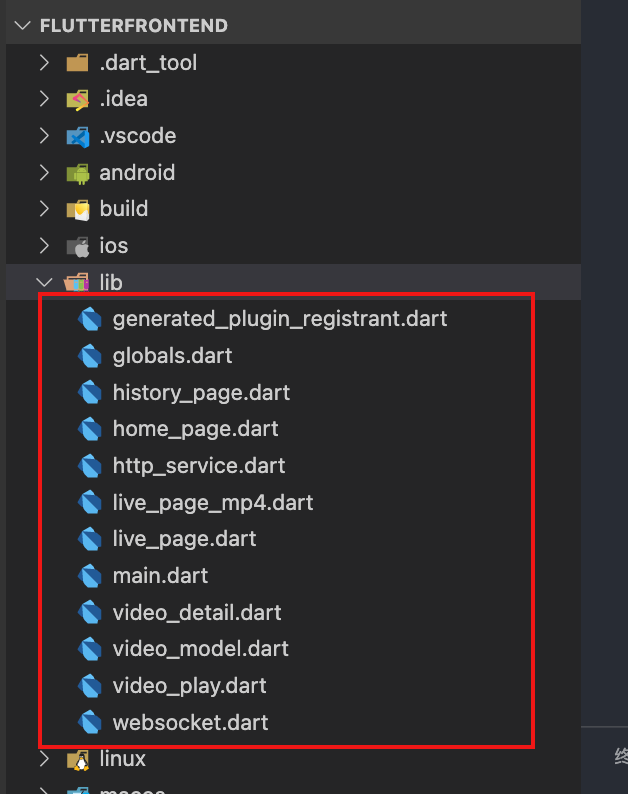
- globals.dart:全局變量定義
- main.dart:程序入口
- home_page.dart:首頁
- live_page.dart:實時播放
- live_page_mp4.dart:測試播放mp4視頻
- history_page.dart:歷史記錄列表頁面
- video_detail.dart:單條歷史記錄詳情
- video_play.dart:播放具體的歷史視頻
- video_model.dart:單條記錄的數(shù)據(jù)模型
- http_service.dart:請求RestFul接口
- websocket.dart:實時視頻的WebSocket請求
整個界面,使用了Scaffold來模擬手機/Pad的操作界面,具體界面如下:
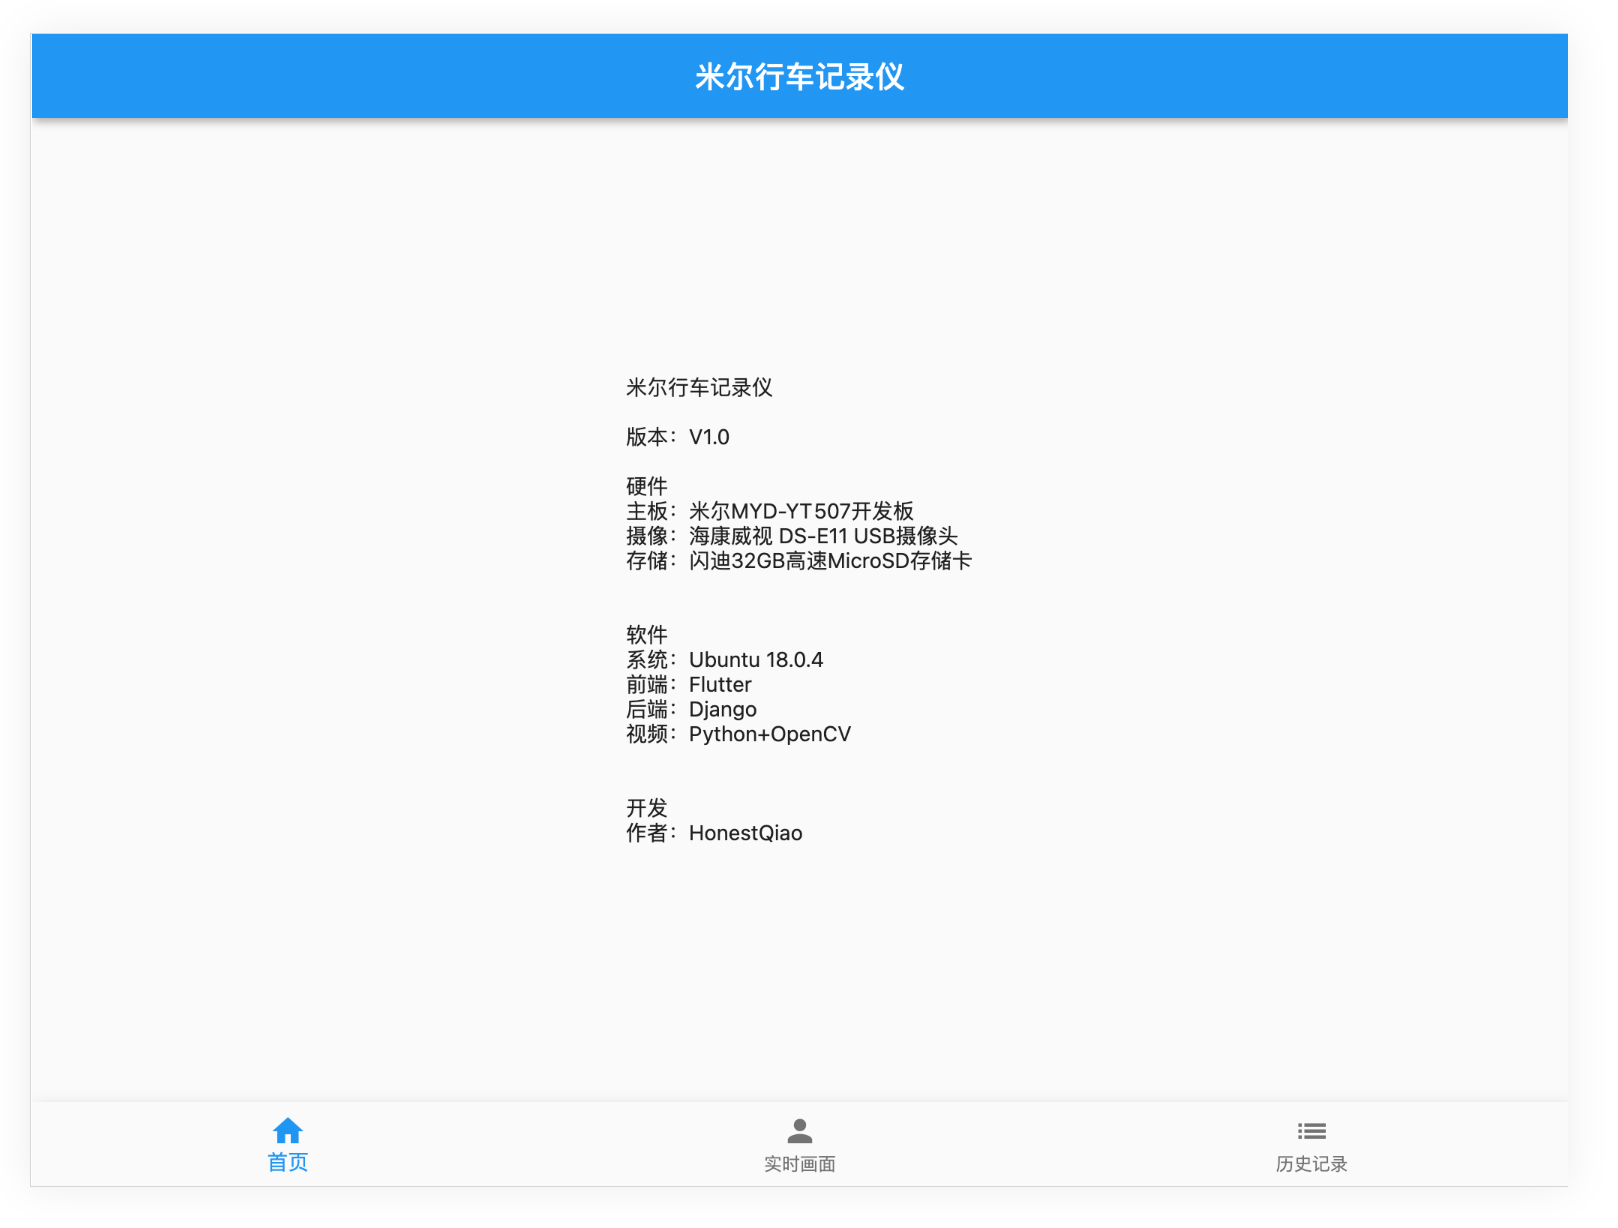
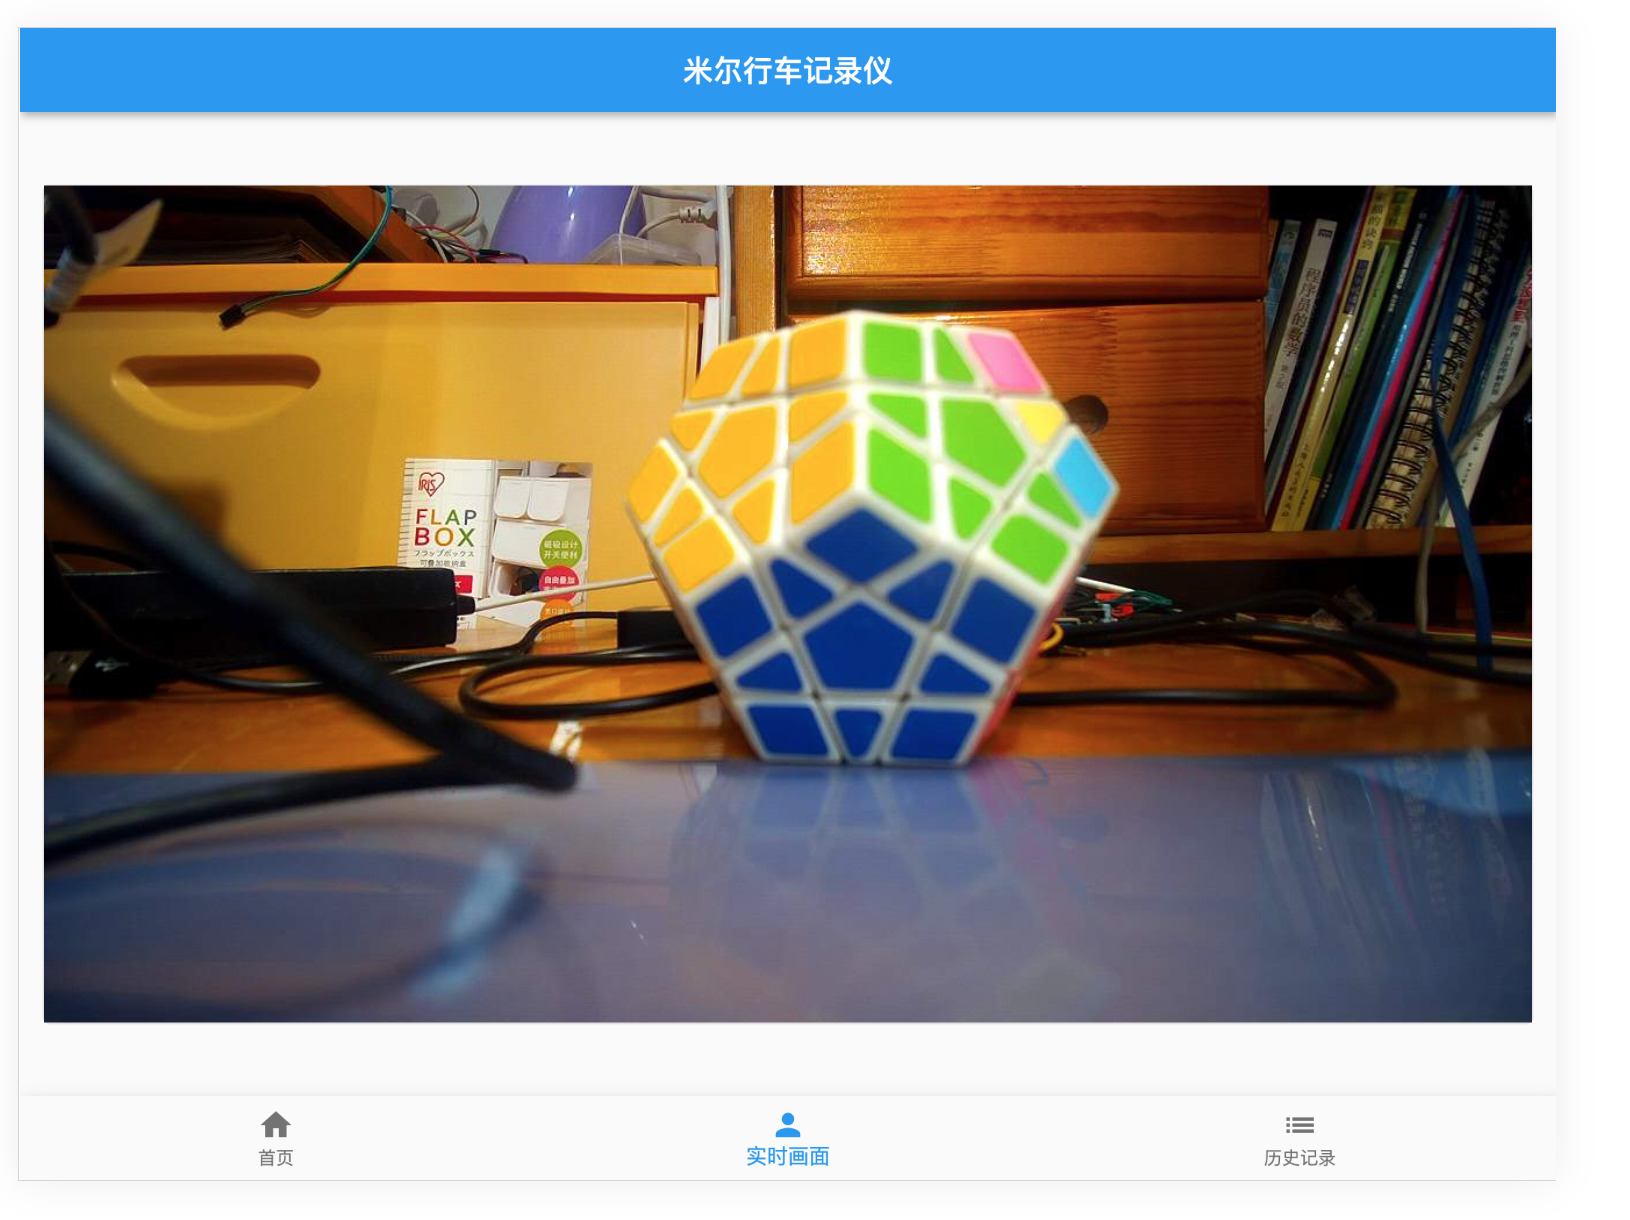
在實時畫面界面中,使用了WebSocket監(jiān)聽,獲取到信息,就使用Stream模式,推送給視頻播放。
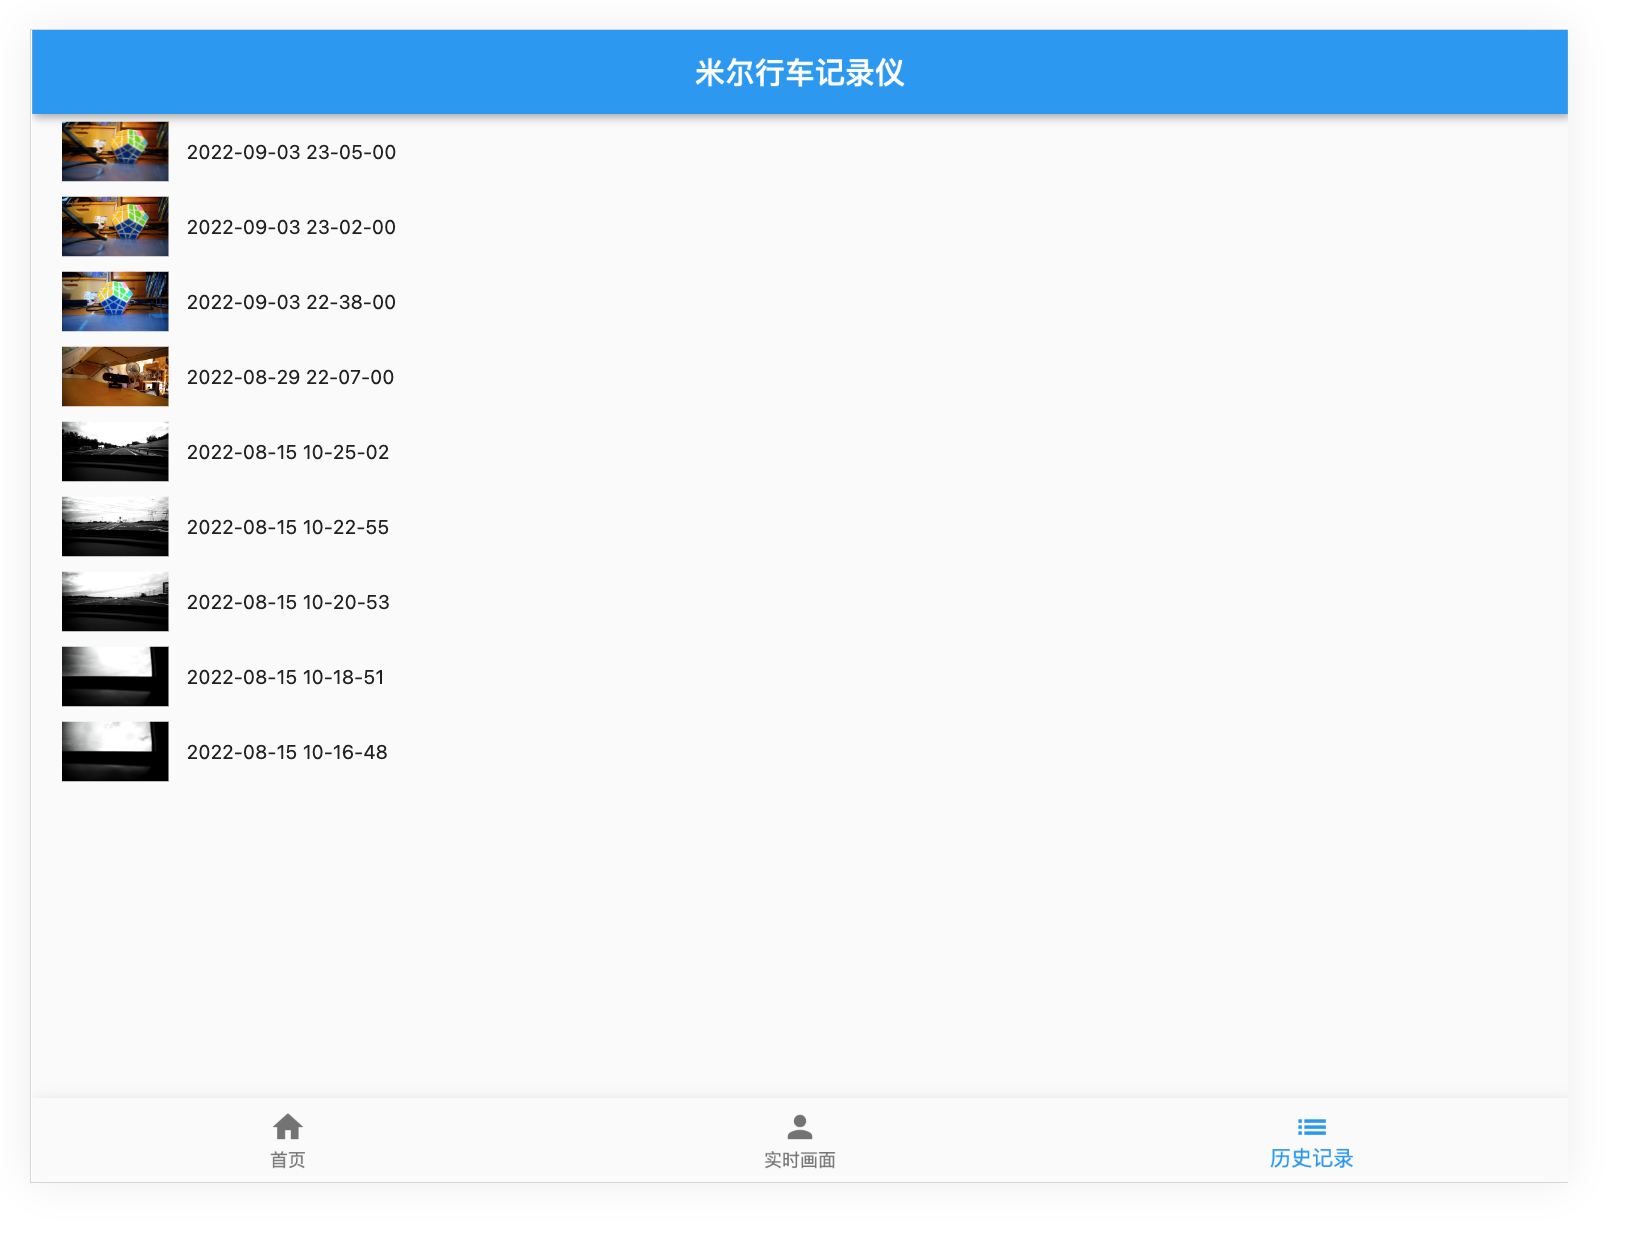
在歷史記錄界面中,則通過RestFul請求列表數(shù)據(jù),然后呈現(xiàn)。
八、整體運行效果
實際的運行效果,不用多說,看界面就成:
-
實時畫面:
-
歷史記錄列表:
-
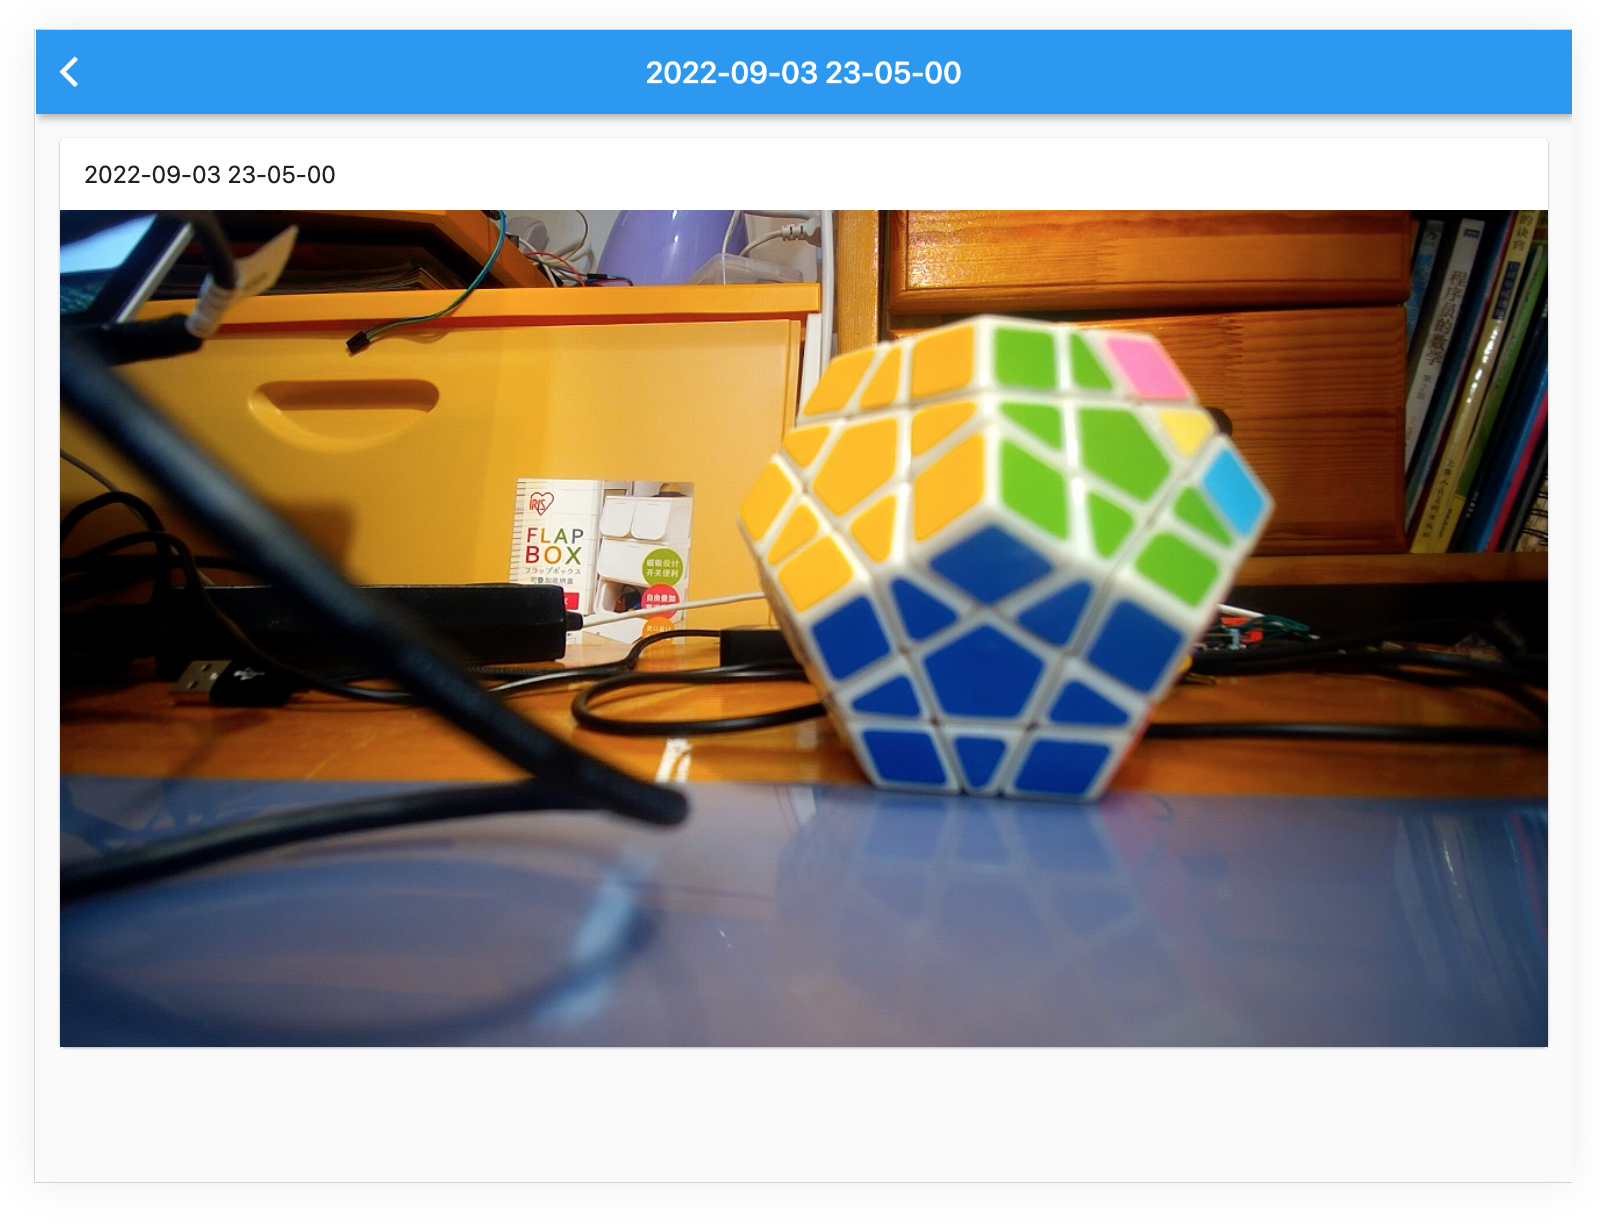
歷史記錄播放:
九、車試:
經(jīng)過反復的測試驗證,確保各項功能完整后,進行了上車實測。

因為最近的疫情原因,所以只在村里轉(zhuǎn)了一圈,進行了實際測試,可以查看最后的視頻。后續(xù)有機會,再找個晴朗的天氣,去環(huán)境優(yōu)美的地方實際拍攝錄制。
十、實際代碼說明:
完整的代碼,請通過米爾行車記錄儀: 米爾行車記錄儀 (https://gitee.com/honestqiao/MYiR-Driving-Recorder)獲取。
代碼目錄說明如下:
- DrivingRecorder:攝像頭服務(wù)
- backend:RestFul服務(wù)
- frontend:Flutter Web界面
在以上倉庫中,包含了詳細的代碼使用說明。
在實際應用中,將記錄視頻的data目錄與后端static/data目錄關(guān)聯(lián),以便兩者統(tǒng)一。
十一、感謝
在研究學習的過程中,參考了數(shù)十篇各類資料,先將部分列出如下。對所有學習過的資料的作者,表示深深的感謝。
- janakj/py-mjpeg: Python MJPEG streaming utilities (github.com)
- Simple Python Motion Jpeg (mjpeg server) from webcam. Using: OpenCV,BaseHTTPServer (github.com)
- Python 使用USB Camera錄制MP4視頻_Frank_Abagnale的博客-CSDN博客
- 用 Python、nginx 搭建在線家庭影院 - 知乎 (zhihu.com)
- Django報錯解決:RuntimeError: Model class ...apps... doesn't declare an explicit app_label and isn't in a_lyp039078的博客-CSDN博客
- Python OpenCV 調(diào)用攝像頭并截圖保存_Clannad_niu的博客-CSDN博客
- 用 Python、nginx 搭建在線家庭影院mob604756e97f09的技術(shù)博客51CTO博客
- Python-OpenCV錄制H264編碼的MP4視頻 - 掘金 (juejin.cn)
- ****[VideoWriter]保存H264/MPEG4格式MP4視頻 - image processing (zj-image-processing.readthedocs.io)
- Manual USB camera settings in Linux | KUROKESU
- UVC Web Cameras (indilib.org)
- 編寫你的第一個 Flutter 網(wǎng)頁應用 - Flutter 中文文檔 - Flutter 中文開發(fā)者網(wǎng)站 - Flutter
- macOS install | Flutter
- [Django 設(shè)定 LANGUAGE_CODE 時所遇到的麻煩] OSError: No translation files found for default language zh-TW. (github.com)**
- Django And Flutter — 樣板應用程序|的分步教程作者:Clever Tech Memes |中等 (medium.com)
- joke2k/django-environ: Django-environ allows you to utilize 12factor inspired environment variables to configure your Django application. (github.com)
- django 之跨域訪問問題解決 access-control-allow-origin - 騰訊云開發(fā)者社區(qū)-騰訊云 (tencent.com)
- django-cors-headers · PyPI
- Django項目解決跨域問題 - SegmentFault 思否
- video_player | Flutter Package (pub.dev)
- 視頻的播放和暫停 - Flutter 中文文檔 - Flutter 中文開發(fā)者網(wǎng)站 - Flutter
- 5.7 頁面骨架(Scaffold) | 《Flutter實戰(zhàn)·第二版》 (flutterchina.club)
- itfitness/BottomNavigationBarDemo - 碼云 - 開源中國 (gitee.com)
- Flutter底部導航 - 簡書 (jianshu.com)
- Flutter之自定義底部導航條以及頁面切換實例——Flutter基礎(chǔ)系列houruoyu3的博客-CSDN博客flutter 自定義底部導航
- How To Use HTTP Requests in Flutter | DigitalOcean
- 在Flutter中發(fā)起HTTP網(wǎng)絡(luò)請求 - Flutter中文網(wǎng) (flutterchina.club)
- Fetch data from the internet | Flutter
- 獲取網(wǎng)絡(luò)數(shù)據(jù) - Flutter 中文文檔 - Flutter 中文開發(fā)者網(wǎng)站 - Flutter
- 深入理解 Function & Closure - Flutter 中文文檔 - Flutter 中文開發(fā)者網(wǎng)站 - Flutter
- Django And Flutter — A Step by Step Tutorial for a Boilerplate Application | by Clever Tech Memes | Medium
- multithreading - Multithreaded web server in python - Stack Overflow
- Simple Python HTTP Server with multi-threading and partial-content support (github.com)
- meska/mjpeg_stream_webcam: Webcam Streamer for Octoprint MacOs (github.com)
- blueimp/mjpeg-server: MJPEG Server implements MJPEG over HTTP using FFmpeg or any other input source capable of piping a multipart JPEG stream to stdout. Its primary use case is providing Webdriver screen recordings. (github.com)
- n3wtron/simple_mjpeg_streamer_http_server: simple python mjpeg streamer http server (github.com)
- Python3遠程監(jiān)控程序?qū)崿F(xiàn)肥宅Sean的博客-CSDN博客
- opencv imencode跟imdecode函數(shù)jpg(python) - PythonTechWorld
- flutter_mjpeg | Flutter Package (pub.dev)
- Can't work on web platform. · Issue #13 · mylisabox/flutter_mjpeg (github.com)
-
Consider if?
fetchis widely supported enough to use · Issue #595 · dart-lang/http (github.com) - 在 Flutter | 中創(chuàng)建實時視頻流應用程序作者:Mitrajeet Golsangi |開發(fā)人員學生社區(qū) Vishwakarma 技術(shù)學院,浦那 |中等 (medium.com)
- Python websockets.serve方法代碼示例 - 純淨天空 (vimsky.com)
- Flutter 常用組件講解 | ImageWidget - iT 邦幫忙::一起幫忙解決難題,拯救 IT 人的一天 (ithome.com.tw)
- Bad State: Stream has already been listened to. · Issue #29105 · flutter/flutter (github.com)
- flutter - Streambuilder with WebSockets stream in TabBarView: Bad state: Stream has already been listened to - Stack Overflow
- 使用WebSockets - Flutter中文網(wǎng) (flutterchina.club)
- VideoStreaming.dart (github.com)
- 在 Flutter | 中創(chuàng)建實時視頻流應用程序作者:Mitrajeet Golsangi |開發(fā)人員學生社區(qū) Vishwakarma 技術(shù)學院,浦那 |中等 (medium.com)
- Flutter:WebSocket封裝-實現(xiàn)心跳、重連機制 - 讓我留在你身邊 (ricardolsw.github.io)
- 2.3 狀態(tài)管理 | 《Flutter實戰(zhàn)·第二版》 (flutterchina.club)
- 路由和導航 - Flutter 中文文檔 - Flutter 中文開發(fā)者網(wǎng)站 - Flutter
- 7.6 異步UI更新(FutureBuilder、StreamBuilder) | 《Flutter實戰(zhàn)·第二版》 (flutterchina.club)
- Flutter 常用組件講解 | ImageWidget - iT 邦幫忙::一起幫忙解決難題,拯救 IT 人的一天 (ithome.com.tw)
- Step By Step Tutorial in Learning Flutter: Lesson 12 — Adding Image (Ice Pokemon) | by Misterflutter | Quick Code | Medium
- Django CORS on static asset - Stack Overflow
- 配置 | Django 文檔 | Django (djangoproject.com)
- Global Variables in Dart - Stack Overflow
- UVC - Community Help Wiki (ubuntu.com)
- 利用OpenCV進行H264視頻編碼的簡易方式 - 知乎 (zhihu.com)
- Documentation for OPENCV_FFMPEG_WRITER_OPTIONS and OPENCV_FFMPEG_CAPTURE_OPTIONS · Issue #21155 · opencv/opencv (github.com)
- 利用OpenCV進行H264視頻編碼的簡易方式 - 知乎 (zhihu.com)
- FFmpeg概述及編碼支持 - 知乎 (zhihu.com)
- Web 渲染器 - Flutter 中文文檔 - Flutter 中文開發(fā)者網(wǎng)站 - Flutter
十二、總結(jié)
在研究學習的過程中,對Linux系統(tǒng)下的UVC框架有了進一步的了解,對Flutter進行應用開發(fā)有了實際的了解,對OpenCV的實際應用也有了具體的了解。
在實際開發(fā)的過程中,遇到的最大的坑來自Flutter,因為變化太快,有一些功能可能兼容性沒有跟上。不過更多是自己學藝不精導致的。
另外,目前還只是V1.0版本,后續(xù)還存在較大的優(yōu)化空間。例如對于OpenCV的應用,可以調(diào)整參數(shù),優(yōu)化獲取的視頻數(shù)據(jù)的指令和大小等。這些有待于進一步學習后進行。
最主要的,對米爾MYD-YT507開發(fā)板有了深入的了解,進行了實際的應用。作為一款車規(guī)級處理器T507的開發(fā)板,名不虛傳!
-
米爾科技
+關(guān)注
關(guān)注
5文章
227瀏覽量
22456
發(fā)布評論請先 登錄
有獎丨米爾全志 T153 MINI開發(fā)板免費試用來啦

如何移植EtherCAT Igh--基于米爾RK3576開發(fā)板

有獎丨米爾 瑞芯微RK3506開發(fā)板免費試用來啦!

有獎丨米爾 瑞芯微RK3506開發(fā)板免費試用
基于米爾全志T536開發(fā)板的多協(xié)議物聯(lián)網(wǎng)關(guān)的方案測試

有獎丨米爾 瑞芯微RK3562開發(fā)板免費試用新增名額!

有獎丨米爾 NXP i.MX91開發(fā)板免費試用來啦

基于米爾全志T536開發(fā)板的視頻識別應用方案
【米爾-STM32MP257開發(fā)板試用體驗】初次體驗米爾-STM32MP257開發(fā)板
如何在米爾-STM32MP257開發(fā)板上實現(xiàn)環(huán)境監(jiān)測系統(tǒng)

如何用OpenCV的相機捕捉視頻進行人臉檢測--基于米爾NXP i.MX93開發(fā)板

快速部署!米爾全志T527開發(fā)板的OpenCV行人檢測方案指南
OpenCV行人檢測應用方案--基于米爾全志T527開發(fā)板

免費丨米爾 STM32MP257開發(fā)板有獎試用

有獎丨米爾 瑞芯微YR3562開發(fā)板免費試用


 工商網(wǎng)監(jiān)
評論