 如何制作張力秤

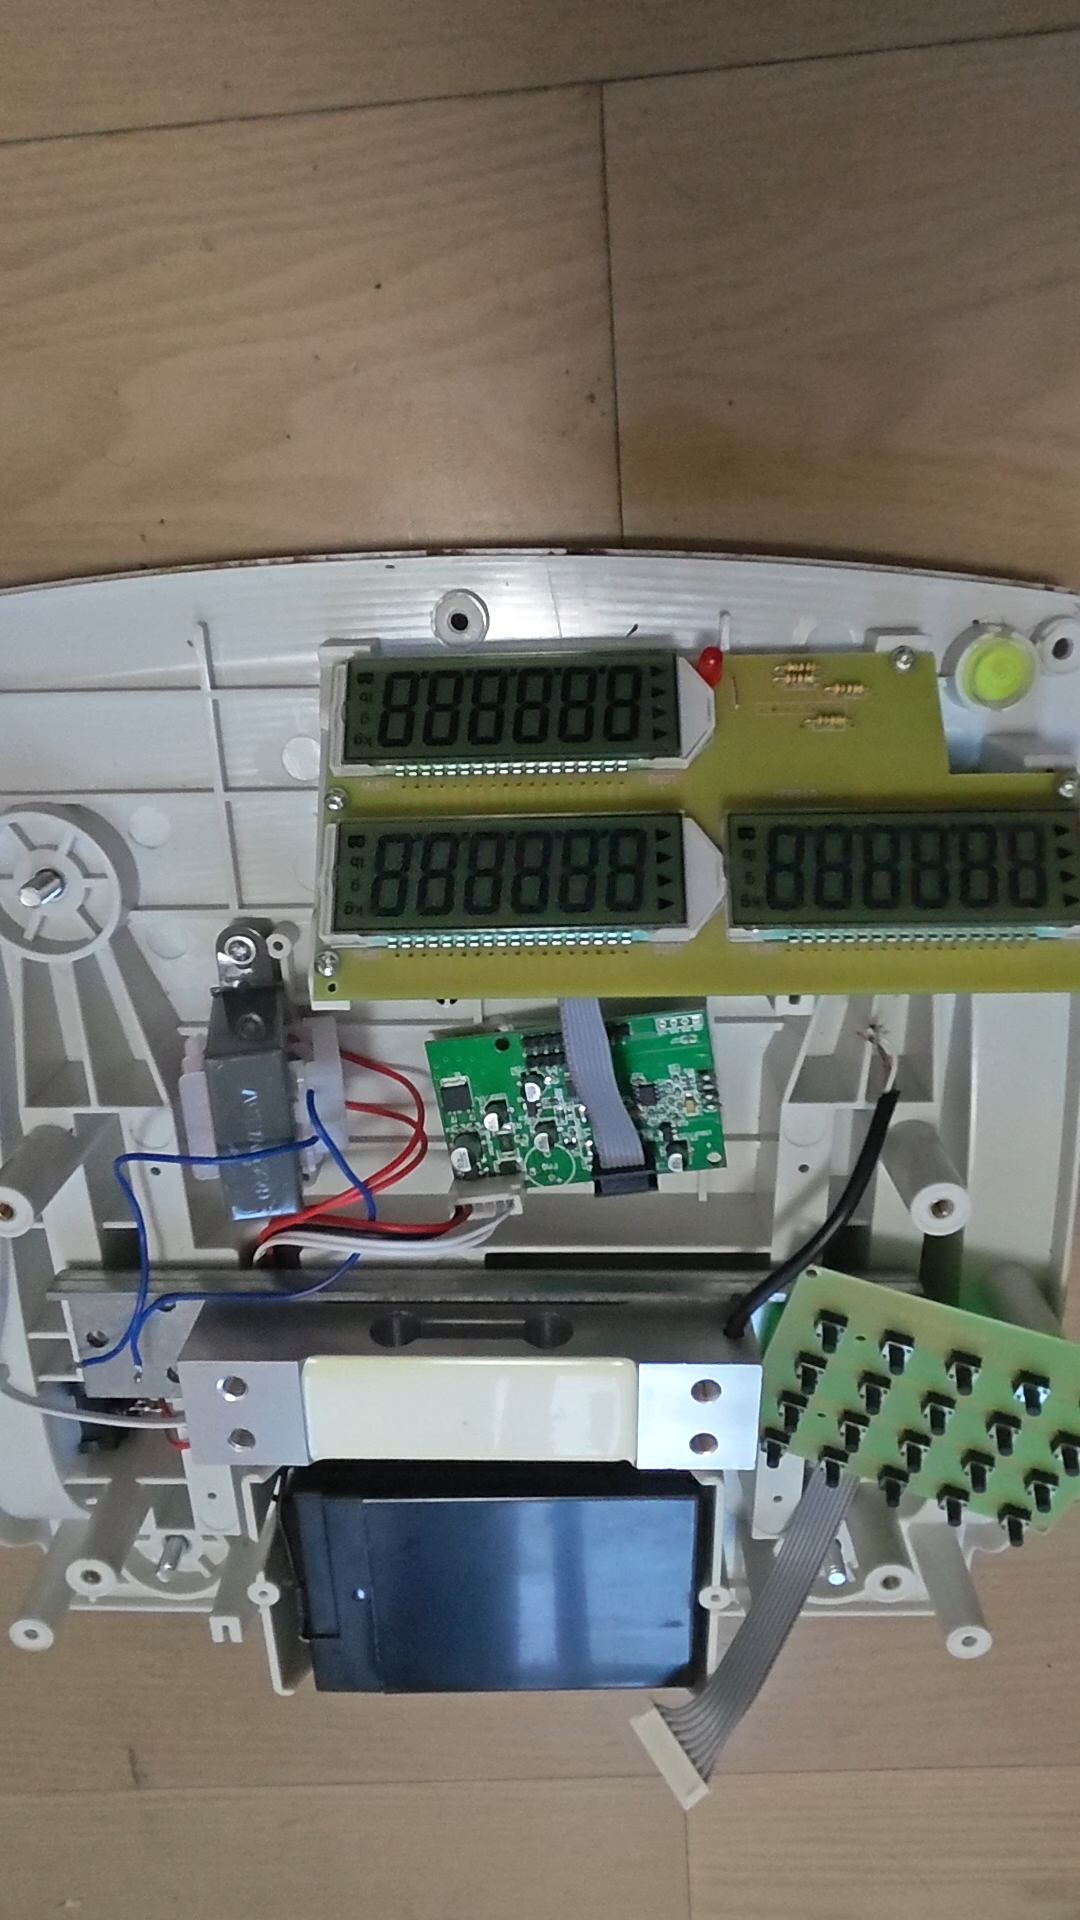
步驟1:安裝稱重傳感器

首先,我們要安裝稱重傳感器。您的坐騎將是唯一的,但是這里是您需要遵循的準則:
1。鋼制稱重傳感器是一塊板,中間裝有應變片。稱重傳感器通過感應稱重傳感器彎曲多少來測量力。
2。支架通過稱重傳感器梁兩端的孔連接。托架的形狀使拉力施加在測力傳感器梁的中心。由于其形狀和固定位置,拉動托架時稱重傳感器梁會彎曲。
3。將括號鉤到要測量的內容上。為此,最好使用可以自由移動的東西(例如鏈,鉤,結實的繩子或扎帶)。您希望稱重傳感器和托架組件能夠使其自身在稱重方向上居中,以便測量準確。
步驟2:為稱重傳感器和HX711接線
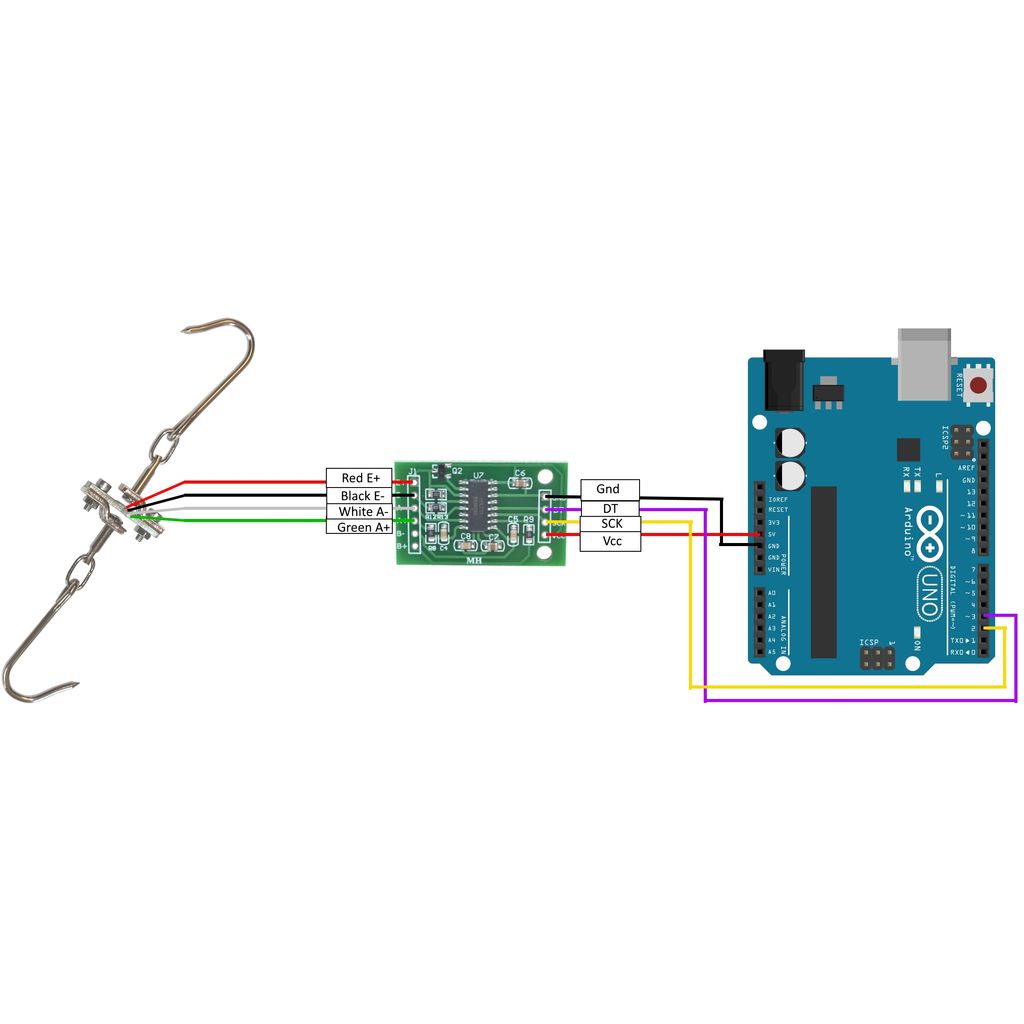
請參閱接線圖,以了解如何連接稱重傳感器,HX711和Arduino。
在所示的行李箱式稱重傳感器上,有多個應變儀已經連接到惠斯通電橋。您所需要做的就是以正確的方向將導線連接到HX711板上。
步驟3:將HX711庫添加到Arduino IDE
HX711庫位于此處:https://github.com/bogde/HX711
有關如何將庫添加到Arduino IDE的說明,請參見Arduino網站上的此鏈接:https://www。 arduino.cc/zh-CN/Guide/Libraries
步驟4:校準并稱重!
Sparkfun有出色的Arduino程序可以運行規模。最新版本可以在GitHub上找到,并在下面轉載:https://github.com/sparkfun/HX711-Load-Cell-Amplifier
第一步是確定秤的校準因子。為此,請運行以下代碼
/*
Example using the SparkFun HX711 breakout board with a scale
By: Nathan Seidle
SparkFun Electronics
Date: November 19th, 2014
License: This code is public domain but you buy me a beer if you use this and we meet someday (Beerware license)。
This is the calibration sketch. Use it to determine the calibration_factor that the main example uses. It also
outputs the zero_factor useful for projects that have a permanent mass on the scale in between power cycles.
Setup your scale and start the sketch WITHOUT a weight on the scale
Once readings are displayed place the weight on the scale
Press +/- or a/z to adjust the calibration_factor until the output readings match the known weight
Use this calibration_factor on the example sketch
This example assumes pounds (lbs)。 If you prefer kilograms, change the Serial.print(“ lbs”); line to kg. The
calibration factor will be significantly different but it will be linearly related to lbs (1 lbs = 0.453592 kg)。
Your calibration factor may be very positive or very negative. It all depends on the setup of your scale system
and the direction the sensors deflect from zero state
This example code uses bogde‘s excellent library:“https://github.com/bogde/HX711”
bogde’s library is released under a GNU GENERAL PUBLIC LICENSE
Arduino pin 2 -》 HX711 CLK
3 -》 DOUT
5V -》 VCC
GND -》 GND
Most any pin on the Arduino Uno will be compatible with DOUT/CLK.
The HX711 board can be powered from 2.7V to 5V so the Arduino 5V power should be fine.
*/
#include “HX711.h”
#define DOUT 3
#define CLK 2
HX711 scale;
float calibration_factor = -7050; //-7050 worked for my 440lb max scale setup
void setup() {
Serial.begin(9600);
Serial.println(“HX711 calibration sketch”);
Serial.println(“Remove all weight from scale”);
Serial.println(“After readings begin, place known weight on scale”);
Serial.println(“Press + or a to increase calibration factor”);
Serial.println(“Press - or z to decrease calibration factor”);
scale.begin(DOUT, CLK);
scale.set_scale();
scale.tare(); //Reset the scale to 0
long zero_factor = scale.read_average(); //Get a baseline reading
Serial.print(“Zero factor: ”); //This can be used to remove the need to tare the scale. Useful in permanent scale projects.
Serial.println(zero_factor);
}
void loop() {
scale.set_scale(calibration_factor); //Adjust to this calibration factor
Serial.print(“Reading: ”);
Serial.print(scale.get_units(), 1);
Serial.print(“ lbs”); //Change this to kg and re-adjust the calibration factor if you follow SI units like a sane person
Serial.print(“ calibration_factor: ”);
Serial.print(calibration_factor);
Serial.println();
if(Serial.available())
{
char temp = Serial.read();
if(temp == ‘+’ || temp == ‘a’)
calibration_factor += 10;
else if(temp == ‘-’ || temp == ‘z’)
calibration_factor -= 10;
}
}
在校準秤后,您可以運行以下示例程序,然后將其用于自己的目的:
/*
Example using the SparkFun HX711 breakout board with a scale
By: Nathan Seidle
SparkFun Electronics
Date: November 19th, 2014
License: This code is public domain but you buy me a beer if you use this and we meet someday (Beerware license)。
This example demonstrates basic scale output. See the calibration sketch to get the calibration_factor for your
specific load cell setup.
This example code uses bogde‘s excellent library: “https://github.com/bogde/HX711”
bogde’s library is released under a GNU GENERAL PUBLIC LICENSE
The HX711 does one thing well: read load cells. The breakout board is compatible with any wheat-stone bridge
based load cell which should allow a user to measure everything from a few grams to tens of tons.
Arduino pin 2 -》 HX711 CLK
3 -》 DAT
5V -》 VCC
GND -》 GND
The HX711 board can be powered from 2.7V to 5V so the Arduino 5V power should be fine.
*/
#include “HX711.h”
#define calibration_factor -7050.0 //This value is obtained using the SparkFun_HX711_Calibration sketch
#define DOUT 3
#define CLK 2
HX711 scale;
void setup() {
Serial.begin(9600);
Serial.println(“HX711 scale demo”);
scale.begin(DOUT, CLK);
scale.set_scale(calibration_factor); //This value is obtained by using the SparkFun_HX711_Calibration sketch
scale.tare(); //Assuming there is no weight on the scale at start up, reset the scale to 0
Serial.println(“Readings:”);
}
void loop() {
Serial.print(“Reading: ”);
Serial.print(scale.get_units(), 1); //scale.get_units() returns a float
Serial.print(“ lbs”); //You can change this to kg but you‘ll need to refactor the calibration_factor
Serial.println();
}
責任編輯:wv
-
HX711
+關注
關注
7文章
66瀏覽量
45863 -
Arduino
+關注
關注
190文章
6526瀏覽量
196959
發布評論請先 登錄
三防漆和 PCB 板 “疏離、起皮、脫層”,90% 不是漆本身差,而是界面張力 / 表面能不匹配。

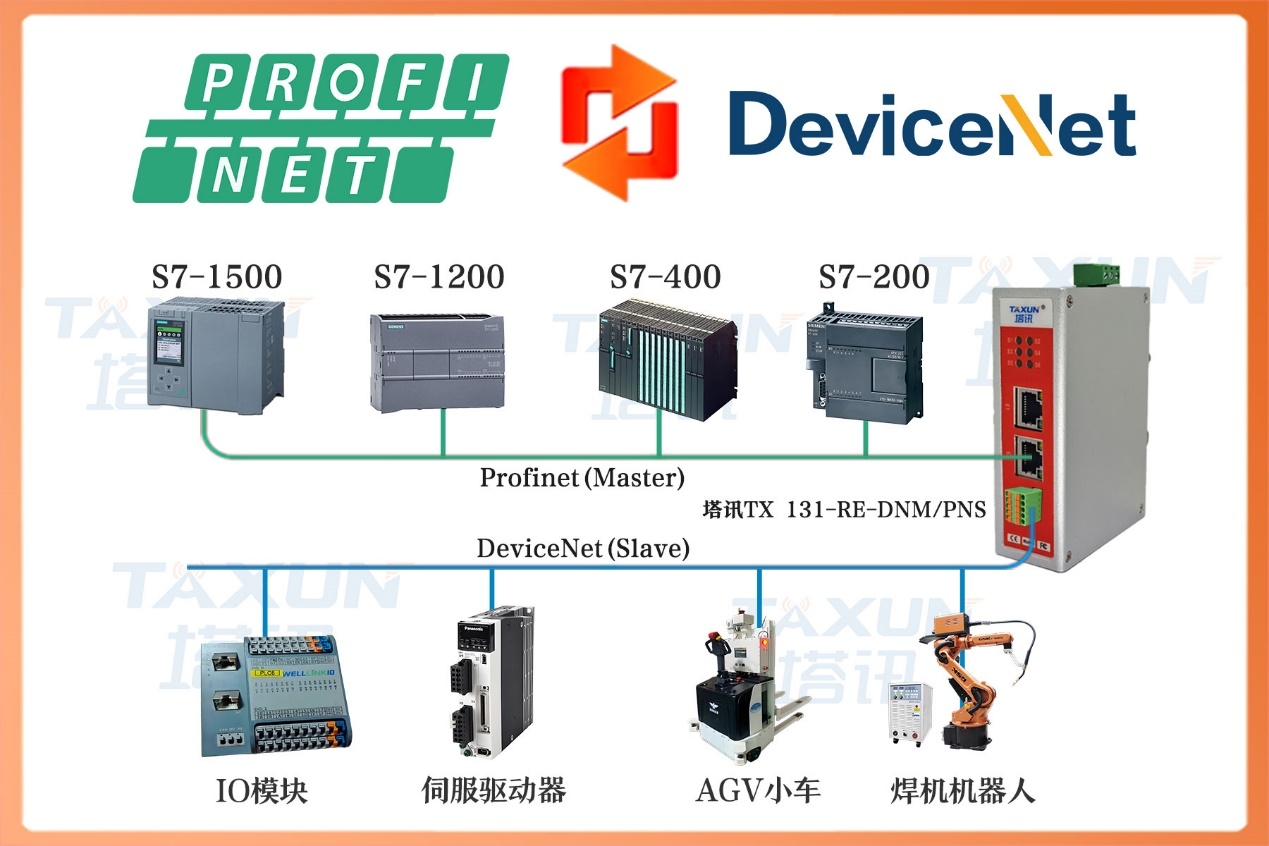
ProfiNet轉DeviceNet工業物聯網網關實現PLC張力傳感器數據采集提升鋰電池卷繞張力檢測可靠性
聲光協同,抬頭守護:WT588F02KD-32N帶LED驅動語音芯片重塑嬰兒體重秤體驗

包裝張力監測物聯網平臺方案

聲光守護,精準稱重——WT588F02KD-32帶LED 驅動語音芯片賦能嬰兒體重秤新體驗

廣州唯創電子WT588F02KD-40N:當電子秤學會“說話”,一顆語音芯片如何重塑家庭健康終端?
引領AI圖像識別+營養分析技術!涂鴉AI食物秤方案,端云協同可分析30萬種食物

廣州唯創電子WTN6040-8S語音芯片:智能電子體重秤的語音解決方案

智能藍牙廚房秤方案開發設計
解密基于磁編碼器的印刷張力控制系統精度提升技術
PCB 板表面張力對三防漆涂覆的影響及改善方法
技術分享 | 晶華微SD82P253觸摸廚房秤方案
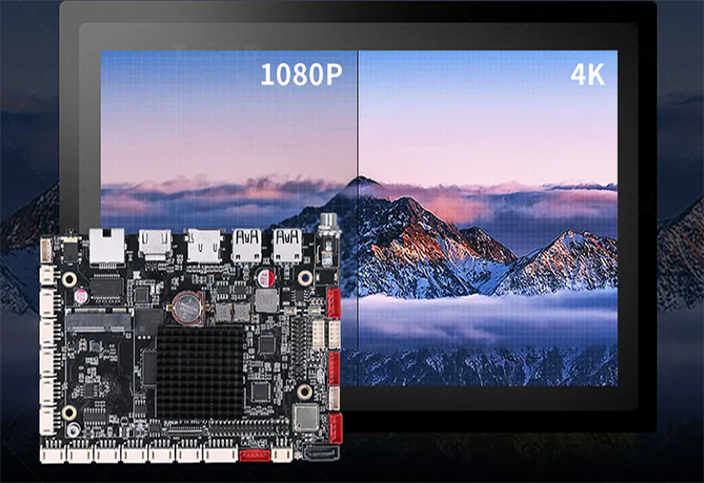
工業安卓主板在智能電子秤設備中的應用
皮帶秤PLC數據采集遠程監控系統方案


 工商網監
工商網監
評論