") 如何使用語音指令控制串口輸出
如何使用語音指令控制串口輸出

簡介
在上兩篇文章中, 我們實現(xiàn)了GPIO輸出, 和PWM輸出(組件介紹在前文中已經(jīng)介紹過),在本章節(jié)我們將繼續(xù)進行使用語音指令控制串口輸出。
配置Example默認串口數(shù)據(jù)輸出
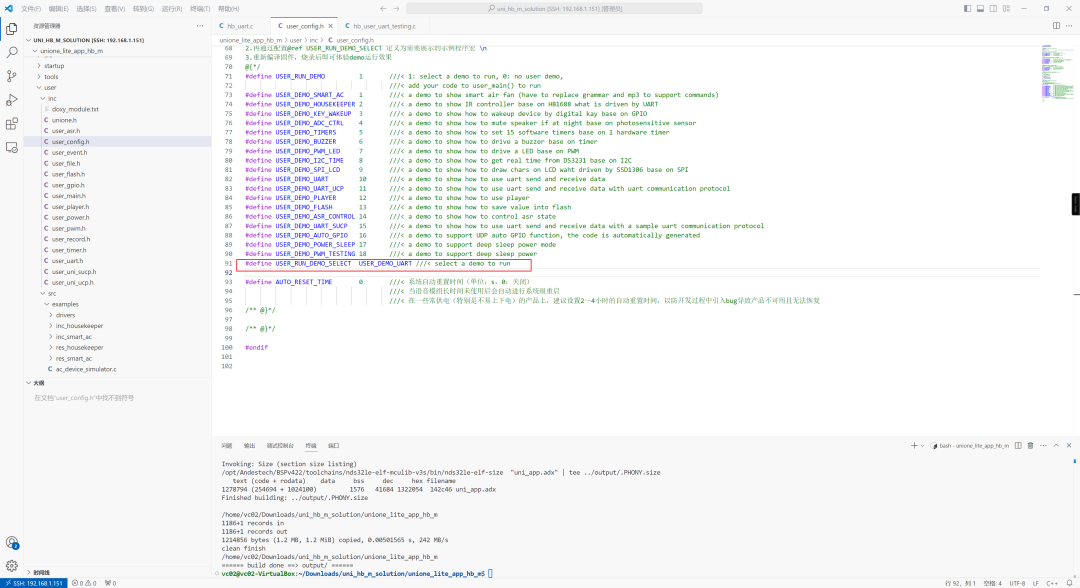
1、首先修改
/home/vc02/Downloads/uni_hb_m_solution/unione_lite_app_hb_m/user/inc/user_config.h
中的USER_RUN_DEMO_SELECT為USER_DEMO_UART
這樣默認運行的程序就是
/home/vc02/Downloads/uni_hb_m_solution/unione_lite_app_hb_m/user/src/examples/hb_uart.c
代碼如下所示
#include"user_uart.h"
#include"user_event.h"
#include"user_player.h"
#include"user_config.h"
#defineTAG"hb_uart_voice"
staticuni_pthread_tg_uart_thread_id =0;
staticboolg_uart_thread_running =false;
// 串口發(fā)送線程函數(shù)
staticvoid_uart_send_task(void*args) {
charbuf[6] = {1,2,3,4,5,6};
intret;
 g_uart_thread_running =true;
while(g_uart_thread_running) {
 LOGT(TAG,"UART send done, ret=%d", ret);
 uni_msleep(2000);// 每隔2秒發(fā)送一次
 }
}
// 創(chuàng)建發(fā)送線程
staticResult _create_uart_thread(void) {
if(g_uart_thread_running) {
 returnE_OK;
 }
 thread_param param;
uni_memset(¶m,0,sizeof(param));
 param.stack_size = STACK_SMALL_SIZE;
 param.priority = OS_PRIORITY_LOW;
uni_strncpy(param.task_name,"uart_voice",sizeof(param.task_name) -1);
if(0!=uni_pthread_create(&g_uart_thread_id, ¶m, _uart_send_task,NULL)) {
 returnE_FAILED;
 }
uni_pthread_detach(g_uart_thread_id); // 自動資源回收
returnE_OK;
}
// 停止發(fā)送線程
staticvoid_stop_uart_thread(void) {
if(!g_uart_thread_running)return;
 g_uart_thread_running =false;
if(g_uart_thread_id !=0) {
 uni_pthread_destroy(g_uart_thread_id);
  g_uart_thread_id =0;
 }
}
// 語音喚醒命令回調
staticvoid_on_wakeup_cmd_cb(USER_EVENT_TYPE event,user_event_context_t*context) {
if(context ==NULL)return;
event_goto_awakend_t*awake = &context->goto_awakend;
if(strcmp(awake->cmd,"wakeup_uni") ==0) {
  _create_uart_thread(); // 啟動串口線程
 user_player_reply_list_random(awake->reply_files); // 播放語音回復
 }
}
// 自定義設置命令回調
staticvoid_custom_setting_cb(USER_EVENT_TYPE event,user_event_context_t*context) {
if(context ==NULL)return;
event_custom_setting_t*setting = &context->custom_setting;
if(strcmp(setting->cmd,"TurnOn") ==0) {
  _stop_uart_thread(); // 停止串口線程
 user_player_reply_list_random(setting->reply_files); // 播放語音回復
 }
}
// 注冊語音事件回調
staticvoid_register_event_callback(void) {
user_event_subscribe_event(USER_GOTO_AWAKENED, _on_wakeup_cmd_cb);
user_event_subscribe_event(USER_CUSTOM_SETTING, _custom_setting_cb);
}
// 主入口
inthb_user_uart_voice_control(void){
if(0!=user_uart_init(NULL)) {
 LOGE(TAG,"UART init failed");
 return-1;
 }
 _register_event_callback();
return0;
}
其默認行為為創(chuàng)建線程定時發(fā)送數(shù)據(jù), 然后使用LOG打印。但是它沒辦法調試。 因此我們做一點簡單的修改, 當接受的數(shù)據(jù)的時候再發(fā)送出去。
// 串口發(fā)送線程函數(shù)
staticvoid_uart_send_task(void*args) {
charbuf[6] = {1,2,3,4,5,6};
intret;
 g_uart_thread_running =true;
while(g_uart_thread_running) {
  LOGT(TAG,"Voice triggered UART send [1, 2, 3, 4, 5, 6]");
  ret = user_uart_send(buf,sizeof(buf));
  LOGT(TAG,"UART send done, ret=%d", ret);
  uni_msleep(2000);// 每隔2秒發(fā)送一次
 }
}
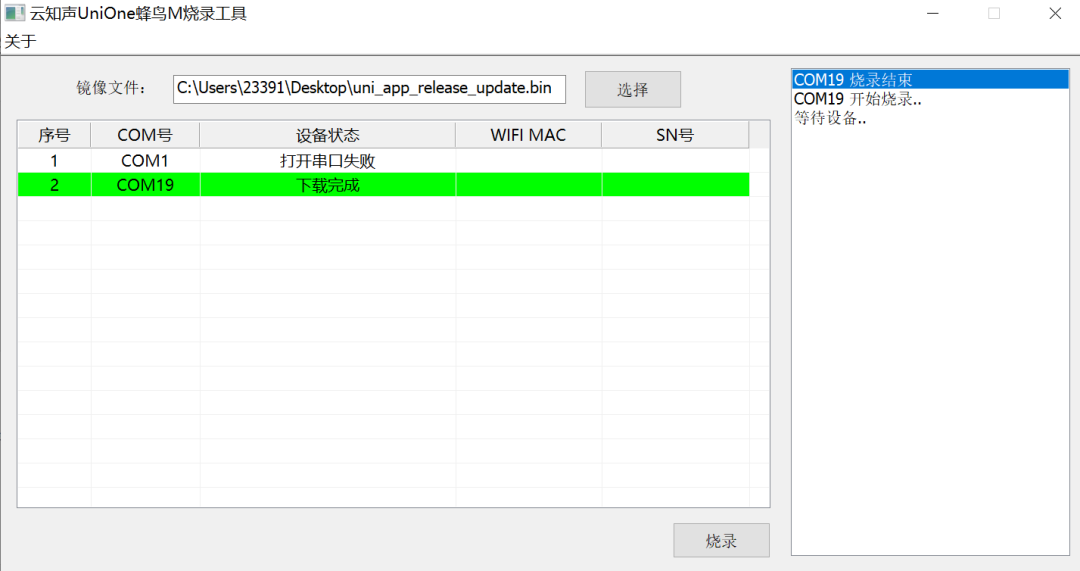
2、編譯和燒錄
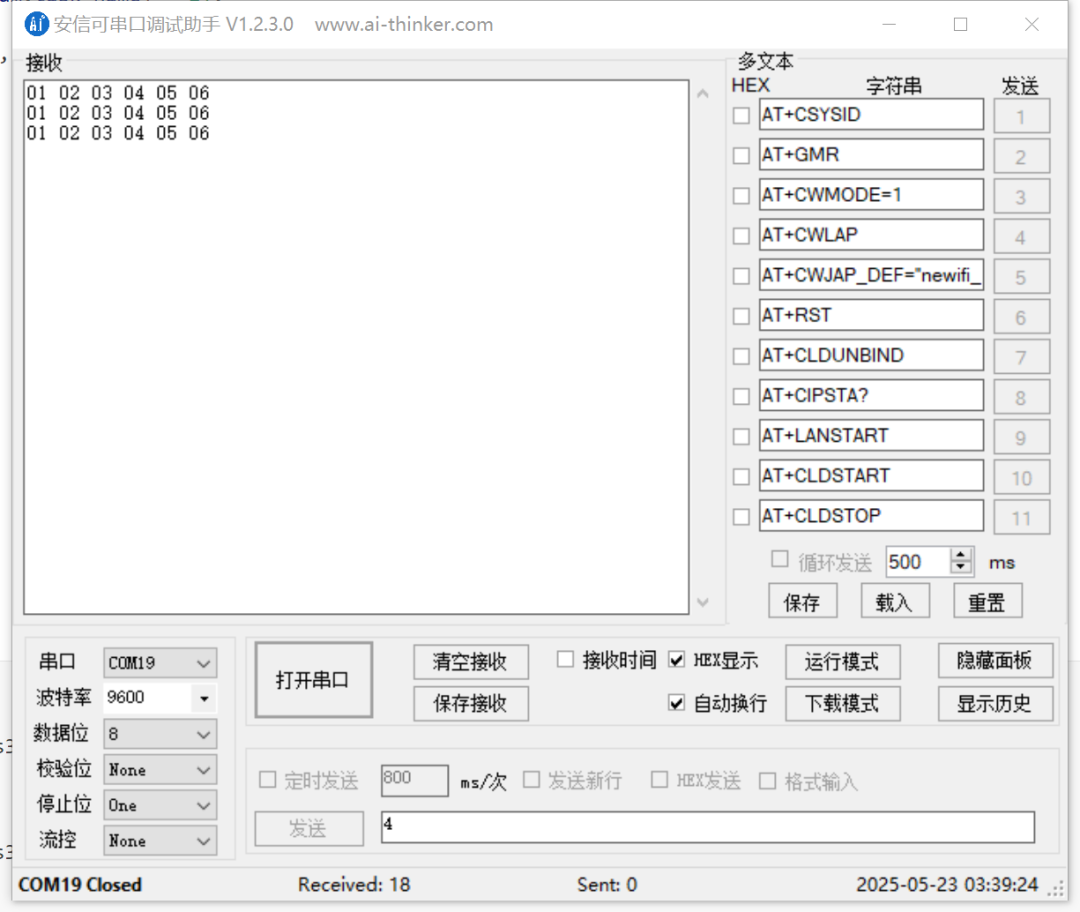
實驗現(xiàn)象:串口以9600的波特率持續(xù)接收到數(shù)據(jù) 01,02,03,04,05,06 和程序中的數(shù)據(jù)對應,正確無誤。
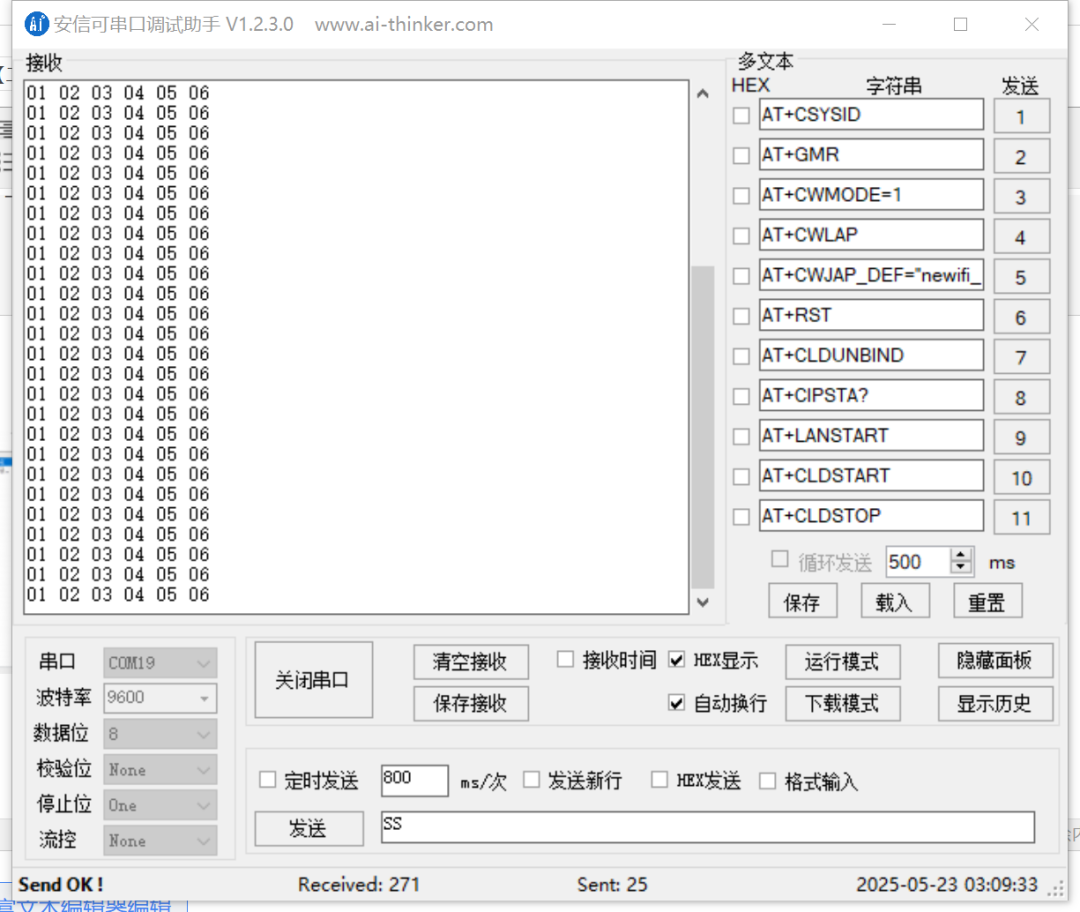
發(fā)送測試:之后嘗試向其發(fā)送數(shù)據(jù), 查看VC-02是否能正常轉發(fā)回來(關閉HEX顯示, 發(fā)送的數(shù)據(jù)和接受的一致)。
使用語音命令控制串口發(fā)送數(shù)據(jù)
1、創(chuàng)建文件
hb_user_uart_testing.c在/home/vc02/Downloads/uni_hb_m_solution/unione_lite_app_hb_m/user/src/examples下
#include"user_uart.h"
#include"user_event.h"
#include"user_player.h"
#include"user_config.h"
#defineTAG"hb_uart_voice"
staticuni_pthread_tg_uart_thread_id =0;
staticboolg_uart_thread_running =false;
// 串口發(fā)送線程函數(shù)
staticvoid_uart_send_task(void*args) {
charbuf[6] = {1,2,3,4,5,6};
intret;
 g_uart_thread_running =true;
while(g_uart_thread_running) {
 LOGT(TAG,"Voice triggered UART send [1, 2, 3, 4, 5, 6]");
  ret =user_uart_send(buf,sizeof(buf));
 LOGT(TAG,"UART send done, ret=%d", ret);
 uni_msleep(2000);// 每隔2秒發(fā)送一次
 }
}
// 創(chuàng)建發(fā)送線程
staticResult _create_uart_thread(void) {
if(g_uart_thread_running) {
 returnE_OK;
 }
 thread_param param;
uni_memset(¶m,0,sizeof(param));
 param.stack_size = STACK_SMALL_SIZE;
 param.priority = OS_PRIORITY_LOW;
uni_strncpy(param.task_name,"uart_voice",sizeof(param.task_name) -1);
if(0!=uni_pthread_create(&g_uart_thread_id, ¶m, _uart_send_task,NULL)) {
 returnE_FAILED;
 }
uni_pthread_detach(g_uart_thread_id); // 自動資源回收
returnE_OK;
}
// 停止發(fā)送線程
staticvoid_stop_uart_thread(void) {
if(!g_uart_thread_running)return;
 g_uart_thread_running =false;
if(g_uart_thread_id !=0) {
 uni_pthread_destroy(g_uart_thread_id);
  g_uart_thread_id =0;
 }
}
// 語音喚醒命令回調
staticvoid_on_wakeup_cmd_cb(USER_EVENT_TYPE event,user_event_context_t*context) {
if(context ==NULL)return;
event_goto_awakend_t*awake = &context->goto_awakend;
if(strcmp(awake->cmd,"wakeup_uni") ==0) {
  _create_uart_thread(); // 啟動串口線程
 user_player_reply_list_random(awake->reply_files); // 播放語音回復
 }
}
// 自定義設置命令回調
staticvoid_custom_setting_cb(USER_EVENT_TYPE event,user_event_context_t*context) {
if(context ==NULL)return;
event_custom_setting_t*setting = &context->custom_setting;
if(strcmp(setting->cmd,"TurnOn") ==0) {
  _stop_uart_thread(); // 停止串口線程
 user_player_reply_list_random(setting->reply_files); // 播放語音回復
 }
}
// 注冊語音事件回調
staticvoid_register_event_callback(void) {
user_event_subscribe_event(USER_GOTO_AWAKENED, _on_wakeup_cmd_cb);
user_event_subscribe_event(USER_CUSTOM_SETTING, _custom_setting_cb);
}
// 主入口
inthb_user_uart_voice_control(void){
if(0!=user_uart_init(NULL)) {
 LOGE(TAG,"UART init failed");
 return-1;
 }
 _register_event_callback();
return0;
}
輸入上述代碼, 其主要的業(yè)務邏輯就是通過喚醒命令來觸發(fā)串口的定時輸出,然后通過TrunOn的命令來關閉串口輸出的線程。
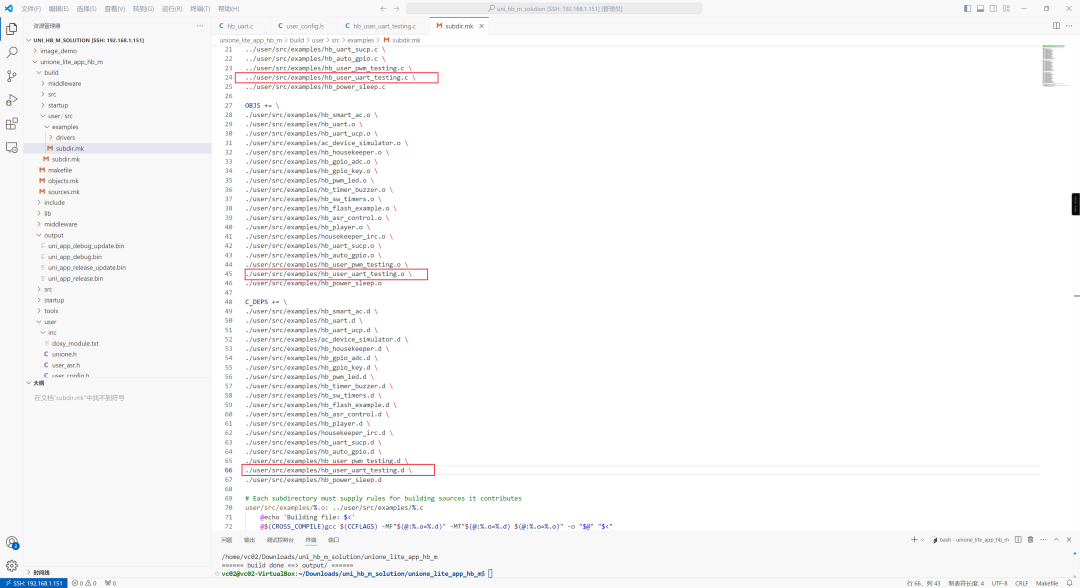
2、添加編譯支持在
/home/vc02/Downloads/uni_hb_m_solution/unione_lite_app_hb_m/build/user/src/examples下的subdir.mk添加對當前編譯文件的引用。
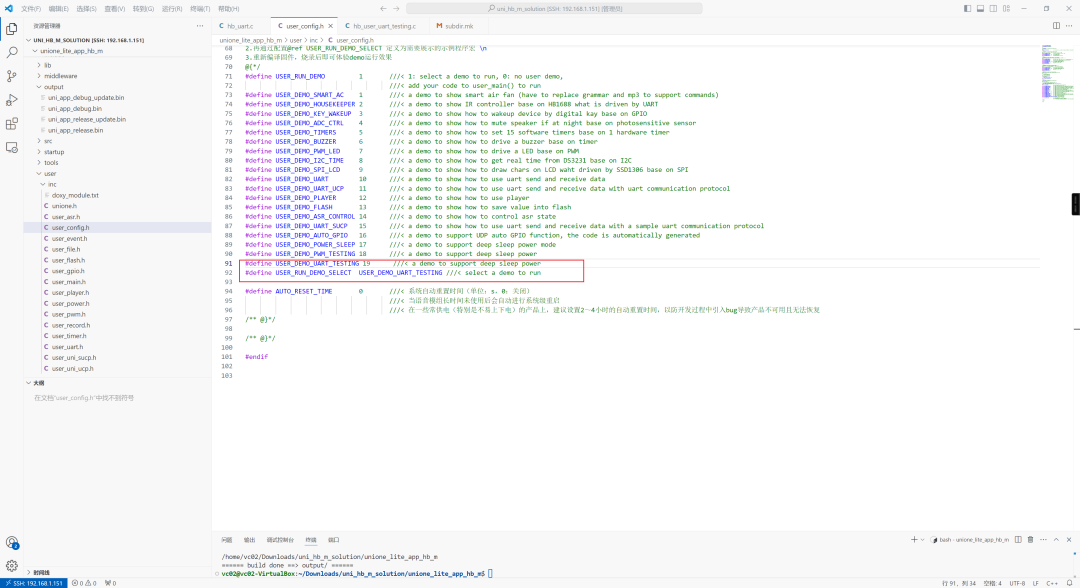
3、修改
/home/vc02/Downloads/uni_hb_m_solution/unione_lite_app_hb_m/user/inc/user_config.h文件, 增加對應的demo宏支持。
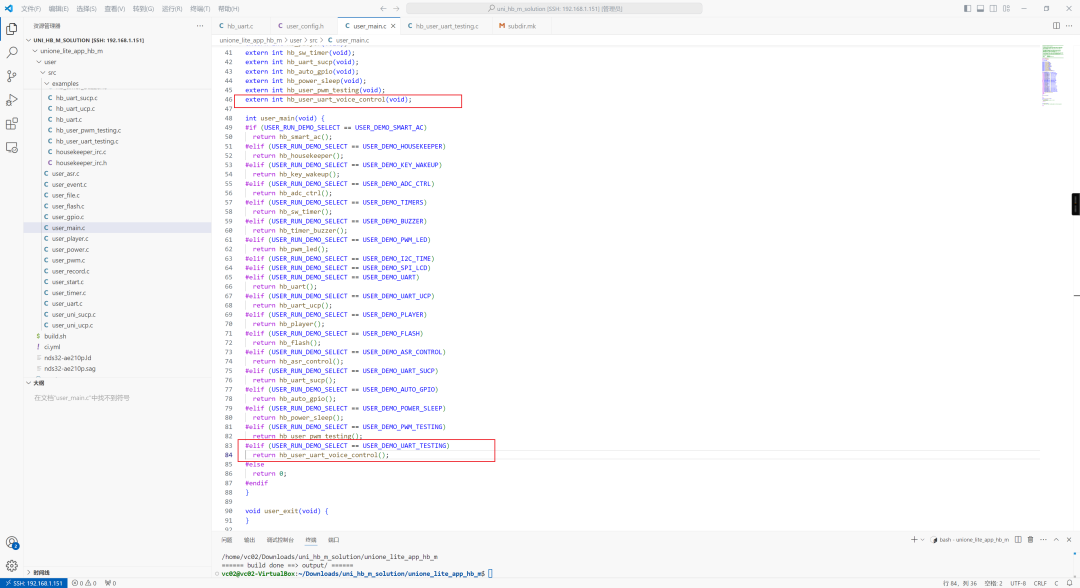
4、修改
/home/vc02/Downloads/uni_hb_m_solution/unione_lite_app_hb_m/user/src/user_main.c,增加對上述自定義宏的支持。
5-、編譯并且燒錄固件。
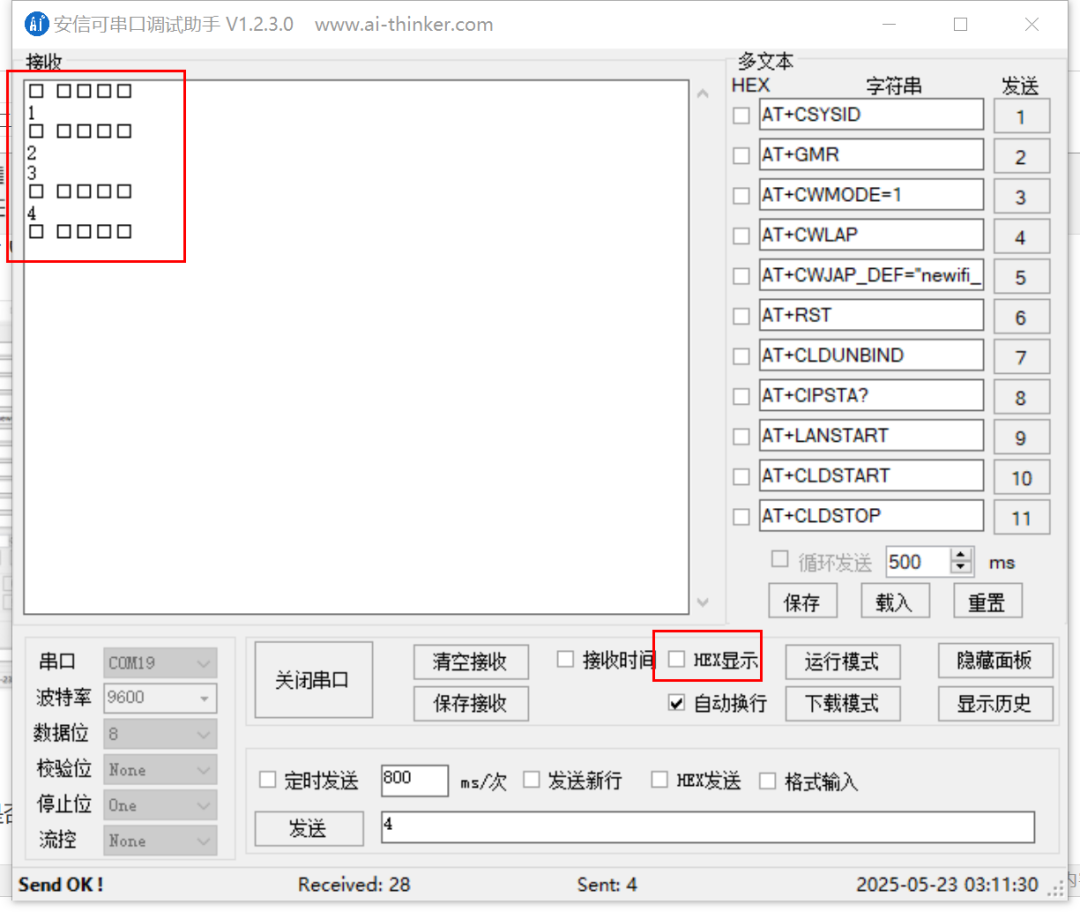
實驗現(xiàn)象
燒錄完成之后, 串口默認不輸出任何數(shù)據(jù)。
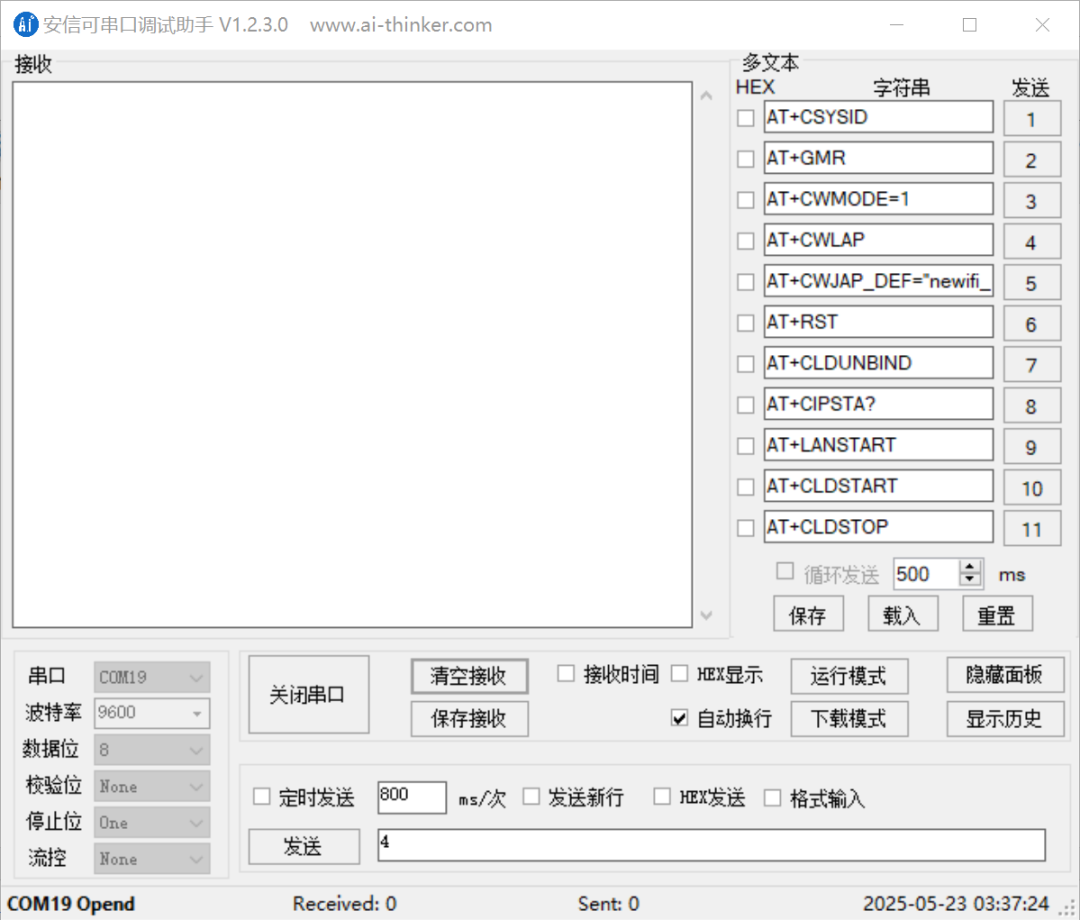
當識別到語音命令“你好小美” 之后將開始打印01 02 03 04 05。
當識別到語音命令“打開燈光” 的時候將刪除串口發(fā)送進程, 串口停止輸出。
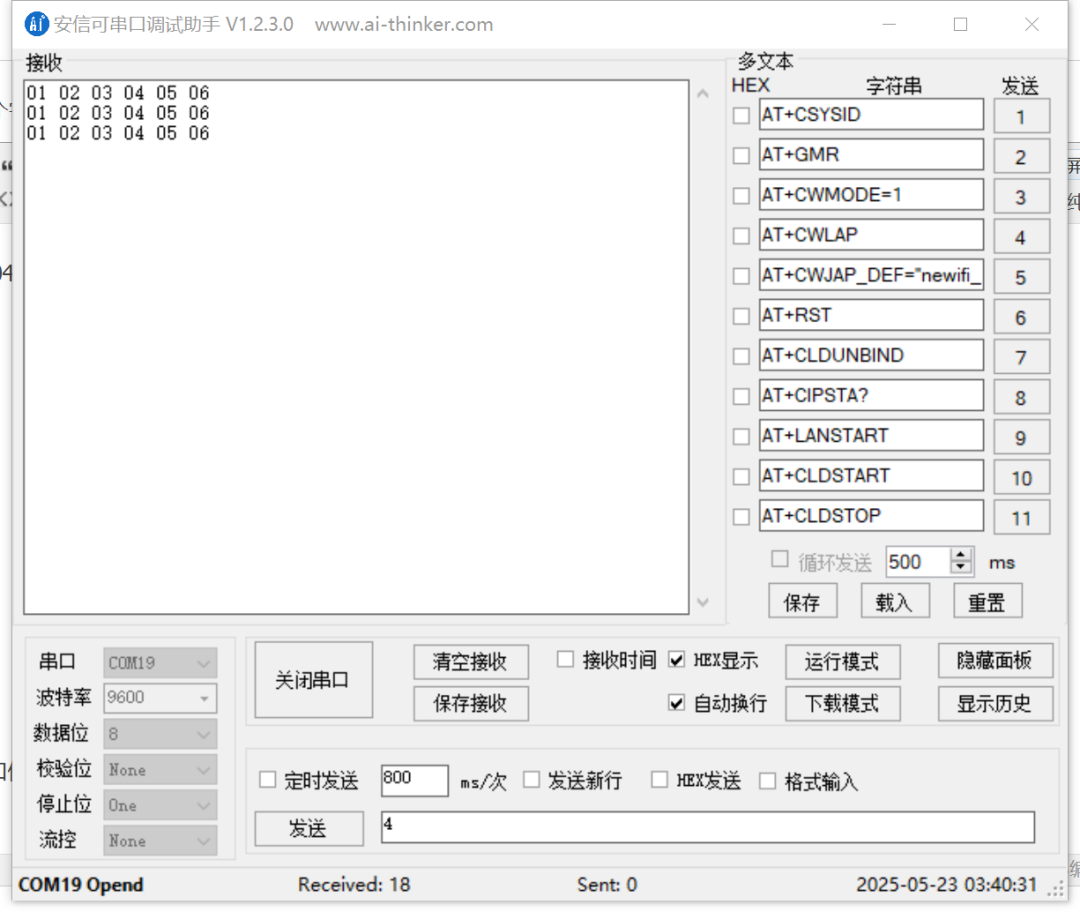
如上圖所示, 此時的串口處于打開狀態(tài),但是沒有輸出數(shù)據(jù)。
-
PWM
+關注
關注
116文章
5883瀏覽量
226293 -
GPIO
+關注
關注
16文章
1332瀏覽量
56373 -
串口輸出
+關注
關注
0文章
18瀏覽量
7843
原文標題:【離線語音】安信可VC-01/02二次開發(fā)篇: 串口輸出
文章出處:【微信號:安信可科技,微信公眾號:安信可科技】歡迎添加關注!文章轉載請注明出處。
發(fā)布評論請先 登錄
什么是語音芯片IC的串口通訊協(xié)議標準(AT)指令?

【大聯(lián)大品佳 Nuvoton ISD9160語音識別試用體驗】-深圳志芯
【大聯(lián)大品佳 Nuvoton ISD9160語音識別試用體驗】
為何要開發(fā)一套無線控文字語音指令系統(tǒng)
基于n元語法模型的領域語音指令識別


智能語音窗簾:離線語音控制技術的優(yōu)勢與應用
語音控制空調伴侶插座—離線語音模塊的智能家居新篇章

智能沙發(fā)語音控制方案

KT148A語音芯片的下載用的是串口,測試可以直接串口發(fā)指令控制嗎?
語音控制模塊工作原理


 工商網(wǎng)監(jiān)
評論