 炫彩LED燈帶的制作

概述
永恒的時尚標準,帶有聲音感應,全彩LED動畫,并可以通過手機無線控制。
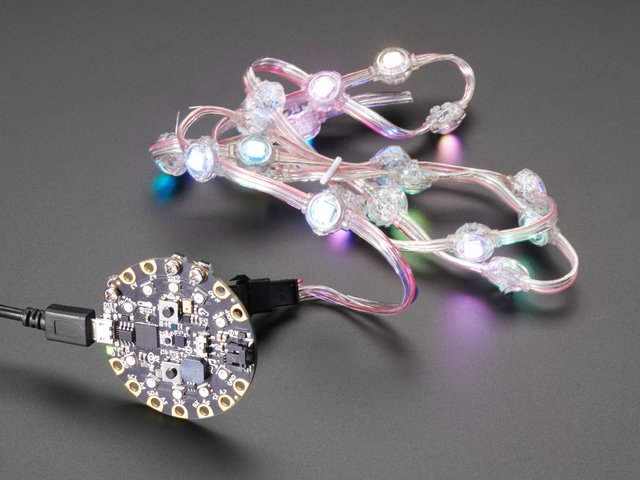
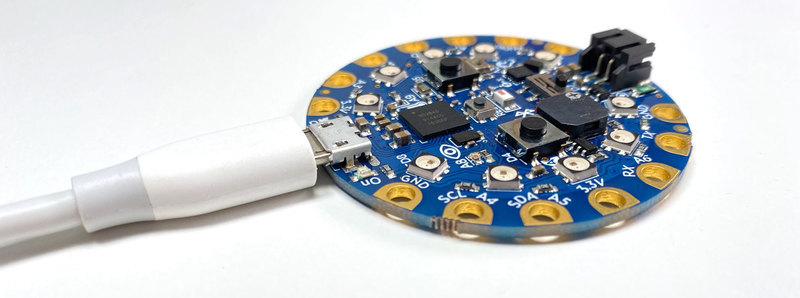
受約翰G啟發,此經典Ampli-Tie的更新使用了 Circuit Playground Bluefruit 和 Neopixel LED ,可將領帶變成便攜式的,可自定義的燈光秀-無需焊接。這肯定會在舞池和絕大多數正式活動中引起您的注意。
您需要什么
電路場Bluefruit-低功耗藍牙
產品ID:4333
電路游樂場Bluefruit是電路游樂場系列中的第三塊板,朝著完美介紹電子學和編程邁出了一步。我們已經。..
$ 24.95
進貨
添加到購物車
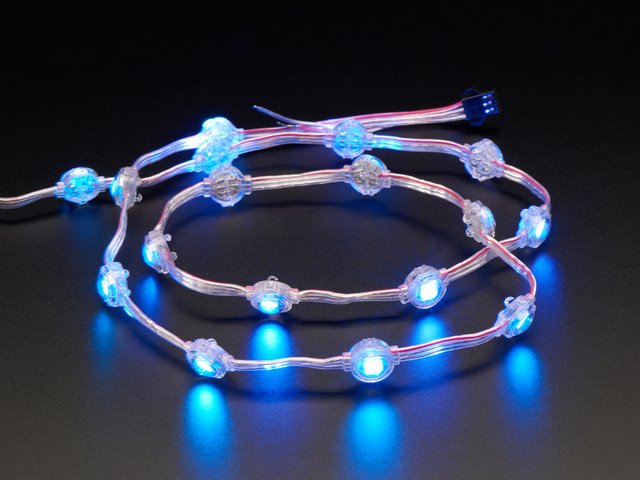
Adafruit NeoPixel LED點鏈-20“,間距2”
產品ID:3630
將NeoPixel條形連接到服裝上可能會很費力,因為柔性PCB彎曲得過多時會破裂,因此如何添加少量的顏色點呢?擱淺的NeoPixel點!。..
$ 27.50
入庫存
添加到購物車
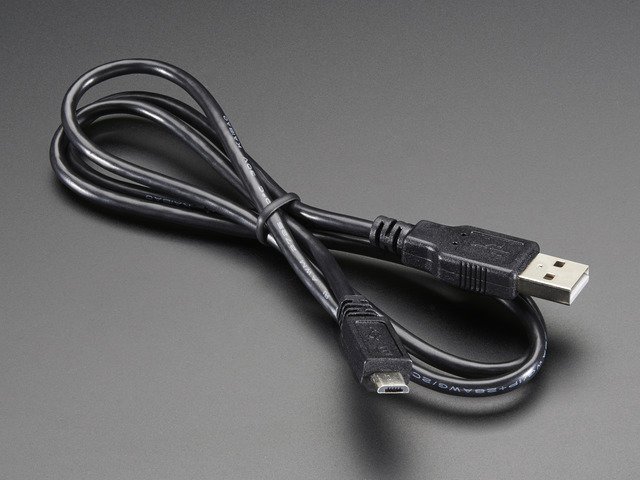
USB電纜-USB A到Micro-B
產品ID:592
這是您的標準A到Micro-B USB電纜,用于USB 1.1或2.0,非常適合將PC連接到Metro,Feather,Raspberry Pi或其他dev-board或。..
$ 2.95
進貨
添加到購物車
電路場的螺栓固定套件, micro:bit,Flora或Gemma
產品ID:4103
您有一個Circuit Playground Express,想連接一些電線以添加LED或傳感器或揚聲器嗎?您可以使用我們的。..
$ 1.50
入庫存
添加到購物車
1 x 鋰離子聚合物電池-3.7v 1200mAh
力量
添加到購物車
1 x 剝線鉗
用于暴露引線
添加到購物車
1 x 剪刀
用于修剪電線,螺紋等
添加到購物車
1 x 口袋螺絲刀
用于固定電線
添加到購物車
1 x 縫制針
縫制這些像素
添加到購物車
Plus…
分離式或夾式領帶-如果您想要一個不錯的領帶,請參見
織物(用于電池袋)
螺紋
10毫米下擺帶
鐵和熨衣板
iPhone/iPad(iOS 11.3或更高版本)或帶有BLE的Android設備(Android 4.4或更高版本)
Circuit Playground Bluefruit上的CircuitPython
安裝或更新CircuitPython
按照以下快速分步操作,在Circuit Playground Bluefruit上安裝或更新CircuitPython。
Circuit Playground Bluefruit需要CircuitPython 5.0+。 CircuitPython 5.0當前處于Alpha狀態。這意味著我們仍在努力添加功能并解決問題。如果遇到任何問題,請通過#help-with-circuitpython頻道的Discord(https://adafru.it/discord)與我們聯系,或者在GitHub上通過https://github.com/adafruit/提交問題。
此外,如果要使用要使用此開發板的藍牙(BLE)功能,您需要adafruit_ble庫的預發行版本。從https://github.com/adafruit/Adafruit_CircuitPython_BLE/releases
中選擇最新的預發布版本,可通過circuitpython.org 《
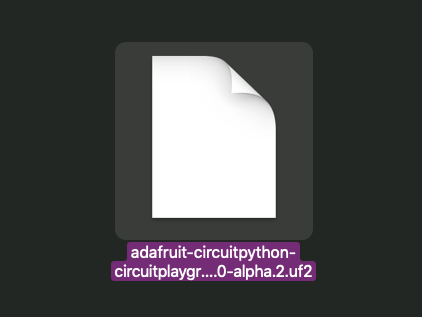
點擊鏈接上方并下載最新的UF2文件
下載并將其保存到桌面(或任何方便的地方)
使用已知的具有良好數據功能的USB電纜將Circuit Playground Bluefruit插入計算機。
許多人最終使用僅可充電的USB電纜,這非常令人沮喪!因此,請確保您擁有知道對數據同步有用的USB電纜。
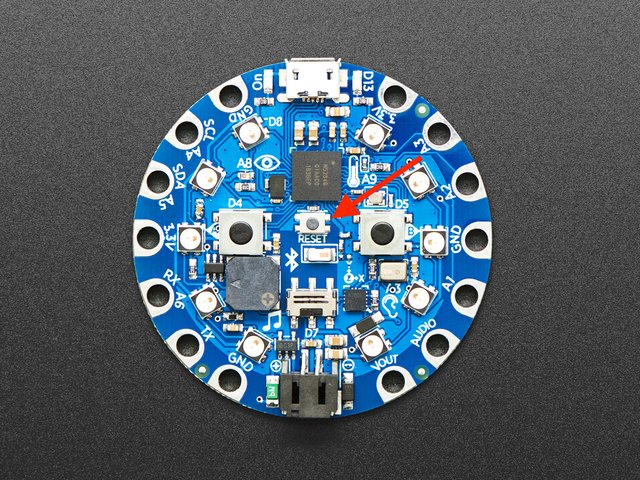
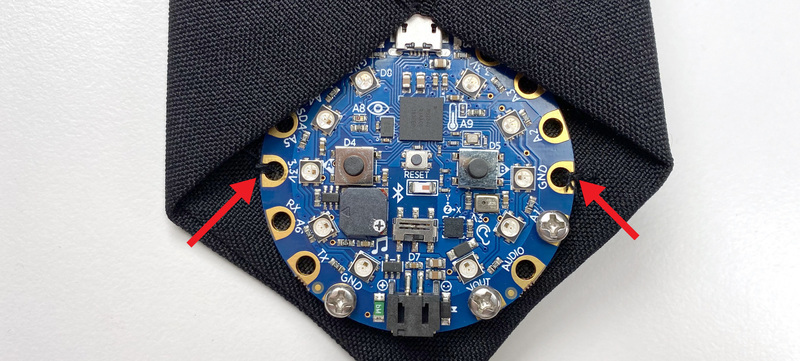
雙擊CPB中間的小 Reset 小按鈕(由表示圖片中的紅色箭頭)。十個NeoPixel LED將全部變為紅色,然后全部變為綠色。如果它們全部變為紅色并保持紅色,請檢查USB電纜,嘗試使用另一個USB端口,等等。USB連接器旁邊的紅色LED指示燈將呈紅色閃爍-可以!
如果雙擊鼠標不第一次沒有工作,請再試一次。有時可能需要一些嘗試才能使節奏正確!
(如果雙擊不起作用,請單擊一下!)
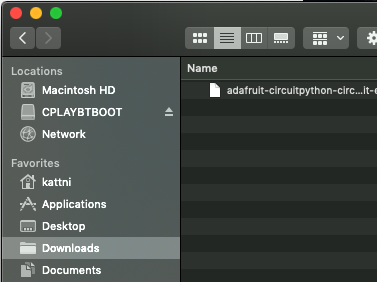

您將看到一個名為 CPLAYBTBOOT 的新磁盤驅動器。
將 adafruit_circuitpython_etc.uf2 文件拖到 CPLAYBTBOOT。
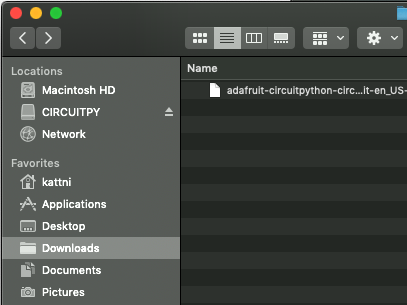
LED將變為紅色。然后, CPLAYBTBOOT 驅動器將消失,并出現一個名為 CIRCUITPY 的新磁盤驅動器。
就這樣,您就完成了! :)
軟件
現在在CPB上安裝了 CircuitPython ,我們可以繼續安裝項目軟件。
安裝Bluefruit Connect和Neopixel庫
項目代碼需要兩個代碼庫才能協助藍牙通訊。 點擊下面的鏈接以下載CircuitPython庫捆綁包:
庫捆綁包
解壓縮庫捆綁包,然后打開其中的 lib 文件夾。
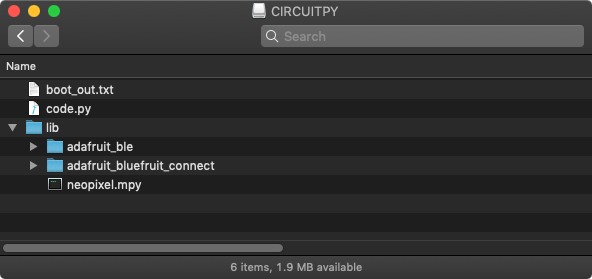
找到名為 adafruit_bluefruit_connect 的文件夾和名為的文件neopixel.mpy – 兩者復制并將它們粘貼到 CIRCUITPY 驅動器的 lib 文件夾。
安裝BLE庫
要下載我們需要的最后一個庫,請單擊下面的按鈕:
BLE庫
解壓縮,已下載的zip文件,并打開其中的 lib 文件夾。復制名為 adafruit_ble 的文件夾,并將其粘貼到 CIRCUITPY 驅動器的 lib 文件夾中。
您的CIRCUITPY驅動器的文件結構現在應該看起來像這樣:
上傳代碼
復制下面的代碼并將其粘貼到新文本文件中。
將文本文件另存為 code.py 到 CIRCUITPY的根目錄中驅動器。
下載:Project Zip 或代碼.py | 在Github上查看
復制代碼
“”“
LED Disco Tie with Bluetooth
=========================================================
Give your suit an sound-reactive upgrade with Circuit
Playground Bluefruit & Neopixels. Set color and animation
mode using the Bluefruit LE Connect app.
Author: Collin Cunningham for Adafruit Industries, 2019
”“”
# pylint: disable=global-statement
import time
import array
import math
import audiobusio
import board
import neopixel
from adafruit_ble.uart_server import UARTServer
from adafruit_bluefruit_connect.packet import Packet
from adafruit_bluefruit_connect.color_packet import ColorPacket
from adafruit_bluefruit_connect.button_packet import ButtonPacket
uart_server = UARTServer()
# User input vars
mode = 0 # 0=audio, 1=rainbow, 2=larsen_scanner, 3=solid
user_color= (127,0,0)
# Audio meter vars
PEAK_COLOR = (100, 0, 255)
NUM_PIXELS = 10
CURVE = 2
SCALE_EXPONENT = math.pow(10, CURVE * -0.1)
NUM_SAMPLES = 160
# Restrict value to be between floor and ceiling.
def constrain(value, floor, ceiling):
return max(floor, min(value, ceiling))
# Scale input_value between output_min and output_max, exponentially.
def log_scale(input_value, input_min, input_max, output_min, output_max):
normalized_input_value = (input_value - input_min) / \
(input_max - input_min)
return output_min + \
math.pow(normalized_input_value, SCALE_EXPONENT) \
* (output_max - output_min)
# Remove DC bias before computing RMS.
def normalized_rms(values):
minbuf = int(mean(values))
samples_sum = sum(
float(sample - minbuf) * (sample - minbuf)
for sample in values
)
return math.sqrt(samples_sum / len(values))
def mean(values):
return sum(values) / len(values)
def volume_color(volume):
return 200, volume * (255 // NUM_PIXELS), 0
# Set up NeoPixels and turn them all off.
pixels = neopixel.NeoPixel(board.A1, NUM_PIXELS, brightness=0.1, auto_write=False)
pixels.fill(0)
pixels.show()
mic = audiobusio.PDMIn(board.MICROPHONE_CLOCK, board.MICROPHONE_DATA,
sample_rate=16000, bit_depth=16)
# Record an initial sample to calibrate. Assume it‘s quiet when we start.
samples = array.array(’H‘, [0] * NUM_SAMPLES)
mic.record(samples, len(samples))
# Set lowest level to expect, plus a little.
input_floor = normalized_rms(samples) + 10
# Corresponds to sensitivity: lower means more pixels light up with lower sound
input_ceiling = input_floor + 500
peak = 0
def wheel(wheel_pos):
# Input a value 0 to 255 to get a color value.
# The colours are a transition r - g - b - back to r.
if wheel_pos 《 0 or wheel_pos 》 255:
r = g = b = 0
elif wheel_pos 《 85:
r = int(wheel_pos * 3)
g = int(255 - wheel_pos*3)
b = 0
elif wheel_pos 《 170:
wheel_pos -= 85
r = int(255 - wheel_pos*3)
g = 0
b = int(wheel_pos*3)
else:
wheel_pos -= 170
r = 0
g = int(wheel_pos*3)
b = int(255 - wheel_pos*3)
return (r, g, b)
def rainbow_cycle(delay):
for j in range(255):
for i in range(NUM_PIXELS):
pixel_index = (i * 256 // NUM_PIXELS) + j
pixels[i] = wheel(pixel_index & 255)
pixels.show()
time.sleep(delay)
def audio_meter(new_peak):
mic.record(samples, len(samples))
magnitude = normalized_rms(samples)
# Compute scaled logarithmic reading in the range 0 to NUM_PIXELS
c = log_scale(constrain(magnitude, input_floor, input_ceiling),
input_floor, input_ceiling, 0, NUM_PIXELS)
# Light up pixels that are below the scaled and interpolated magnitude.
pixels.fill(0)
for i in range(NUM_PIXELS):
if i 《 c:
pixels[i] = volume_color(i)
# Light up the peak pixel and animate it slowly dropping.
if c 》= new_peak:
new_peak = min(c, NUM_PIXELS - 1)
elif new_peak 》 0:
new_peak = new_peak - 1
if new_peak 》 0:
pixels[int(new_peak)] = PEAK_COLOR
pixels.show()
return new_peak
pos = 0 # position
direction = 1 # direction of “eye”
def larsen_set(index, color):
if index 《 0:
return
else:
pixels[index] = color
def larsen(delay):
global pos
global direction
color_dark = (int(user_color[0]/8), int(user_color[1]/8),
int(user_color[2]/8))
color_med = (int(user_color[0]/2), int(user_color[1]/2),
int(user_color[2]/2))
larsen_set(pos - 2, color_dark)
larsen_set(pos - 1, color_med)
larsen_set(pos, user_color)
larsen_set(pos + 1, color_med)
if (pos + 2) 《 NUM_PIXELS:
# Dark red, do not exceed number of pixels
larsen_set(pos + 2, color_dark)
pixels.write()
time.sleep(delay)
# Erase all and draw a new one next time
for j in range(-2, 2):
larsen_set(pos + j, (0, 0, 0))
if (pos + 2) 《 NUM_PIXELS:
larsen_set(pos + 2, (0, 0, 0))
# Bounce off ends of strip
pos += direction
if pos 《 0:
pos = 1
direction = -direction
elif pos 》= (NUM_PIXELS - 1):
pos = NUM_PIXELS - 2
direction = -direction
def solid(new_color):
pixels.fill(new_color)
pixels.show()
def map_value(value, in_min, in_max, out_min, out_max):
out_range = out_max - out_min
in_range = in_max - in_min
return out_min + out_range * ((value - in_min) / in_range)
speed = 6.0
wait = 0.097
def change_speed(mod, old_speed):
new_speed = constrain(old_speed + mod, 1.0, 10.0)
return(new_speed, map_value(new_speed, 10.0, 0.0, 0.01, 0.3))
while True:
# While BLE is *not* connected
if not uart_server.connected:
# OK to call again even if already advertising
uart_server.start_advertising()
# While BLE is connected
else:
if uart_server.in_waiting:
packet = Packet.from_stream(uart_server)
# Received ColorPacket
if isinstance(packet, ColorPacket):
user_color = packet.color
# Received ButtonPacket
elif isinstance(packet, ButtonPacket):
if packet.pressed:
if packet.button == ButtonPacket.UP:
speed, wait = change_speed(1, speed)
elif packet.button == ButtonPacket.DOWN:
speed, wait = change_speed(-1, speed)
elif packet.button == ButtonPacket.BUTTON_1:
mode = 0
elif packet.button == ButtonPacket.BUTTON_2:
mode = 1
elif packet.button == ButtonPacket.BUTTON_3:
mode = 2
elif packet.button == ButtonPacket.BUTTON_4:
mode = 3
# Determine animation based on mode
if mode == 0:
peak = audio_meter(peak)
elif mode == 1:
rainbow_cycle(0.001)
elif mode == 2:
larsen(wait)
elif mode == 3:
solid(user_color)
“”“
LED Disco Tie with Bluetooth
=========================================================
Give your suit an sound-reactive upgrade with Circuit
Playground Bluefruit & Neopixels. Set color and animation
mode using the Bluefruit LE Connect app.
Author: Collin Cunningham for Adafruit Industries, 2019
”“”
# pylint: disable=global-statement
import time
import array
import math
import audiobusio
import board
import neopixel
from adafruit_ble.uart_server import UARTServer
from adafruit_bluefruit_connect.packet import Packet
from adafruit_bluefruit_connect.color_packet import ColorPacket
from adafruit_bluefruit_connect.button_packet import ButtonPacket
uart_server = UARTServer()
# User input vars
mode = 0 # 0=audio, 1=rainbow, 2=larsen_scanner, 3=solid
user_color= (127,0,0)
# Audio meter vars
PEAK_COLOR = (100, 0, 255)
NUM_PIXELS = 10
CURVE = 2
SCALE_EXPONENT = math.pow(10, CURVE * -0.1)
NUM_SAMPLES = 160
# Restrict value to be between floor and ceiling.
def constrain(value, floor, ceiling):
return max(floor, min(value, ceiling))
# Scale input_value between output_min and output_max, exponentially.
def log_scale(input_value, input_min, input_max, output_min, output_max):
normalized_input_value = (input_value - input_min) / \
(input_max - input_min)
return output_min + \
math.pow(normalized_input_value, SCALE_EXPONENT) \
* (output_max - output_min)
# Remove DC bias before computing RMS.
def normalized_rms(values):
minbuf = int(mean(values))
samples_sum = sum(
float(sample - minbuf) * (sample - minbuf)
for sample in values
)
return math.sqrt(samples_sum / len(values))
def mean(values):
return sum(values) / len(values)
def volume_color(volume):
return 200, volume * (255 // NUM_PIXELS), 0
# Set up NeoPixels and turn them all off.
pixels = neopixel.NeoPixel(board.A1, NUM_PIXELS, brightness=0.1, auto_write=False)
pixels.fill(0)
pixels.show()
mic = audiobusio.PDMIn(board.MICROPHONE_CLOCK, board.MICROPHONE_DATA,
sample_rate=16000, bit_depth=16)
# Record an initial sample to calibrate. Assume it’s quiet when we start.
samples = array.array(‘H’, [0] * NUM_SAMPLES)
mic.record(samples, len(samples))
# Set lowest level to expect, plus a little.
input_floor = normalized_rms(samples) + 10
# Corresponds to sensitivity: lower means more pixels light up with lower sound
input_ceiling = input_floor + 500
peak = 0
def wheel(wheel_pos):
# Input a value 0 to 255 to get a color value.
# The colours are a transition r - g - b - back to r.
if wheel_pos 《 0 or wheel_pos 》 255:
r = g = b = 0
elif wheel_pos 《 85:
r = int(wheel_pos * 3)
g = int(255 - wheel_pos*3)
b = 0
elif wheel_pos 《 170:
wheel_pos -= 85
r = int(255 - wheel_pos*3)
g = 0
b = int(wheel_pos*3)
else:
wheel_pos -= 170
r = 0
g = int(wheel_pos*3)
b = int(255 - wheel_pos*3)
return (r, g, b)
def rainbow_cycle(delay):
for j in range(255):
for i in range(NUM_PIXELS):
pixel_index = (i * 256 // NUM_PIXELS) + j
pixels[i] = wheel(pixel_index & 255)
pixels.show()
time.sleep(delay)
def audio_meter(new_peak):
mic.record(samples, len(samples))
magnitude = normalized_rms(samples)
# Compute scaled logarithmic reading in the range 0 to NUM_PIXELS
c = log_scale(constrain(magnitude, input_floor, input_ceiling),
input_floor, input_ceiling, 0, NUM_PIXELS)
# Light up pixels that are below the scaled and interpolated magnitude.
pixels.fill(0)
for i in range(NUM_PIXELS):
if i 《 c:
pixels[i] = volume_color(i)
# Light up the peak pixel and animate it slowly dropping.
if c 》= new_peak:
new_peak = min(c, NUM_PIXELS - 1)
elif new_peak 》 0:
new_peak = new_peak - 1
if new_peak 》 0:
pixels[int(new_peak)] = PEAK_COLOR
pixels.show()
return new_peak
pos = 0 # position
direction = 1 # direction of “eye”
def larsen_set(index, color):
if index 《 0:
return
else:
pixels[index] = color
def larsen(delay):
global pos
global direction
color_dark = (int(user_color[0]/8), int(user_color[1]/8),
int(user_color[2]/8))
color_med = (int(user_color[0]/2), int(user_color[1]/2),
int(user_color[2]/2))
larsen_set(pos - 2, color_dark)
larsen_set(pos - 1, color_med)
larsen_set(pos, user_color)
larsen_set(pos + 1, color_med)
if (pos + 2) 《 NUM_PIXELS:
# Dark red, do not exceed number of pixels
larsen_set(pos + 2, color_dark)
pixels.write()
time.sleep(delay)
# Erase all and draw a new one next time
for j in range(-2, 2):
larsen_set(pos + j, (0, 0, 0))
if (pos + 2) 《 NUM_PIXELS:
larsen_set(pos + 2, (0, 0, 0))
# Bounce off ends of strip
pos += direction
if pos 《 0:
pos = 1
direction = -direction
elif pos 》= (NUM_PIXELS - 1):
pos = NUM_PIXELS - 2
direction = -direction
def solid(new_color):
pixels.fill(new_color)
pixels.show()
def map_value(value, in_min, in_max, out_min, out_max):
out_range = out_max - out_min
in_range = in_max - in_min
return out_min + out_range * ((value - in_min) / in_range)
speed = 6.0
wait = 0.097
def change_speed(mod, old_speed):
new_speed = constrain(old_speed + mod, 1.0, 10.0)
return(new_speed, map_value(new_speed, 10.0, 0.0, 0.01, 0.3))
while True:
# While BLE is *not* connected
if not uart_server.connected:
# OK to call again even if already advertising
uart_server.start_advertising()
# While BLE is connected
else:
if uart_server.in_waiting:
packet = Packet.from_stream(uart_server)
# Received ColorPacket
if isinstance(packet, ColorPacket):
user_color = packet.color
# Received ButtonPacket
elif isinstance(packet, ButtonPacket):
if packet.pressed:
if packet.button == ButtonPacket.UP:
speed, wait = change_speed(1, speed)
elif packet.button == ButtonPacket.DOWN:
speed, wait = change_speed(-1, speed)
elif packet.button == ButtonPacket.BUTTON_1:
mode = 0
elif packet.button == ButtonPacket.BUTTON_2:
mode = 1
elif packet.button == ButtonPacket.BUTTON_3:
mode = 2
elif packet.button == ButtonPacket.BUTTON_4:
mode = 3
# Determine animation based on mode
if mode == 0:
peak = audio_meter(peak)
elif mode == 1:
rainbow_cycle(0.001)
elif mode == 2:
larsen(wait)
elif mode == 3:
solid(user_color)
項目代碼一旦保存 到 CIRCUITPY 作為 code.py, 軟件已全部設置好了–是時候繼續組裝硬件。
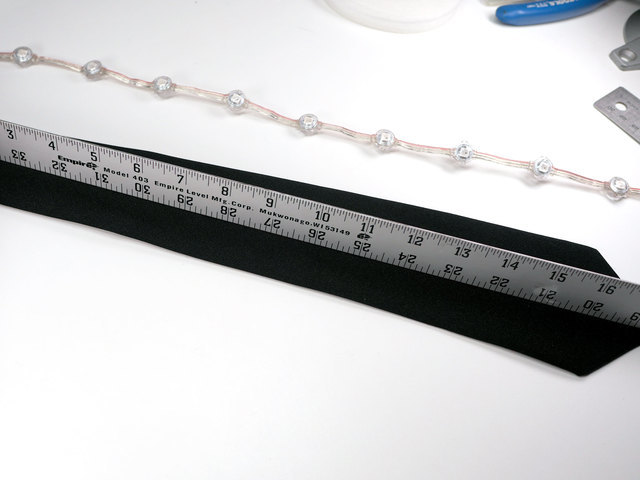
準備NeoPixels
首先要做的是修剪Neopixel LED條以使其與領帶的長度相匹配。 20“分離式領帶的長度可以為 9 NeoPixels 。如果使用其他領帶,請確保在切割前找到合適的長度。
《表類=“ build-table”》
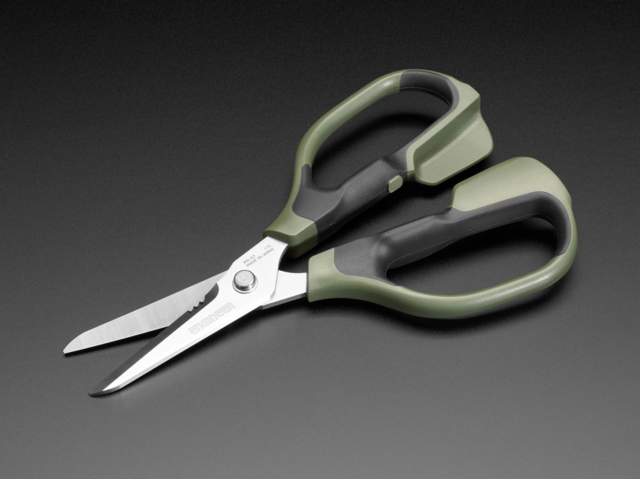
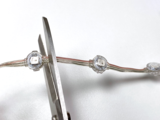
常規剪刀可以被拖拉或損壞,因此請確保使用一對鋼絲鉗或專為切割金屬而設計的剪刀。
我們將在下圖中用紅色虛線表示的兩個點處剪切條。

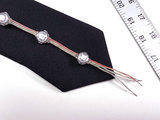
剪切輸入線

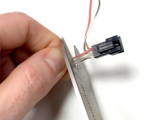
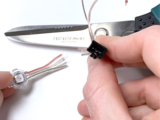
從條形板上剪下公型插針連接器(將2根多余的電線垂到一側)。切近連接器本身以增加長度。這是將要連接到Circuit Playground藍果的條帶的末端。
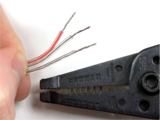
使用剝線鉗移除大約 15mm 》從每根剛切割的導線的末端開始絕緣。
輕輕地扭曲每捆線束,以防止它們磨損。
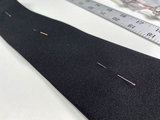
刪除多余的新像素

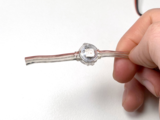
從您剛剪切的一端開始,算出長度為 9 NeoPixels 。
剪切第九個 neopixel之后的條帶,并留有盡可能多的尾巴。
不要在此末端剝皮或分開導線。

完成后,完成條應類似于上圖。
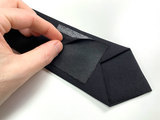
添加電池袋
為了安全地容納脂電池,我們將在領帶的背面創建一個簡單的袋。 p》
此口袋將使用熱激活下擺帶固定在領帶上,但您可以根據需要使用傳統縫制輕松地重新制作它。
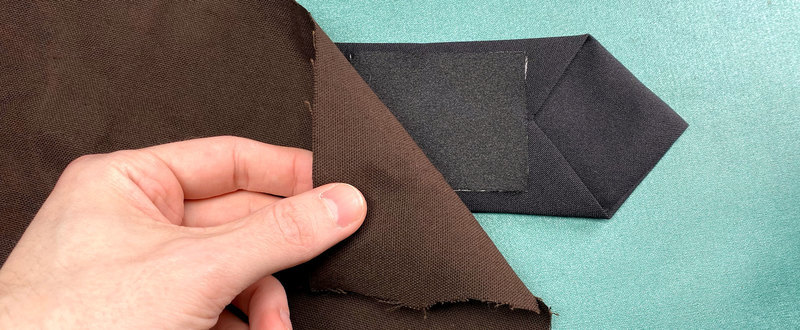
剪切并排列材料
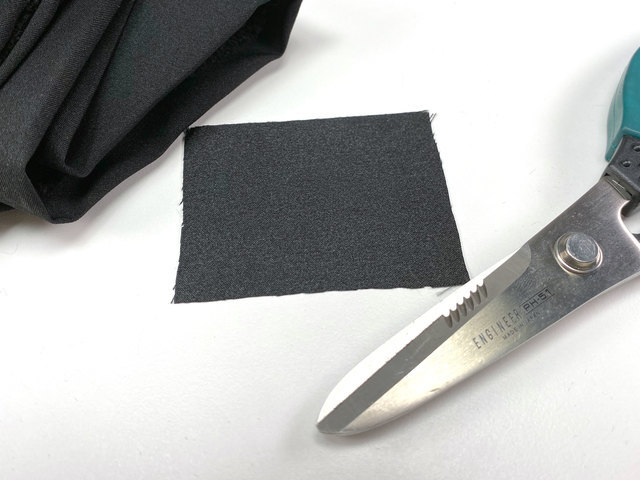
切一塊布 60mm 尺寸 x 75mm 。
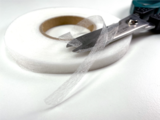
剪切4條下擺帶 2 x 75mm ,和 2 x 15mm
將下擺帶的各部分按照領帶的底部附近的口袋形狀排列后縫。
小心地小心地將放在口袋頂部的中間位置,在口袋底部的中間留出空隙。 。 確保膠帶在口袋的外邊緣–熨燙后將無法重新放置它。
鐵袋就位
輕輕地放置一塊在所有物品上刮擦織物,以在熨燙時保護袖珍織物。
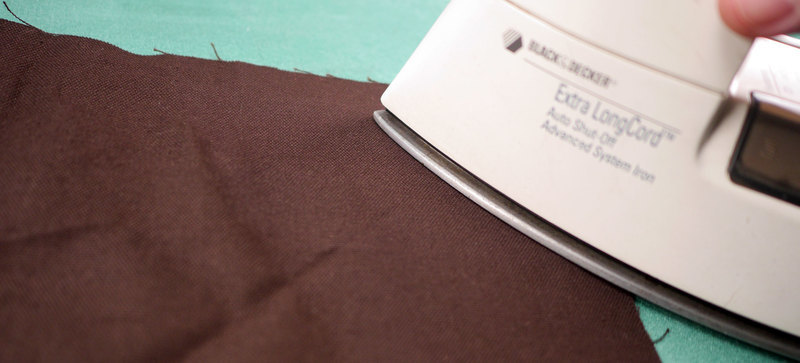
用熱鐵施加確定壓力 10次到20秒來回移動熨斗,將口袋均勻地固定到位。
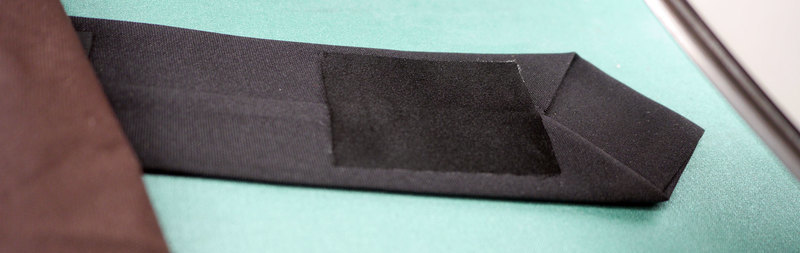
完成后,請檢查并確保口袋完全緊貼到領帶。
組裝和接線
用針和線以及一點點接線組裝所有組件。
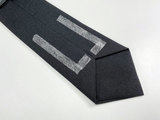
位置新像素帶
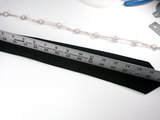
找到領帶的垂直中心線并標記
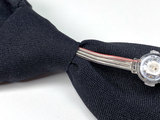
將條帶沿中心線放置,使大約一英寸的導線懸掛領帶的尖端。
塞住靠近脖子的金屬絲條的多余的尾巴到領帶的結。
縫制NeoPixel s


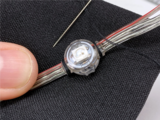
通過將線程穿過織物的頂層并將其包裹起來,將每個NeoPixel縫合到位NeoPixel膠囊的一端。然后對膠囊的另一端進行相同操作。
要在工作時保持條帶對齊,請先縫制NeoPixels的頂部,底部和中間。
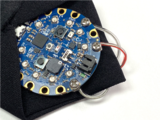
附加賽道游樂場Bluefruit
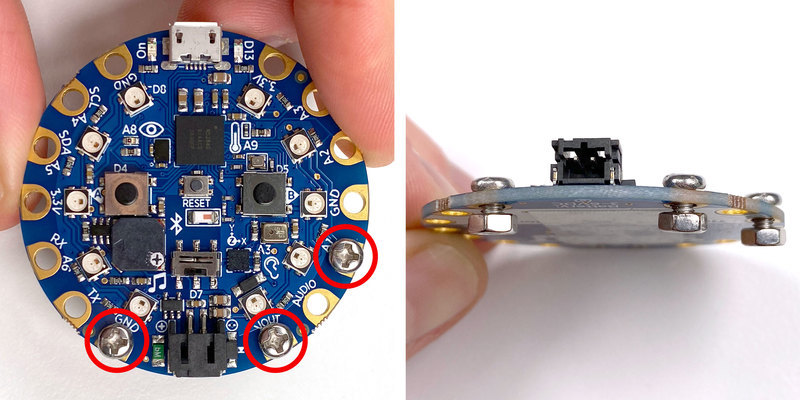
安裝螺栓到CPB的 GND , VOUT 和 A1 焊盤。將它們稍稍松動,以便稍后可以輕松地將電線繞在螺釘上。
將CPB放在扎帶背面的底部,以便微型USB端口稍微扎在扎帶的折線下方。
通過將 GND 和 3.3V 焊盤牢固地縫合到織物的頂層,將CPB縫制到位。
接線圖
下面是顯示所有需要進行的電氣連接。單擊圖像可查看大圖。
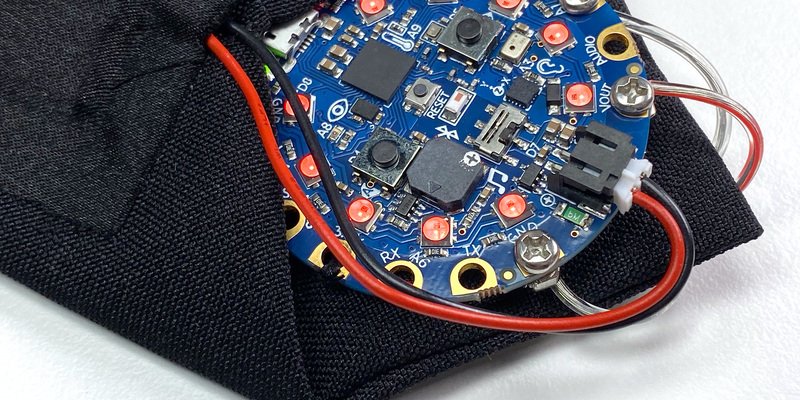
連接NeoPixel地帶
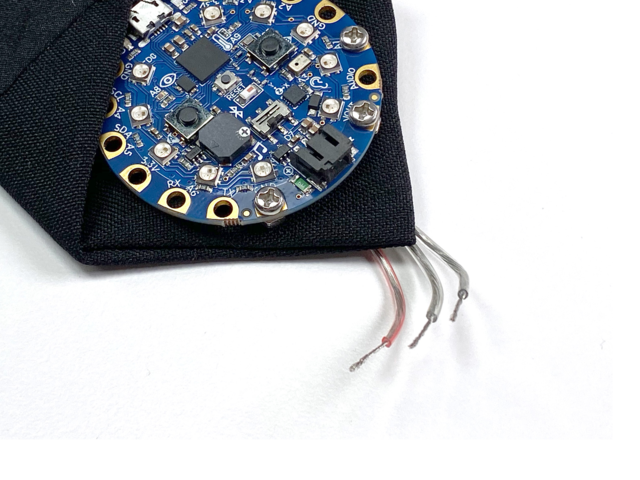
NeoPixel帶中的三根導線連接到CPB上的以下焊盤:
紅色導線- 》 VOUT
中間線-》 A1
剩余線-》 GND
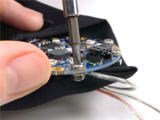
彎曲在綁帶底部邊緣上的導線,并固定 裸露的導線 》用小螺絲刀擰緊螺栓。
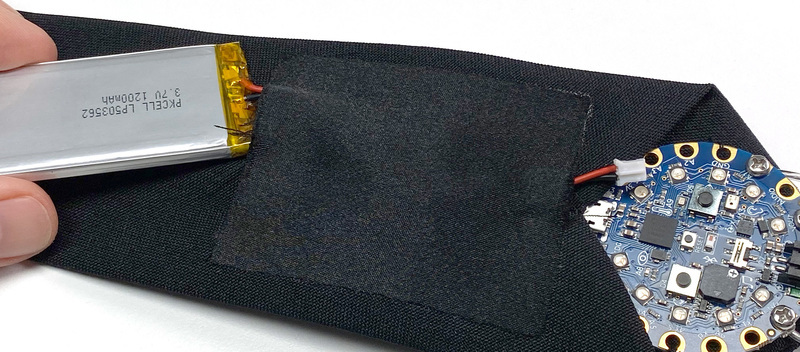
將脂狀電池滑入口袋,同時將其電線連接器穿過口袋末端的開口。
將電池連接到CPB上的黑色JST端口。
祝賀您-您的新領帶已經通電并且可以穿了!
使用
下載應用
Adafruit的Bluefruit LE Connect應用是免費的,這是多方面的Bluetooth LE工具包,我們將使用它來控制領帶的照明和動畫。在以下移動設備上下載并安裝該應用:
iOS版下載
Android版下載
通過BLE連接
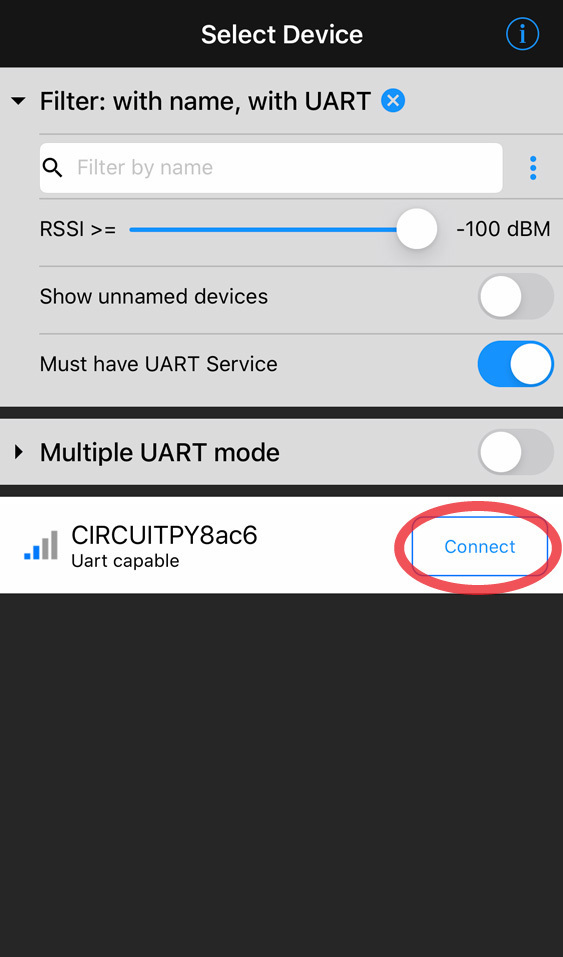
確保您的移動設備已啟用藍牙,然后啟動該應用。啟動屏幕將顯示該應用可以連接到的附近藍牙LE設備的列表。
》
查找名稱以 CIRCUITPY 開頭的設備,然后單擊右側按鈕上的連接。
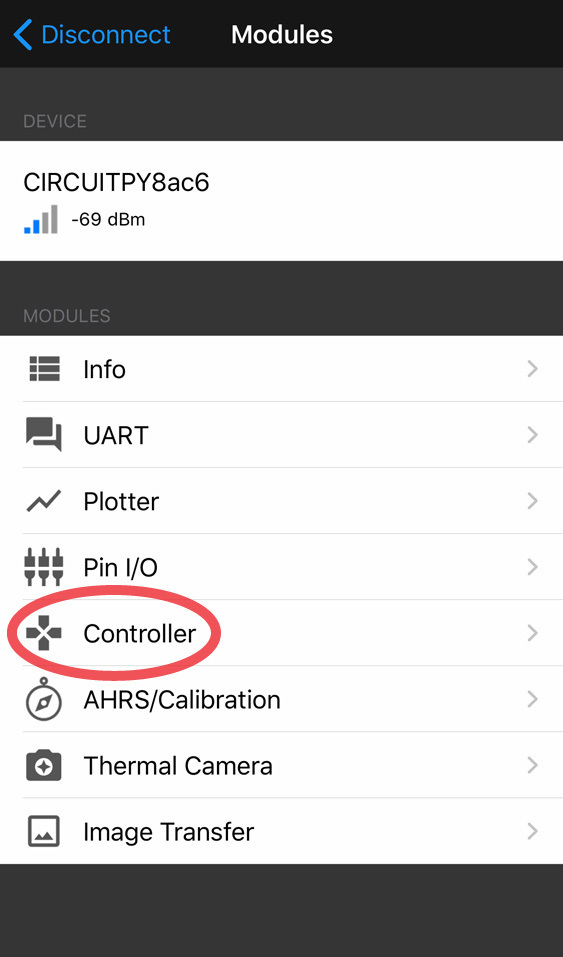
連接后,點擊標題為 Controller 的表格行。這是我們用來控制領帶的顏色和動畫的模塊。
更改動畫
領帶具有4種動畫模式:
Audio Meter -CPB檢測到的現場聲音水平
彩虹周期-所有LED在整個光譜范圍內都會褪色
拉森掃描器-LED上下移動,呈“賽隆”風格
單色-全部相同顏色的LED
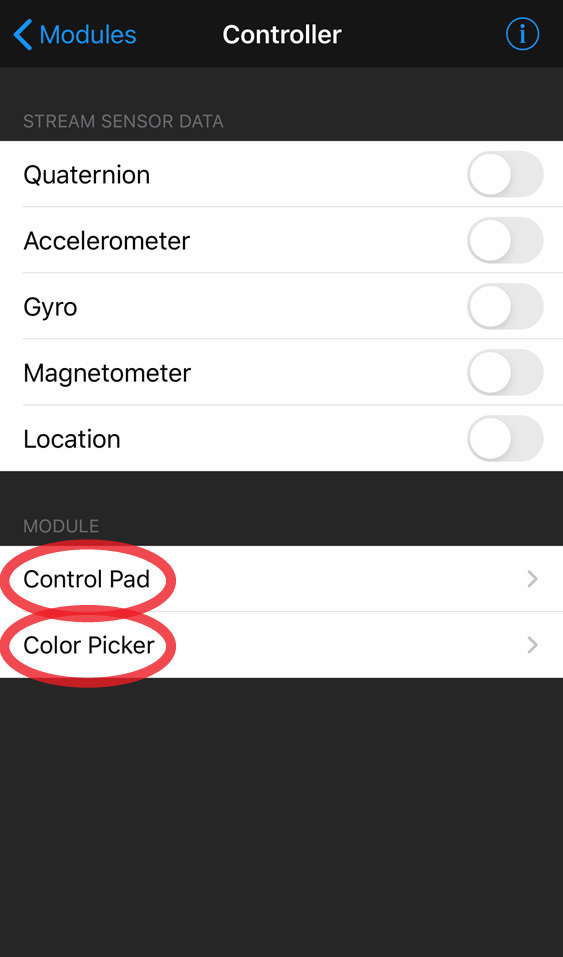
在 Controller 視圖中,點擊 Control Pad 。游戲控制器按鈕界面將會出現。
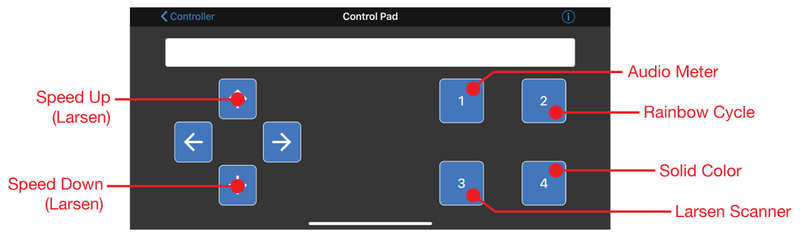
以下是每個控制面板按鈕的功能細分:
按鈕1 –更改為音頻計模式
按鈕2 –更改為彩虹周期模式
按鈕3 –更改為Larsen Scanner模式
按鈕4 –更改為純色模式
向上箭頭按鈕-加快Larsen Scanner
向下箭頭按鈕-放慢Larsen Scanner
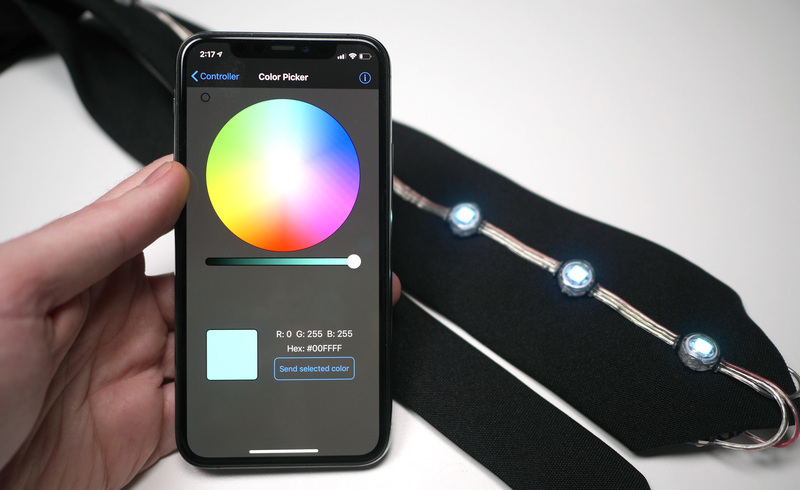
更改顏色
在控制器視圖中,點擊拾色器 –將出現色輪界面。 Color Picker (顏色選擇器)可讓您更改 Larsen Scanner 和 Solid Color 動畫模式的顏色。
觸摸色輪上的一個點以選擇一種色調,然后拖動下面的滑塊來調整顏色亮度。按下發送按鈕,將顏色數據發送到領帶。
責任編輯:wv
-
led
+關注
關注
243文章
24612瀏覽量
691050
發布評論請先 登錄
在昉·星光開發板上控制WS2812B炫彩燈環

合科泰RFL系列厚膜工藝燈帶貼片電阻的核心優勢和應用場景
博通LED燈條:設計與應用的全面指南
原廠 FZH03 內控同步功能的三通道LED固定18mA恒流驅動IC
LED燈帶離線語音控制方案WTK6900P
炫彩光影新體驗HTR7216 (S)、HTR7198 (S)、HTR7144 (S) 智能操控力原廠技術支持一級代理聚能芯半導體
2.4 A 三通道閃光燈 LED 驅動器,帶 I<sup>2</sup>C 控制接口 skyworksinc

2.4 A / 2 A 雙路獨立閃光燈 LED 驅動器,帶 TrueFlash? skyworksinc
LED燈珠來料檢驗
【新品發布】新一代艾為燈語,具備情緒感知的多維炫彩燈效


 工商網監
工商網監
評論