 如何設置LED燈或5V繼電器并使用亞馬遜AlexaEcho和ESP8266控制它

軟件要求
對于此項目,您將需要以下程序:
Arduino IDE(在此處下載最新版本)
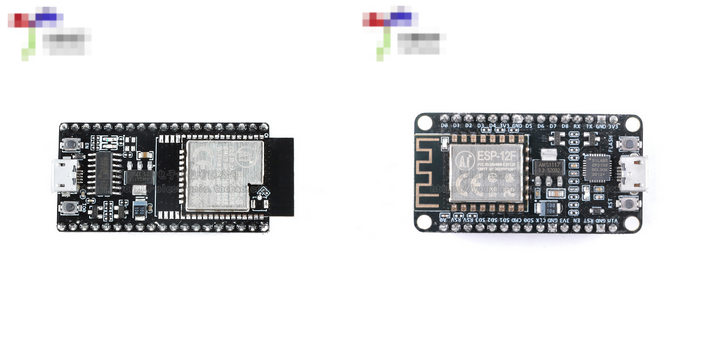
NodeMCU
除ESP8266板支持(NodeMCU)外,還應安裝以下Arduino庫(在庫管理器中搜索或手動將文件夾放在Arduino/庫中):
fauxmoESP
ESPAsyncTCP
ESPAsyncWebServer
連接和原理圖
ESP8266
D1→LED/繼電器
D2→按鈕
編程Arduino
此項目的Arduino代碼使用fauxmoESP庫的示例草圖,該庫模擬Belkin WeMo設備。因此,配置家庭自動化開關遵循與商業設備完全相同的過程,這在Alexa應用程序中是輕而易舉的。為了發現這個設備,我將我的設備命名為“光”。
請注意高電壓:在確定繼電器接線之前拔下所有電源插頭。為了控制電路的交流部分,我使用的是5V繼電器 - 只需中斷220V電線,然后將剝開的端子插入常開和常開螺絲端子。 *請記住,如果您沒有太多使用高壓的經驗,請找一個監督的人。
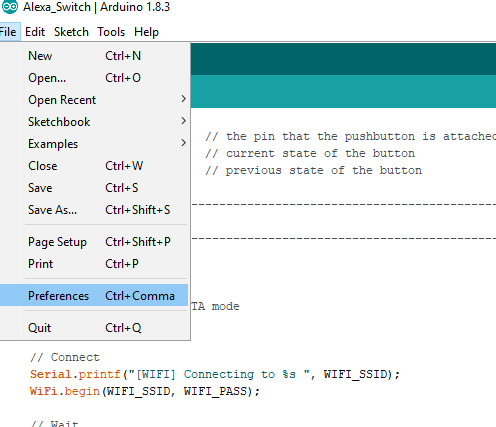
Arduino IDE配置
單擊文件 - 》首選項
添加這個鏈接到附加URL板:
http://arduino.esp8266.com/stable/package_esp8266com_index.json

接下來,安裝電路板文件并按照提及步驟進行操作。
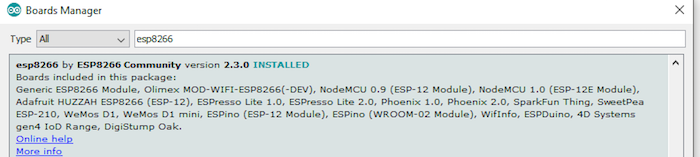
工具→電路板→電路板管理器

搜索ESP8266和安裝模塊包。
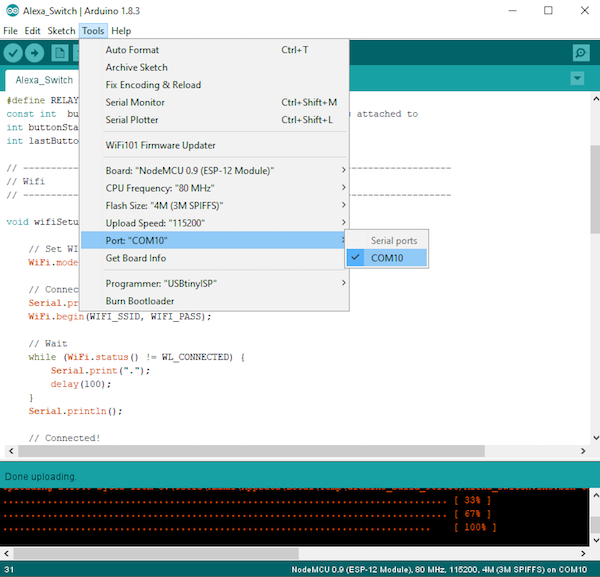
選擇您的電路板,如下圖所示。
《二v》

然后,選擇電路板端口。
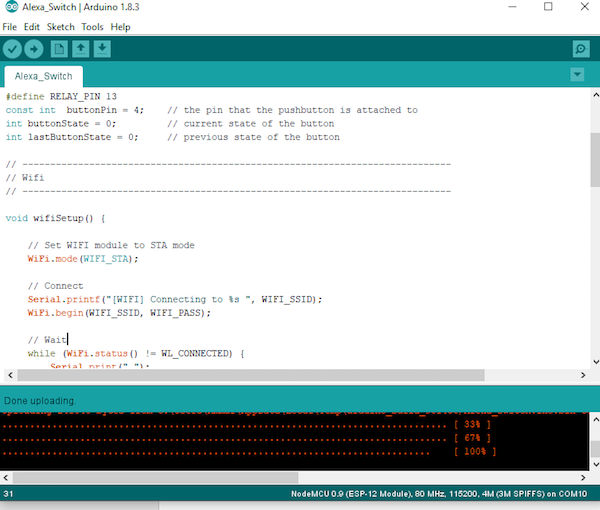
選擇端口后,編輯源代碼并更改Wi-Fi名稱和密碼,如圖所示:

Arduino代碼
#include
#include
#include “fauxmoESP.h”
#include “ESPAsyncWebServer.h”
#include
#include
#define WIFI_SSID “” // Please Enter you Wifi name here
#define WIFI_PASS “” // Enter password here
#define SERIAL_BAUDRATE 115200
fauxmoESP fauxmo;
#define RELAY_PIN 5
const int buttonPin = 4; // the pin that the pushbutton is attached to
int buttonState = 0; // current state of the button
int lastButtonState = 0; // previous state of the button
// -----------------------------------------------------------------------------
// Wifi
// -----------------------------------------------------------------------------
void wifiSetup() {
// Set WIFI module to STA mode
WiFi.mode(WIFI_STA);
// Connect
Serial.printf(“[WIFI] Connecting to %s ”, WIFI_SSID);
WiFi.begin(WIFI_SSID, WIFI_PASS);
// Wait
while (WiFi.status() != WL_CONNECTED) {
Serial.print(“。”);
delay(100);
}
Serial.println();
// Connected!
Serial.printf(“[WIFI] STATION Mode, SSID: %s, IP address: %s ”, WiFi.SSID().c_str(), WiFi.localIP().toString().c_str());
}
void callback(uint8_t device_id, const char * device_name, bool state) {
Serial.print(“Device ”); Serial.print(device_name);
Serial.print(“ state: ”);
if (state) {
Serial.println(“ON”);
digitalWrite(RELAY_PIN, HIGH);
} else {
Serial.println(“OFF”);
digitalWrite(RELAY_PIN, LOW);
}
}
void setup() {
pinMode(RELAY_PIN, OUTPUT);
pinMode(buttonPin, INPUT_PULLUP);
digitalWrite(RELAY_PIN, LOW);
// Init serial port and clean garbage
Serial.begin(SERIAL_BAUDRATE);
Serial.println(“FauxMo demo sketch”);
Serial.println(“After connection, ask Alexa/Echo to ‘turn on’ or ‘off’”);
// Wifi
wifiSetup();
// Fauxmo
fauxmo.addDevice(“the light”);
fauxmo.onMessage(callback);
}
void loop() {
fauxmo.handle();
// read the pushbutton input pin:
buttonState = digitalRead(buttonPin);
// compare the buttonState to its previous state
if (buttonState != lastButtonState) {
// if the state has changed, increment the counter
if (buttonState == LOW) {
Serial.println(“on”);
digitalWrite(RELAY_PIN, HIGH);
}
else {
// if the current state is LOW then the button
// went from on to off:
Serial.println(“off”);
digitalWrite(RELAY_PIN, LOW);
}
// Delay a little bit to avoid bouncing
delay(50);
}
// save the current state as the last state,
//for next time through the loop
lastButtonState = buttonState;
}
現在是時候玩了!
上傳代碼后讓您的Alexa發現新設備,它會檢測到您的智能家居設備,即ESP8266。通過說“Alexa打開/關閉燈”來控制它。在這種情況下,Alexa可以是您的計算機或Amazon Echo。
-
繼電器
+關注
關注
133文章
5566瀏覽量
154844 -
led燈
+關注
關注
22文章
1606瀏覽量
111892 -
ESP8266
+關注
關注
51文章
970瀏覽量
49526 -
Alexa
+關注
關注
2文章
197瀏覽量
24388
發布評論請先 登錄
【ESP8266系列】WT8266-S3模組規格書

【ESP8266系列】WT8266-S5模組規格書
【ESP8266系列】WT8266-S6模組規格書
【ESP8266系列】WT8266-S1模組產品介紹
【ESP8266系列】WT8266-S6模組產品介紹
無需安裝!在瀏覽器里就能玩轉ESP32/ESP8266,這個神器絕了!

ESP32 Wi-Fi 控制 LED 燈的原理

晶科鑫 | 國產26MHz晶振匹配Espressif(樂鑫) ESP8285/ESP8266芯片案例

ESP8266和ESP32開發板常見的2種下載方式
ESP8266和ESP32開發板常見的2種下載方式
STM32+esp8266連接機智云,上傳溫濕度數據并控制繼電器開關(平臺配置、代碼生成、代碼移植)

2路繼電器控制模塊是什么?光電隔離,可控制變頻器
【RA-Eco-RA4M2開發板評測】使用RA4M2和ESP8266實現MQTT協議上傳傳感器數據到云服務器并反向點燈控制
ESP8266燒錄與機智云一鍵配網教程


 工商網監
工商網監
評論